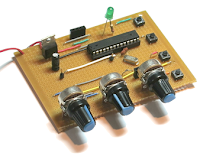
 Arduino Morse Tutor
In a recent conversation with my good friend Lewis, we started discussing Morse code, training and the old equipment that was used to educate and teach the code to newcomers. In particular we discussed the old Datong D70 practice oscillators. Lewis carried on the tell me that his Datong like so many others started sending odd illegal characters and essentially rendered the kit useless. Of course you could whip of the lid and replace the logic chips, but I thought of recreating the Datong functionality in a new Arduino sketch.
So here is a breakdown of what the Datong offered:
- Either Mixed, letter or number combinations
- Groups of 5 characters
- Variable speed ( up to 37.5 word per minute)
- Variable character spacing (up to 4 seconds)
The Datong also allowed you to connect a telegraph key, and your headphones. But for now I will focus on the code generation element of the project.
The finished project has just a handful of components and can easily be created on a breadboard, or indeed if you have an old broken Datong you can reuse the box and panel to really replicate the old kit. The complete project includes 3 variable resistors (1K LIN) for Character speed, gap and volume. It also needs a 3 way switch to select the mode.
The Arduino I’m using is the UNO. Arguably the most popular Arduino on the market, but I have also tried the sketch on a Nano and it works fine – just some customisation of pin assignments is all that is needed.
On start up the Arduino checks to see which switch is LOW – it also saves the current mode and checks if the saved mode is the same as the current selected switch. If this is different, then the Arduino has had a change in the mode selection and resets.
When generating the tones, the Arduino randomly selects a character from an array. With that chosen letter – it calls a function and plays the corresponding tone functions. 2 functions exist as a DIT and a DAH.
The rest of the functions are dedicated to allowing the speed and gap to alter and also displaying the results on the LCD panel (completely optional).
Here is a short video of the kit working, and a link to the source code.


