Author Archive
 SOTA Activation: Ormes Peak (W0C/FR-052)
I’ve been thinking about activating Ormes Peak (W0C/FR-052) for a while now. It is not too difficult to get to and is not a difficult climb. After the Waldo Canyon fire (2012), the area was closed for several years, so I needed to be patient. Then I noticed that Don KØDRJ put an alert on SOTAwatch indicating that he was going to activate the summit, so I gave a listen on 146.52 MHz. Sure enough, around mid-morning I heard Don on the frequency and worked him without any problem from my home location.
Then I got to thinking. Joyce KØJJW and I had talked about going for a walk this afternoon, so I did a little checking on Ormes Peak and concluded that it was an option. My fractured ankle is still on the mend so I am not back to 100% of my hiking ability. Ormes seemed like a good next step that would keep me progressing.
 We hopped in the Jeep and headed to Rampart Range. To get to Ormes Peak, take USFS road 300 from the north (which is what we did, via Mount Herman Road) or from the south via Garden of the Gods. You’ll want to have a Pike National Forest map for this trip.
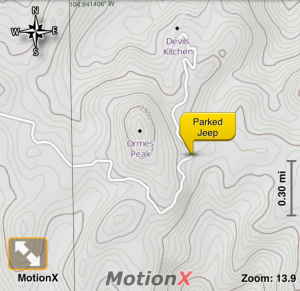 Turn East onto USFS road 303 and then follow USFS 302 (these roads are easy 4WD, probably OK for high clearance 2WD). These roads go through the Waldo burn area so you see what a burned forest looks like. Ormes Peak was not directly affected by the fire but we did see a few burned trees on the mountain. According to the Summit Post info, the best approach is from the south but we continued on around to the east and parked at the marked parking area here: 38.948680 deg N, 104.929677 deg W. From there, we bushwacked westward up the side of the hill without too much trouble (about half a mile and 600 feet vertical).
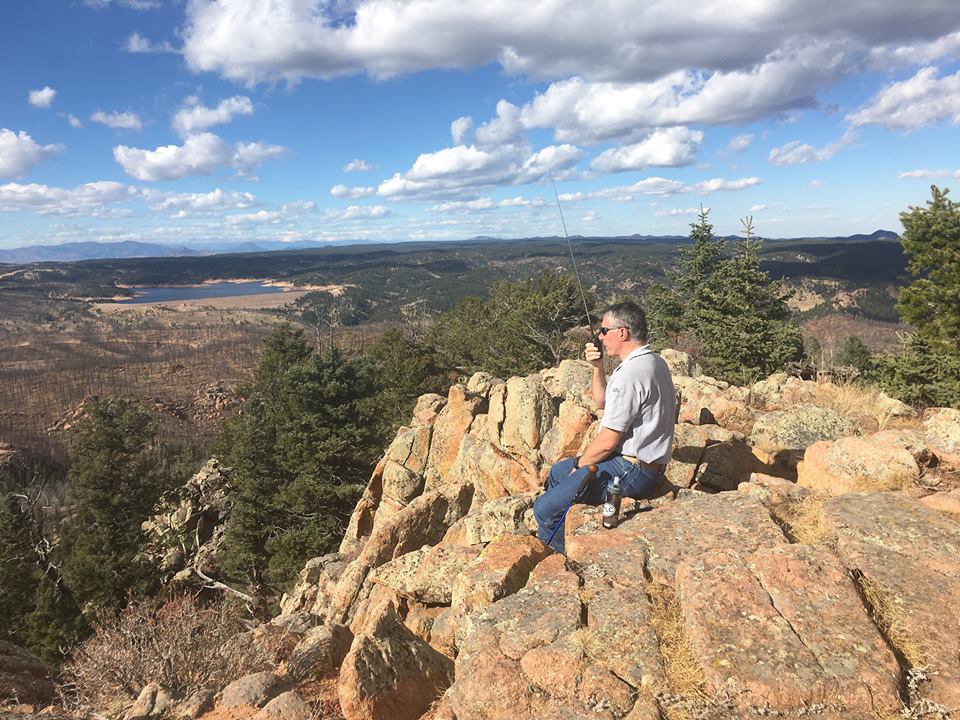
Once on top, I started calling on 146.52 MHz using the FT-1D handheld transceiver. I assembled my 2m yagi antenna hoping to work Brad WA6MM headed up Mt Antero but I found out later he did not summit. We had excellent visibility in all directions: great view of Pikes Peak to the south, Mt Yale and a sliver of Mt Princeton to the west and Mt Evans to the northwest. This really is a great spot to just sit and enjoy the view.
After making 7 contacts on 2m fm, we packed up the gear and headed down the mountain. Ormes Peak is a good “close in” summit accessible from Colorado Springs area.
73, Bob KØNR
The post SOTA Activation: Ormes Peak (W0C/FR-052) appeared first on The KØNR Radio Site.
 The Cacophony of Digital Voice Continues (Part 1)
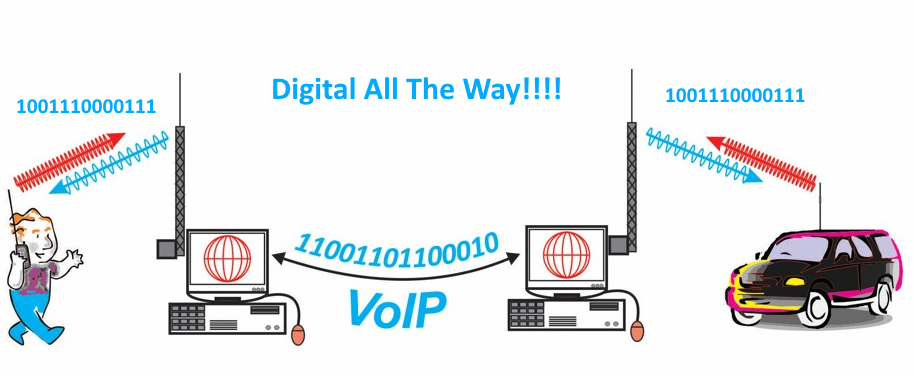
It wasn’t that long ago that I commented on the state of digital voice on the VHF/UHF ham bands: Digital Voice Balkanization. We have three main competing (incompatible) standards in the running: D-STAR, DMR and Yaesu System Fusion (YSF). At a high level, these three formats all do the same thing but there are significant differences in implementation (See Comparison of Amateur Radio DV by Roland Kraatz W9HPX.) All three of these are (arguably) open standards, allowing anyone to implement equipment that supports the standard. However, the reality is that D-STAR is still largely an ICOM system (with Kenwood joining the party), YSF is mostly a Yaesu system and DMR is…well, DMR is not deeply embraced by any large amateur radio equipment supplier. Instead, DMR is promoted heavily by Motorola for the commercial market via their MOTOTRBO product line. Another big factor is the availability of DMR radios from some of the low cost providers in the ham market: Connect Systems, Tytera MD-380. Baofeng has also announced a DMR radio but it has some potential shortcomings.
D-STAR has a clear head start versus the other DV standards and is well-entrenched across the US and around the world. DMR and YSF are the late comers that are quickly catching up. To put some numbers on the adoption of DV technology, I took at the digital repeater listings in the August issue of the SERA Repeater Journal. SERA is the coordinating body for Georgia, Kentucky, Mississippi, North Carolina, South Carolina, Tennessee, Virginia and West Virginia. This is a large region that includes rural and large urban areas, so perhaps it is a good proxy for the rest of the country. I just considered the listings for D-STAR, DMR and YSF repeaters, some of which are set up as mixed-mode analog and digital repeaters.
D-STAR   161    39%
DMR      136    33%
YSF      121    29%
Total:   418   100%
SERA Repeater Journal - August 2016
I was definitely surprised at how the DMR and YSF numbers are in the ballpark with D-STAR. Of course, we don’t know for sure how many of these repeaters are actually on the air or how many users are active on each one. Still, pretty impressive numbers. (And I did not bother to count the analog FM repeaters but those numbers are way higher, of course.)
It is the repeater clubs and repeater owners that drive the deployment of infrastructure for new technology. To some extent, they are driven by what their users want but also by their own technical interests and biases. One of the positive factors for DMR is that most of these systems are Motorola MOTOTRBO. Hams involved in commercial land mobile radio are exposed to that technology and naturally port it into the amateur radio world. MOTOTRBO is actually not that expensive and it’s built for commercial use. YSF received a big boost when Yaesu offered their repeater for $500 to clubs and owners that would put them on the air. By using Yaesu’s mixed analog/digital mode, it was an easy and attractive upgrade for aging repeater equipment.
Disruption From New Players
Early on in the world of D-STAR, the DV Dongle and DV Access Point by Robin AA4RC allowed hams to access the D-STAR network without needing a local repeater. This basic idea has continued and evolved in several different directions. For example, the DV4Mini is a cute little USB stick that implements a hot spot for…wait for it…D-STAR, DMR and YSF. This is very affordable technology (darnright cheap) that lets any ham develop his or her own local infrastructure. We don’t need no stinkin’ repeater. DV MEGA is another hot spot, supporting D-STAR, DMR and YSF. I guess somebody forgot to tell these guys they have to choose one format and religiously support only that one.
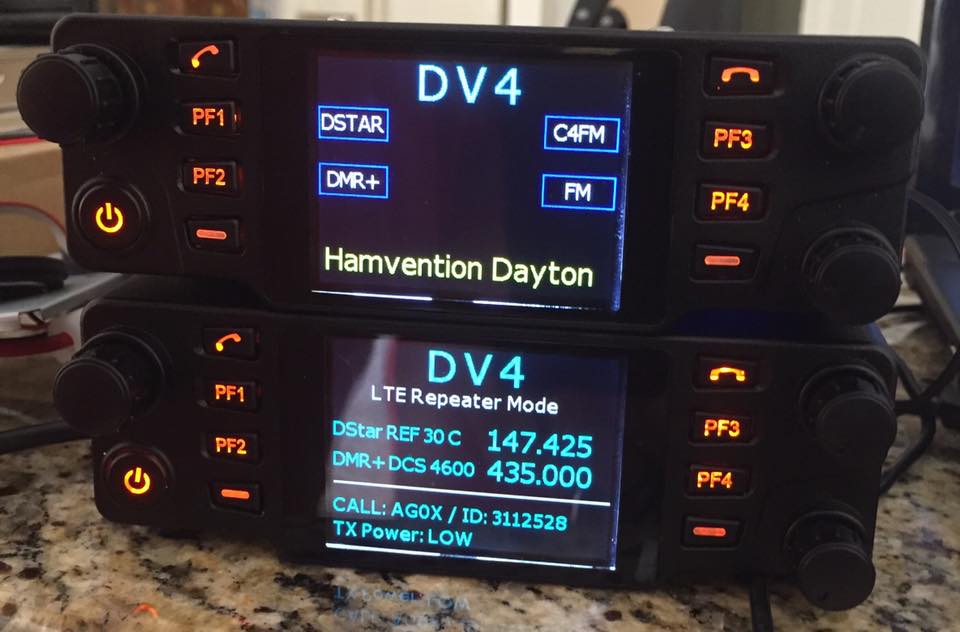
OK, so that’s one way to solve the babel fish problem…support all three formats in one device. And that’s what the DV4 mobile radio promises to do as well: “This DV4mobile is a tri-band VHF/UHF transceiver (2m, 1.25m and 70cm) that supports DMR, D-STAR and C4FM ( or “fusion”) all in one box.” Heck, let’s throw in LTE while we are at it, it’s only software. This site says the radio will be available Q4 2016. Well, it’s Q4, so maybe it will be here soon.
Conclusions
So let’s wrap up Part 1 of this story. What can we conclude?
- For the foreseeable future, we will have D-STAR, DMR and YSF technologies being used in amateur radio. I don’t see one of them dominating or any of them disappearing any time soon.
- Equipment that handles all three of those DV modes will be highly desirable. It is the most obvious way to deal with the multiple formats. Software-defined radios will play a key role here.
- A wild card here is DMR. It benefits from being a commercial land mobile standard, so high quality infrastructure equipment is available (both new and used gear). And DMR is being embraced by suppliers of low cost radios as well. This combination may prove to be very powerful.
The post The Cacophony of Digital Voice Continues (Part 1) appeared first on The KØNR Radio Site.
 SOTA Activation: Bald Mountain (W0C/SP-115)
On Saturday, I activated Bald Mountain (W0C/SP-115) for Summits On The Air. It was an awesome fall day here in the Rockies, so Joyce KØJJW and I were ready for some outdoor fun. When you say you are going to the summit of Bald Mountain, the usual response is “which Bald Mountain?” Fortunately, for SOTA purposes we can use the designator (W0C/SP-115) to drive out the ambiguity. Else, you have to deal with the fact there are 32 summits in Colorado known as Bald Mountain. And I am sure there are many more in other states.
SP-115 is a drive-up summit if you have a reasonable 4WD vehicle. For us, this meant taking the Jeep Wrangler to the top. (I am still recovering from a fractured ankle and just starting to hike a bit, so a drive-up opportunity sounded good to me.) Many maps do not show the road up Bald Mountain, so I included a portion of the latitude40smap.com map for the area (below). These recreational maps are excellent quality so I recommend you get one for exploring the area.
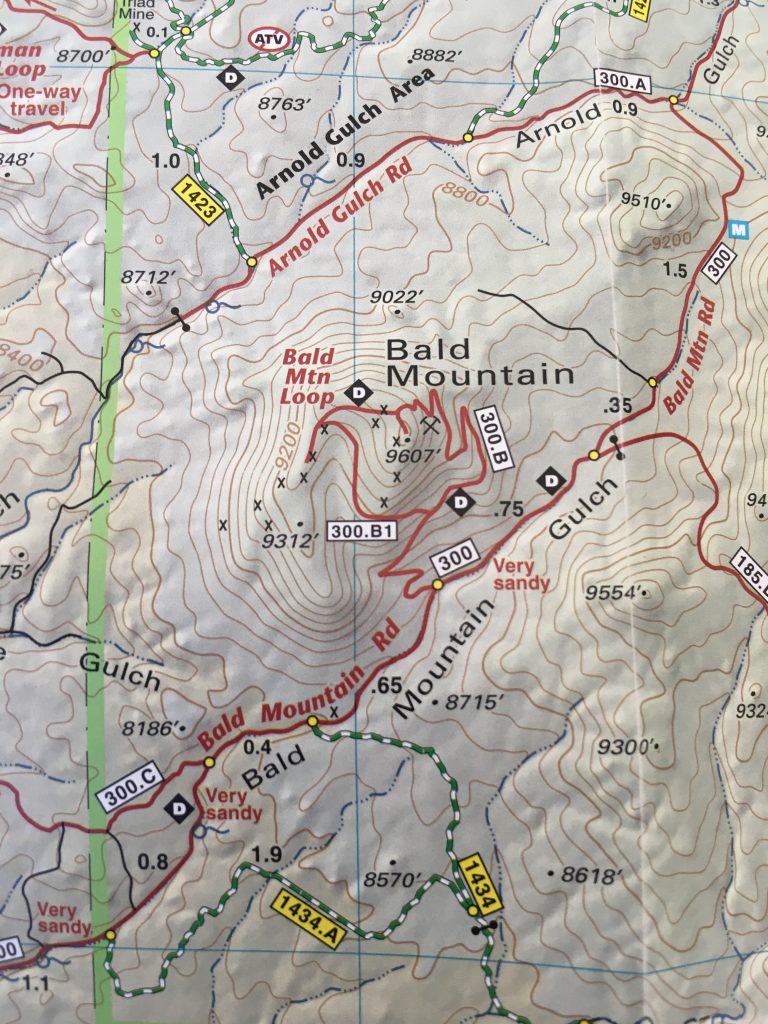
This summit is south of Buena Vista on Highway 285, which we exited at Fisherman’s Bridge, heading towards FS road 300. (Refer to the San Isabel National Forest or Latitude 40 map for details.) We followed FS 300 east which is easy 4WD. About 2 miles in, we took FS 300B (marked) to the north which winds its way up Bald Mountain.
At 0.6 miles from the intersection of 300 and 300B, an unmarked 4WD road leads off to the left and proceeds around the west side of the mountain. Taking this route provides a much easier path than the main route leading to the east side of the mountain. (We had taken the main route on our previous activation.) The preferred road does one big switchback out to the west and then returns east to the summit. This road is easy 4WD but is a bit narrow so a full size SUV or truck may have trouble. Of course, you can always hike to the summit…most likely just following the road.
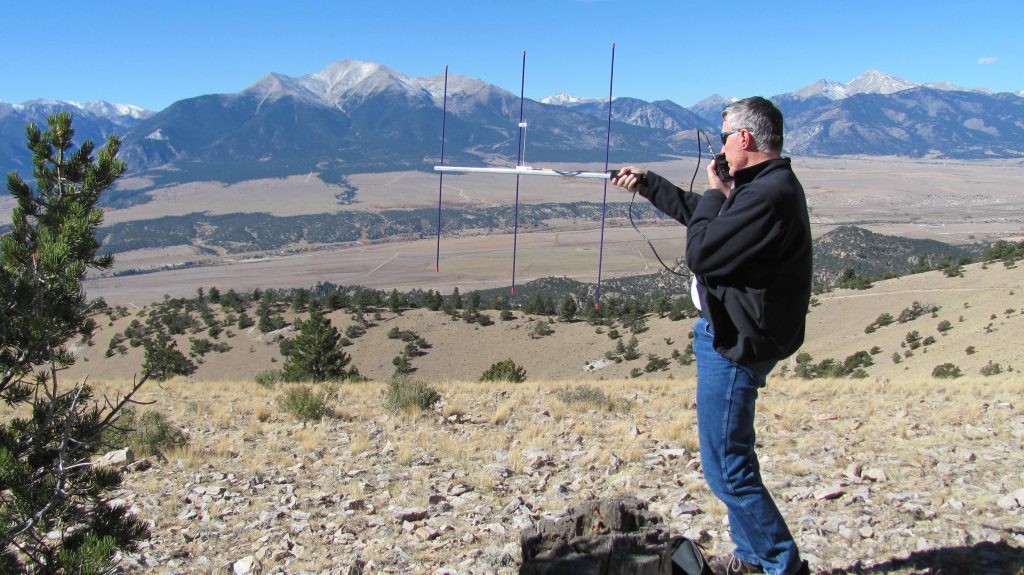 I got out my trusty Arrow 2m yagi antenna, connected it to the Yaesu FT-1D and started calling on 146.52 MHz. It took a while to get my four contacts but I kept at it. Actually, I worked five stations on 2m fm: KEØDMT, KDØMRC, K5UK, KAØABV and NØVXE. I was hoping to work WGØAT who was on the summit of Mount Herman, but I was unable to copy him. Thanks for the contacts! The summit has awesome views of the Collegiate Peaks to the west and it’s worth the trip just for the view.
73, Bob KØNR
The post SOTA Activation: Bald Mountain (W0C/SP-115) appeared first on The KØNR Radio Site.
 Rehab for the KØNR Repeater
My UHF repeater has been operating on 447.725 MHz here in Monument for a couple of decades now. It started out as a classic “pet repeater” project and has been operating from my basement all this time. Over time it has picked up additional users and has turned into the de facto hangout for our local radio club.
The repeater system has gone through a number of revisions over the years, especially for the RF transmitter and receiver. I wanted to retire the pair of Motorola Mitrek mobile radios I have been using when they started to exhibit a few lose connections. Really though, I thought it was time for some synthesized, modern RF gear in a compact package.
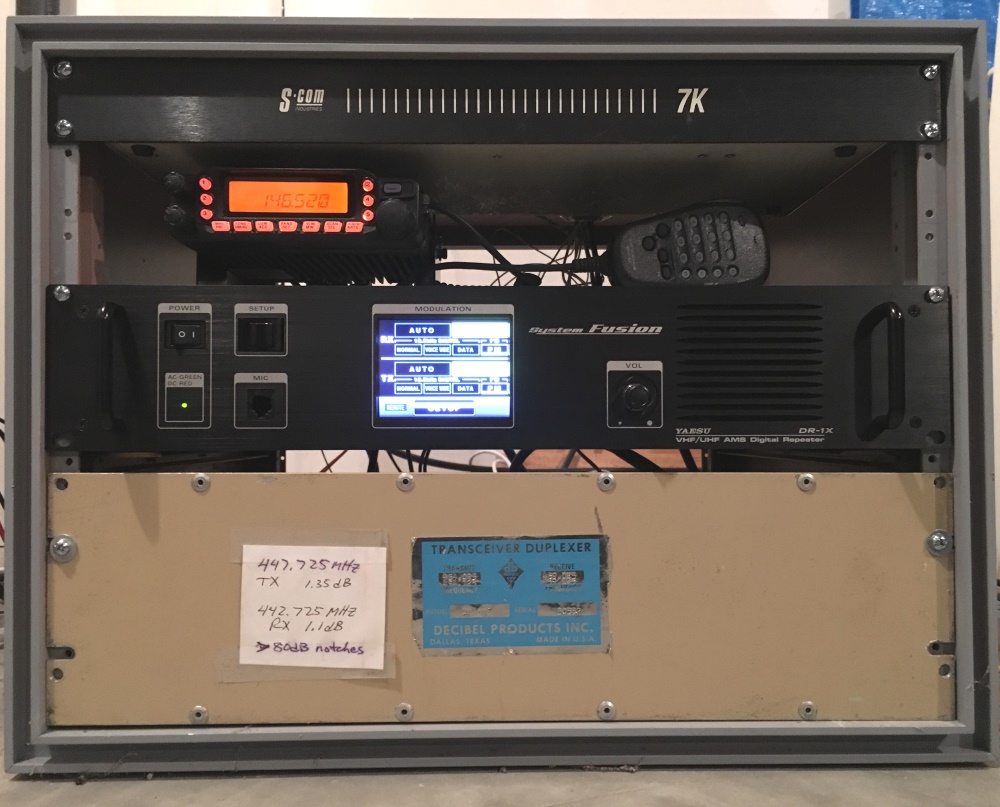 When Yaesu offered an attractive price on their DR-1X Fusion repeater, I jumped at the chance. Initially, I put it on the air in mixed analog-digital mode with the repeater automatically switching modes to handle either analog FM or C4FM digital. I used the internal controller of the DR-1X which is quite simple and has limited functionality. The DR-1X supports using an external controller but implementing the mixed analog-digital mode is…well…challenging. (Various people have figured out ways to do it with modifications to the DR-1X or using additional hardware.) In the end, I decided to just run the repeater in analog FM mode and have the expanded features of a real controller.
The repeater controller is an SCOM 7K that has been in service for decades. SCOM has long since moved on to a newer, improved model but my 7K keeps on ticking. The 7K has the voice synthesis and autopatch options installed, so, yes the repeater has an autopatch (not that anyone cares). A Yaesu FT-7800R is used as a 2m remote base and the duplexer is a classic Decibel Products. Not shown in the photo is a Bearcat WX100 weather receiver that is used to transmit weather information when an alert occurs in our area.
I’ve documented the wiring diagram and configuration used here: k0nr-repeater-construction-notes
This was a good opportunity to clean up some of the cabling and physical mounting that had degraded over time. (A kluge here, a kluge there and entropy takes over.) I am happy with the result.
73, Bob K0NR
The post Rehab for the KØNR Repeater appeared first on The KØNR Radio Site.
 Introducing The Android HT
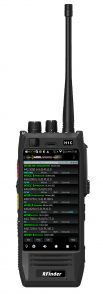
Some exciting news wandered into my inbox this past week concerning a handheld radio driven by the Android operating system. The RFinder H1 is an FM plus DMR radio to be released at the end of this month. Click to enlarge the photo to the left to get a better view. I had proposed a similar concept back in 2012: The Android HT, so this radio immediately grabbed my attention.
Details are still a bit thin on the RFinder H1 (pronounced “Ar Finder H 1”) but this video gives you a glimpse of its operation. The 70cm band radio apparently also supports GSM and 4G/LTE mobile phone formats.
There are a few other YouTube videos available, one of which emphasizes the easy programming of the radio using the RFinder online repeater directory. This makes perfect sense and is a great example of the power of a connected device. This feature would be very handy for programming up FM repeaters on the fly and outstanding for dealing with the complexity of DMR settings.
The RFinder H1 includes DMR capability, something I wasn’t thinking of back in 2012. That also makes perfect sense…embracing the growing amateur radio format that is based on industry standards.
Very cool development. What do you think?
73, Bob K0NR
The post Introducing The Android HT appeared first on The KØNR Radio Site.
 NPOTA: Grand Teton, Yellowstone and Rocky Mountain
 To celebrate the 100th anniversary of the National Parks Service, the ARRL is sponsoring National Parks On The Air (NPOTA) during 2016. Joyce KØJJW and I happened to have a trip planned to visit several of the National Parks, so it was great opportunity to take along some radio gear and operate portable from the parks.
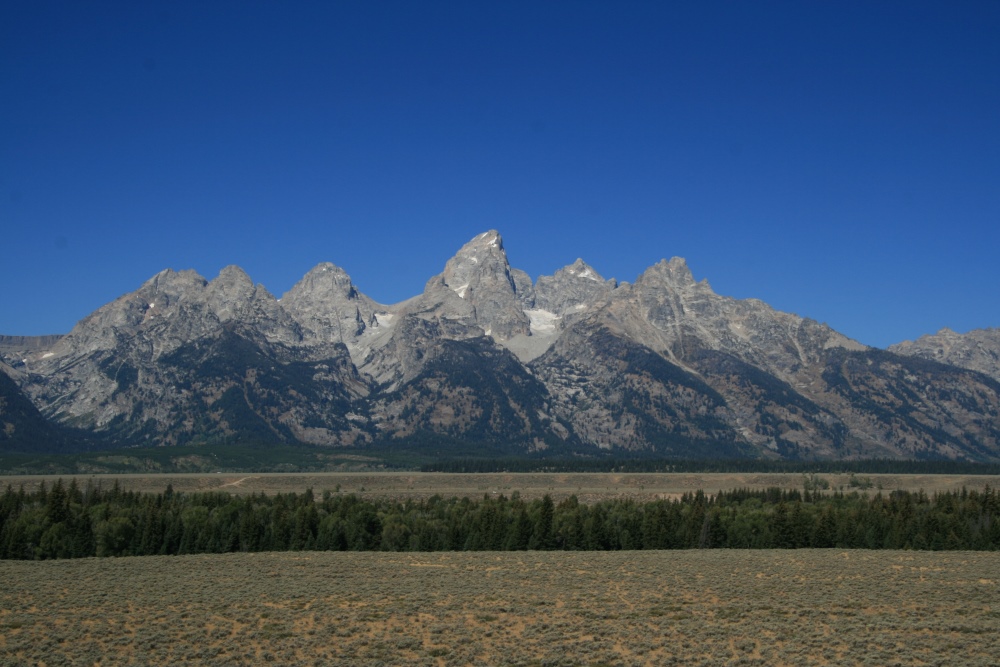
First stop was the Grand Teton National Park (NP23) in Wyoming. I operated from Signal Mountain, which is also a Summits On The Air (SOTA) peak. See my previous blog posting: SOTA plus NPOTA on Signal Mountain.
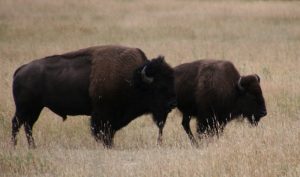
We continued on to Yellowstone NP (NP57), where we saw lots of wildlife: buffalo, elk, deer, bear and antelope. (Click on any of the photos to get a larger image.)
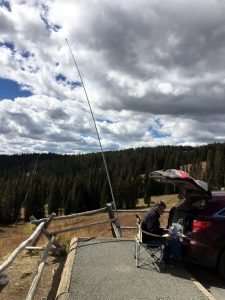
As described in the Signal Mountain post, my portable station was a Yaesu FT-991 driving an end-fed halfwave antenna on 20m. I used a SOTABEAMS pole to support the antenna, lashing the pole to whatever posts I found available. It was not too difficult to find a suitable parking spot close to mounting post. I was prepared to operate on other bands but 20m seemed to be the best choice based on current band conditions. I made 48 contacts on 20m ssb in about 30 minutes.
As we headed back home to Colorado, we visited Rocky Mountain National Park (NP48). We entered the park from the west side and crossed over to the east entrance via Trail Ridge Road. Love that drive! But first we stopped on the west side to do another NPOTA activation. Again, 20m phone was the operating mode and I made 33 contacts with stations across the US and Canada.

We took our time leaving the park around dusk so that we could spot some elk. The strategy paid off as we saw more than 20 elk in various locations.
Our top priority was enjoying the parks and viewing wildlife so we did not spend a huge amount of time doing NPOTA activations. Still, we activated three of our favorite National Parks, making 121 QSOs. We also worked in two SOTA activations on the trip as a bonus. All in all, it was a great trip with some fun ham radio activity included.
The SOTA and NPOTA logs have all been submitted (SOTA database and Logbook of The World, respectively.)
73, Bob K0NR
The post NPOTA: Grand Teton, Yellowstone and Rocky Mountain appeared first on The KØNR Radio Site.
 SOTA plus NPOTA on Signal Mountain (W7Y/TT-161)
Signal Mountain (W7Y/TT-161) is now my favorite spot in the Grand Teton National Park. The summit is well-marked on the Grand Teton NP map, on the east side of Jackson Lake. It has a paved road to the top and it provides excellent views of Jackson Hole and the surrounding mountains. Oh, and it’s a great location for ham radio.
On this summit, I did a combination Summits On The Air (SOTA) and National Parks On the Air (NPOTA) activation. Well, sort of. It turns out that when I packed for the trip, I included my usual SOTA gear, which is all VHF. For NPOTA, I loaded up my HF DXpedition gear that needs a pretty hefty power source. These means that the HF stuff uses my car battery, so it is not SOTA-compliant. Oh well.
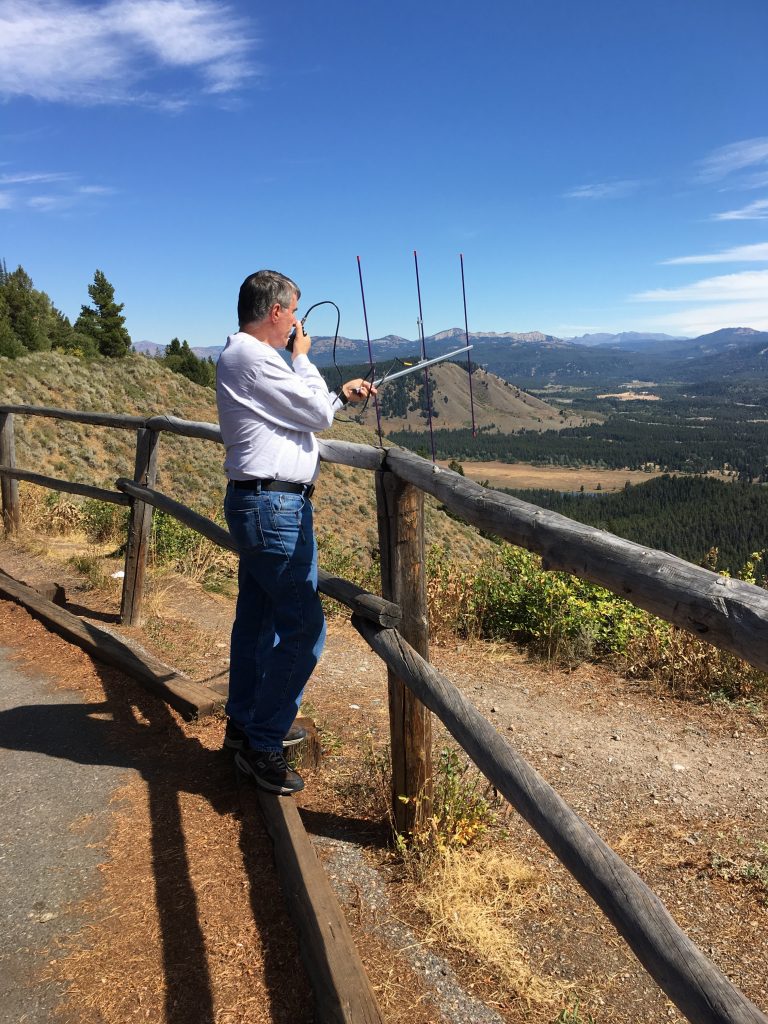
For the SOTA activation, I used the Yaesu FT-1DR and my 3-element Arrow yagi antenna to work a handful of stations on 146.52 MHz. I was a little concerned about finding enough stations listening on 52, but once again a little bit of patience payed off and I made my four QSOs.
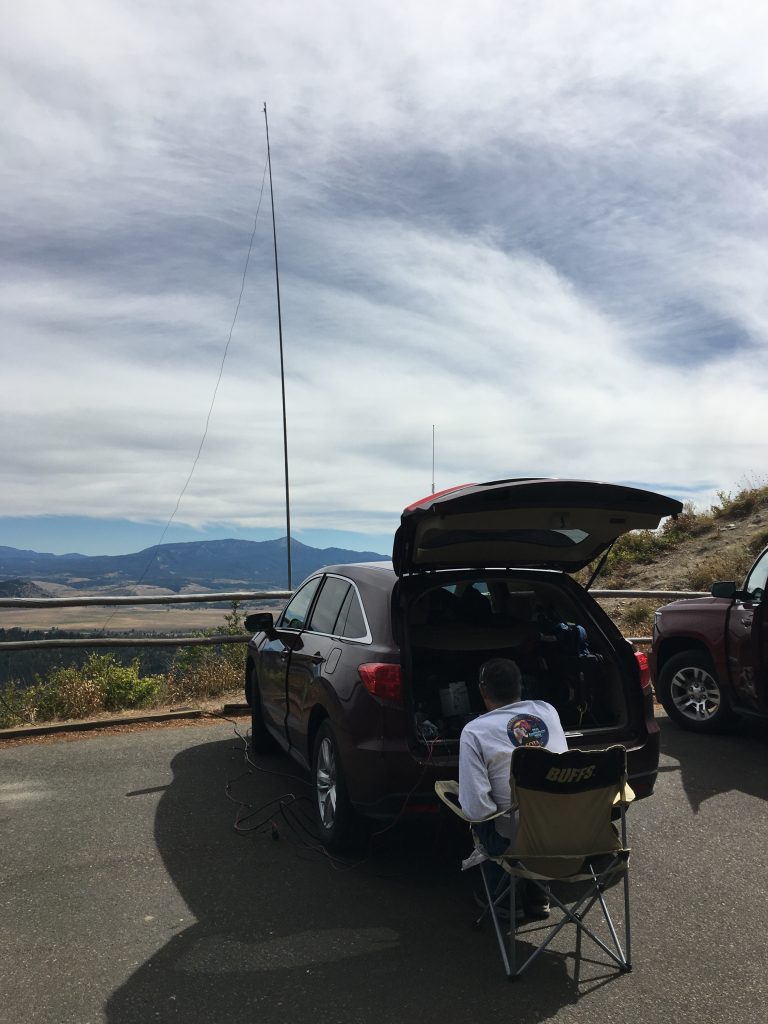
Then I set up the NPOTA station to activate Grand Teton National Park (NP23). My equipment was a Yaesu FT-991 driving an end-fed half-wave for 20m from LNR Precision. I’ve tried a number of different portable antennas over the years but have found that a half-wave radiator up in the air is a pretty effective antenna. This could be a center-fed dipole antenna but that can be a challenge to support, depending on the physical location.
The end-fed half-waves (EFHW) from LNR Precision are easily supported using a non-conductive pole such as the 10m SOTABEAMS pole. The top two sections of the pole are too thin to support much of antenna, so I have removed them. This makes my pole about 9 meters in length which is still long enough to support a 20m halfwave. (The antenna angles out a bit as shown in the photo but its pretty much vertical.) I attached the pole to a fence post using some hook/loop straps. I don’t fiddle with the length of the antenna, I just let the antenna tuner in the FT-991 trim up the match. This is the same configuration I used in Antigua (V29RW), where it worked great.
The FT-991 is a great little radio for this kind of operation. The SUV we were driving is not set up for HF operation so I just located the radio in the back of the vehicle and plopped down on a folding camp chair. For power, I clipped directly onto the vehicle battery with fused 10 gauge wires.
I started by making a few calls on 20m ssb. As soon as I was “spotted” on the usual web sites, I had a good pileup going. I worked 40 stations in about 40 minutes, so averaged one QSO per minute overall. Thanks to everyone that worked me; all contacts have been uploaded to Logbook of The World.
Oh, and it was a lot of fun.
73, Bob K0NR
The post SOTA plus NPOTA on Signal Mountain (W7Y/TT-161) appeared first on The KØNR Radio Site.
