Archive for the ‘review’ Category
 Let’s Call CQ – QSO Today Episode 184 with NW7US
I got a Skype call a few weeks ago from Eric, 4Z1UG–the creator and host of the QSO Today Podcast–during which he asked me about how and why I got into amateur radio. Here’s the result.
Eric writes,
We talk a lot about the band conditions due to the Sunspot cycle. Most of it on Facebook and other places is about how “dead” the bands are at this point. We all can’t wait until the cycle starts to rise and we will be making contacts with little effort. I remember in my conversation with Chuck Adams, K7QO in Episode 58, that he really enjoys operating is “Pigrig”, one watt, CW transceiver on 20 meters. When I asked him, (I liberally paraphrase) “but Chuck, the bands are dead. How does that work for you?”. His reply was that while most hams are listening to the bands, he calls CQ until he gets a reply. Works every time.
My QSO this week is with Tomas Hood, NW7US, who has years of expertise in propagation and Solar activity. He is the propagation editor of more than a few radio magazines and websites. In our post-recording conversation we discussed this phenomenon of listening and not calling CQ. I even had this idea that maybe one of the reasons that the digital modes are so successful is because they “beacon”, as part of the whole digital experience, the same as calling CQ. This is why they make contacts. From what I see, looking at PSK Reporter, hams are making lots of contacts worldwide using the digital modes. While SSB may not be working so well, CW and the digital modes seem to work fine.
I like to work on my bench or make the podcast while listening to the bands. Jeff Damm, WA7MLH, in Episode 177, says that he will put his keyer in CQ mode while he is working on a new radio. Invariably, sometimes after many minutes, he gets a reply. Great idea Jeff!
73,
Eric, 4Z1UG
Episode 184 can be found here: https://www.qsotoday.com/podcasts/nw7us
Highlights of Episode 184:
Tomas Hood, NW7US is the propagation editor of a number of shortwave and amateur radio magazines, and has a wide variety of websites, that grew out of his love for all things radio, and for listening on the bands to far off DX and commercial broadcast stations. Tomas shares his understanding of propagation and the lessons we can learn from listening, really listening to the QSOs and exchanges during contest operation.
All of the QSO Today episodes are great. I enjoy hearing about many different hams. Do check out all of the episodes that Eric has published.
73 de NW7US dit dit
 Demonstration: Using FLDigi to Communicate with Olivia Digital Mode on Shortwave
Are you interested in starting out with the amateur-radio digital modes on the high frequencies? Have you heard of FLDigi? FLDigi is a software control and modem suite that interfaces with your transceiver, your computer sound card, and other input/output interfaces so that you can receive and transmit one of many digital modes. For example, FLDigi allows you to operate using the Olivia digital mode.
Unlike the JT/FT digital modes–modes that do an incredible job under marginal propagation conditions–there are other modes that offer keyboard-to-keyboard conversational QSO opportunities that can overcome rough shortwave radio propagation conditions. (The meaning of QSO on Wikipedia: An amateur radio contact, more commonly referred to as simply a “contact”, is an exchange of information between two amateur radio stations.)
While making quick work of getting DX stations into your logbook by exchanging callsigns, a signal report, and a grid square, the JT/FT modes (JT stands for Joe Taylor, the fellow that pioneered these modes) are limited. They cannot handle any additional communications beyond a callsign, a signal report, a grid square, and a very limited set of acknowledgments and sign-off messages.
When you desire to get to know people from other areas of the world, or if you need to establish networks around the world for passing information–perhaps an emergency net in support of the Red Cross–or if you are motivated by any other of a myriad reasons to establish a keyboard-to-keyboard conversation by way of the ionosphere, modes like Olivia are great candidates for your consideration.
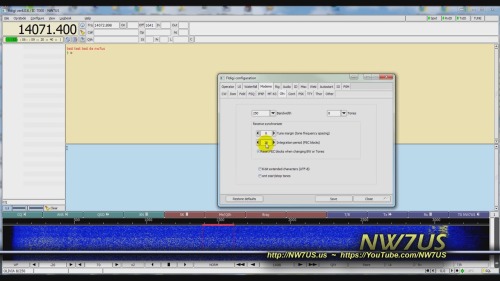
In this video, contributing editor with CQ Amateur Radio Magazine, NW7US shares some starting points in the FLDigi software for Olivia keyboard-to-keyboard chat mode.
[embedyt] https://www.youtube.com/watch?v=ejSNfXiT8FE[/embedyt]
Current CENTER Frequencies With 8/250 in MHz:
1.8269, 3.5729, 7.0729, 10.1429, 14.0729, 18.1029, 21.0729, 24.9229, 28.1229, and so on. See the pattern?
By the way: The current suggested CENTER frequency With 16/1000 or 32/1000 on 20 meters is 14.1059.
(Why the …9 frequencies? Experts say that ending in a non-zero, odd number is easier to remember!)
Q: What’s a ‘CENTER’ Frequency? Is That Where I Set My Radio’s Dial?
For those new to waterfalls: the CENTER frequency is the CENTER of the cursor shown by common software. The cursor is what you use to set the transceiver’s frequency on the waterfall. If your software’s waterfall shows the frequency, then you simply place the cursor so that its center is right on the center frequency listed, above. If your software is set to show OFFSET, then you might, for example, set your radio’s dial frequency to 14.0714, and place the center of your waterfall cursor to 1500 (1500 Hz). That would translate to the 14.0729 CENTER frequency.
The FLDigi Manual of Operation is found here: http://www.w1hkj.com/FldigiHelp/
FLDigi can be downloaded here: https://sourceforge.net/projects/fldigi/
Join the Olivia movement:
1. Subscribe to the mailing list: https://Groups.io/g/Olivia
2. Join the Facebook group: https://www.facebook.com/groups/olivia.hf
For additional information on Olivia, check out:
http://blog.nw7us.us/post/168515010062/olivia-digital-mode-great-compromise
http://blog.nw7us.us/post/169114702522/are-you-an-amateur-ham-radio-operator-check-out
73 de NW7US
 RepeaterBook – A FREE Online Repeater Directory – ETH078
In this episode of the Everything Ham Radio Podcast, we talk with Garrett Dow, KD6KPC, the creator of RepeaterBook.com. RepeaterBook is a free online repeater directory that covers all of the US and Canada as well as several other countries around the world.
You can use RepeaterBook directly from its website, or through its app. You can find the app on IOS, Android and Kindle. RepeaterBook has done a great job on getting and maintaining the information of about 35,000 repeaters thank in a large part to about 95 admins that maintain the records in their assigned areas and from the ham community at large.
Make sure you give the interview a listen and check out the show notes.
 Radio taken a back seat
I’ve finished work for the remainder of the year and its a good time to take stock. I had a lot of plans, most of which didn’t happen as a result of some over optimism on the planning front so what went wrong. Well not much in fact when it comes to radio. I did however sneak a little progress here or there but its been barren for a few months. Before we get into new years resolutions I think its worth noting what did go on….
- I bought a MTR-5B rig which has had a few outings and a couple of QSO’s. Lovely bit of kit by the way.
- Practiced my CW a lot off air. Not so much on air.
- I acquired a TS-850 as well. Very nice
- I spent a bit of time perfecting the Raspberry Pi / RTL Dongle iGate. Pleased with that because I’m not that great with Linux.
- I am typing this on a PC loaded with Ubuntu. In an attempt to learn a bit more about Linux.
- Bought a FT-817. I really missed the old one for VHF contesting (get which section I prefer)
- Built a towbar mounted decorating pole mast. Well prototyped one at least.
- Attempted to programme an Arduino to display a load of GPS data. This is definitely in the work in progress tray.
- Did programme an Arduino to decode morse
- Wrote a piece for RSGB on the SatNOGS project we did at the club. May or may not get published
………….hang on this list is getting longer than I though it would
I suspect I’m not alone in this but looking back in the log I have not had a QSO in a few months other than on a repeater or as part of a contest. I thought that this meant I hadn’t really done much. But the reality is that, probably like quite a few, there are a more pressures on your time than you think there are. It just so happened that when this relaxed and I turned the rig on, conditions were down the khazi.
So Happy Christmas, Happy New Year and all that. Remember hams don’t just make QSO’s.
 Review – BTech APRS-K2 Cable (TRRS/APRS)
by John ‘Miklor’
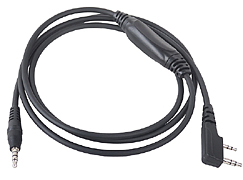
APRS-K2
It’s long overdue, but there’s finally a TRRS/APRS cable available for radios using a standard Kenwood style K2 connector.
I’ve been wanting to get involved with APRS for a while now, and this made it extremely easy.
APRS-K2 interface cable
The APRS-K2 cable allows you to interface your handheld transceiver with your existing mobile device, including. iPhone, iPad, and Android.
One end of the cable uses the Kenwood style K2 connector, while the opposite end is 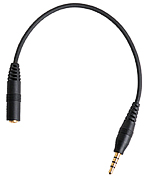 terminated with a TRRS connector. Also included with the APRS-K2 is a Reverse Adapter to insure compatibility with all devices. This adapter allows cable to connect to earlier 3.5MM TRRS standards, such as Nokia.
App Driven
The APRS-K2 cable uses a virtual TNC found in several apps, such as APRSDroid, APRS.fi, and Pocket Packet. Plug in the cable, turn on the VOX, and you’re pretty much set to go.
Product Description
BTECH APRS-K2 TRRS / APRS Cable A simple way to start using APRS by using devices you already own. The BTECH APRS-K2 Cable will quickly connect your radio to APRS by using virtual TNC (app driven) on your tablet or device. The APRS-K2 cable is built with a custom circuit board that will automatically adjust the audio for clear packet transmissions with minimal adjustment; along with protecting your devices from strong over modulated signals.
Along with allowing APRS functionality the APRS-K2 cable can provide a simple interface gateway to allow several features to your radio!
Easily record radio conversations:
By connecting the APRS-K2 cable between your radio and any recording (line-in) device.
Use the APRS-K2 cable as a Mic In Connector:
Set up VOX on your radio to accept any form of incoming audio – such as a Push-to-talk application on a Phone – or a Line-out application from your computer.
Use the APRS-K2 cable to push transmissions over a speaker system:
Easily play audio over a intercom or speaker system from your handheld.
With a backup radio and your own ingenuity, the APRS-K2 cable can serve as an interface for a variety of applications for any amateur. Compatible with Kenwood K2 Accessory Slot Radios (such as BaoFeng, BTECH, Wouxun, TYT) Compatible with all phones, tablets, and computers with 3.5MM Audio In/Out Ports
Includes:
APRS-K2 Cable
Reverse Connector Adapter
Quick Start Guide
Conclusion:
The cable comes with a simple one page instruction sheet which should have you up and running in about 10 minutes after the appropriate app is loaded.
– Plug in the cable
– Set your handhelds volume control
– Turn on the VOX
– Set your handheld to 144.390 (US)
– Activate the app
That’s all it takes. If you’ve been considering building an APRS cable, you might find this an easy Plus and Play alternative.
The APRS-K2 can be ordered from Amazon, or if outside the US, you can go to their website and contact them directly. Baofeng Tech
Too many toys, too little time.
John ‘Miklor’ K3NXU
http://www.miklor.com
 Review – BTech UV-5X3 TriBand Handheld
 UV-5X3
Although the case design is familiar, the radio inside is not. BTech has recently introduced the new UV-5X3 to the US Ham Radio market. This radio is a true triband transceiver with internal filters specifically configured for triband operation.The firmware in this radio has been reworked to include several new features not found in similar appearing radios.
.
In the Box
Included with the radio are the:
– 1500mAh Li-Ion Battery **
– 85 page User Guide – English
– Charger base & AC adapter
– Hand strap
– Belt clip
– PTT Earpiece / Microphone
– Antenna (1) – VHF / UHF 6 3/4″ (17cm) A-V85
– Antenna (2) – 220 MHz 6 1/4″ (15.5cm)
.
** This is the identical battery that is commonly mislabeled as 1800mAh on some handhelds.
The UV-5X3 was specifically designed as a Tri-Band transceiver. The internal filtering allows not only the traditional VHF and UHF frequencies, but also includes the 222-225 MHz Ham band for the US.
 Case Design
The UV-5X3 has the traditional case design, which allows me to use my high capacity BL-5L 3800mAh battery with no alteration to the base. Accessories such as my mobile battery eliminator, Spkr/Micr, etc. are fully compatible.
.
Transmitter
The frequency range is VHF 130-176 / 222-225 / UHF 400-480 MHz, supporting both Wide and Narrowband with 2.5kHz steps.The radio’s filtering scheme allows for full power on all bands. My OTA audio reports have been clean with clear with mellow audio. Power levels are respectable using a Bird VHF/UHF Termaline.
|
DTMF / IRLP Access
Something new also appearing on this model is a DTMF gain adjustment, allowing me to adjust the DTMF audio to the transmitter to a comfortable level for both repeater control and IRLP access.
If you are in a area that requires tone burst for repeater or network access, the 1000Hz, 1450Hz, 1750Hz, and 2000Hz burst are accessible by pressing the PTT along with one of the four pre-assigned keypad keys.
The receiver sensitivity is excellent, and the audio quality is clear, loud, and undistorted. Along with the 3 TX/RX bands, the receiver also includes the traditional commercial FM radio band. (65MHz-108MHz)
.
Tone Scanning – The receiver also has the ability to identify the tone of a repeater being transmitted by a received signal.
This feature gives me the ability to add / delete channels from the scanning list using the keypad. No longer a software only function. The more I can do from the keypad, the better I like it.
A Long Press of the [*SCN] button will start the scanning process.Channel Mode – When scanning with the Display Sync set to ON, the upper and lower display will scan together. This is explained below under Display Synchronization.Frequency Mode – When entering Scan, the image below will appear on the screen. Enter the first 3 digits set the range start, the second 3 digits sets the stop.
Example: Entering 146 : 146
Start the scan range at 146.000
Ends the scan range at 146.999
 Antenna
I found two antennas included with the radio. One was the standard upgraded A-V85 antenna, and a slightly shorter one for the 220MHz band.
Antenna (1) – VHF / UHF 6 3/4″ (17cm) A-V85
Antenna (2) – 220 MHz 6 1/4″ (15.5cm)
The separate antenna specifically tuned for 220 MHz is a great addition. The SWR shows 1.3 which is excellent. No compromise. I labeled my 220 antenna, as they are very close in appearance.
Display
The radio has a tri-color display, allowing the color options of the blue, orange and purple. The LCD can be formatted in either of three formats. Choices are Frequency, Channel number, or up to 6 Alpha Characters.Display Synchronization
The UV-5X3 supports display syncing, which gives ability to track both the upper and lower LCD. I keep mine set to display the channel name in display A, and the frequency in display B. When you change the channel, both the upper and lower displays move together.
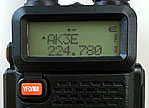 .
.Programming
Manual programming is pretty straight forward once you enter a few channels. A programming guide can be found at Manual Programming with a Menu Definition summary available at Menu Definitions.
The software support for the UV-5X3 can be found in the Latest Daily Build of CHIRP. There are a few new options that will be added to the 5X3 in the near future. One is the ability to Stun, Kill, Revive. This gives you the ability to disable your radio remotely.
The new chipset (RDA1846S and RDA5802N) provides reduced AGC switching noise and a low-IF digital audio processor for improved sound quality.
The programming cable requires a traditional two pin Baofeng / Kenwood style. There are several cable available. The generic cables may require special drivers, due to the use of cloned chips. For Plug and Play, a cable using an FTDI chip is recommended.
 Conclusion
The UV-5X3 firmware has obviously been reworked to include:
– Tri-Band Support: VHF/1.25M/UHF
– D-ANI (Display incoming DTMF Tones)
– Synchronized Displays
– DTMF audio gain level adjustment
– Add / Remove Channels from Scanning list via keypad (LCD Dot Indication)
– On the Fly scanning by Frequency Range
– 4 Tone Burst options
– Remote Stun, Kill, Revive
 Review – BTech UV-50X3 (Tri-Band)
by John ‘Miklor’
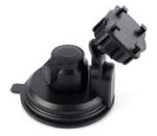
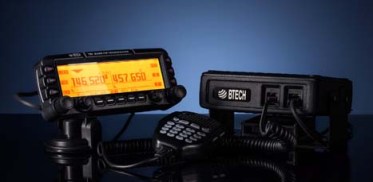
Included with the radio are: 50X3 Weight: Main Chassis 2.1kg (4.6 lbs) Specifications The 50X3 is FCC Part 90 certified for commercial use in the US. Control Head The suction mount is about the best I’ve ever used. It requires a smooth metal or glass surface, but the silicon rubber cup will not let loose. My control head has been mounted atop my computer for over a month, and it is going nowhere. The button functions are displayed on the LCD screen for easy function identification. The PTT button on the upper right is for Momentary or Toggle PTT. One press turns the TX on, next press turns it off. Setting to Toggle is convenient if running a net or using a mobile headset. 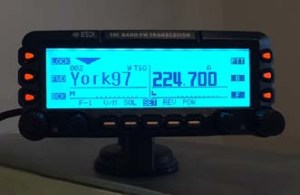 Cooling The 220 ham band transmit range is limited to 222-225MHz. The receiver is capable of being programmed above and below those frequencies, but may be outside of the performance range due to the ham band specific filtering.
Microphone The radio comes with a full function keypad style microphone. On the right side are two slide switches that control the Lock and Lamp feature, and on top of the microphone are two frequency Up and Down buttons. Along with a 16 button DTMF style keypad are 4 programmable function keys. Choices are Squelch Off, TX Power, Rptr Shift, Reverse, and Tone Call. There are two microphone input jacks. One on the control head, the other on the main unit. There is also a built in microphone element inside the control head. Although the audio quality is excellent, the sensitivity is that of a standard microphone. The OTA reports were excellent with plenty of audio, so there’s no reason to shout. A nice feature in the audio section is an adjustable microphone gain control. There are 5 settings available. Min, Low, Normal, High, and Max. Normal is great for speaking in a normal volume an inch from the microphone. Running a net with VOX and a headset, you can bring it up a bit. Driving in an off road vehicle, you just might need to set it back.
Receiver Along with the standard VHF / 220 / UHF frequencies, the receiver covers: 0.5-1.7 MHz (AM Radio) The control head has built in speakers, as well as one in the main module. An external speaker jack in the rear also allows for a larger speaker if desired. The jack provides for either mono or stereo output. (each receiver can have it’s own speaker). I found a menu setting to adjust the tone of the speaker as well. Although there is more than ample audio output, when the volume control is all the way down, the radio is silent, as it should be. Cross Band Repeat The radio takes full advantage of the independent receiver by including a Cross Band Repeat function. I entered the VHF and UHF frequencies, power level and tones, selected the Cross Band mode, and was ready to go. The audio levels are preset and the audio quality reports were excellent. Cross band repeating using a 220MHz frequency was not possible. This is more than likely a precaution due to the minimal frequency separation. Display The control head has a large 5″ LCD with your choice of background colors. Options include White-Blue, Sky-Blue, Marine-Blue, Green, Yellow-Green, Orange, Amber, and White. The brightness and contrast are also menu selectable.
Unless you are only entering a few channels, I would recommend the optional PC05 programming cable. The UV-50X3 uses the CHIRP programming software. Scanning in the VFO mode allowed me to scan either the VHF, 220MHz, or UHF band. In the Channel mode, the scan would select any channel in the list regardless of band. Power Cable There are radios that draw less power whose power cables use thinner wire, lower value fuses, and can be plugged into accessory plugs. Do NOT use these cables, even though they may be plug compatible. The 50X3 draws twice the current, and will blow the fuses and possibly overheat the wire. The cable on the 50X3 appears to match that of the hi-power Yaesu, Icom, Kenwood series. ONLY use the proper cable for the radio. Base Station Operation For mobile drive testing, I teamed this radio with a Nagoya Tri-Band TB320A and SB-35 NMO mag mount and the results were excellent. Conclusion Some of the added advantages to the US market are the FCC Part 90 certification, local US support, and exclusive program support using CHIRP software. The radio can also be shipped worldwide by contacting BTech directly. This is definitely one of the nicest mobile transceivers I’ve used; and yes, I’ve owned the “big 3”.
More Information: Miklor.com |

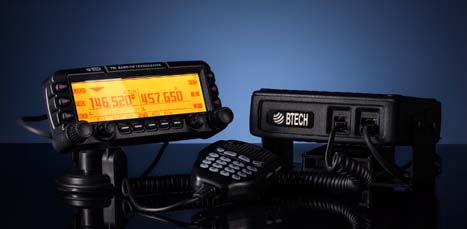 Four years after its initial design, the VGC 6600PRO has evolved into the BTech UV-50X3, a full featured Tri-Band mobile that delivers a full 50W on VHF and UHF, with addition of a 220 MHz module that delivers 5W output. The 220 MHz module was specifically designed and filtered for 222-225MHz US ham band operation. I mention this as there are currently radios being advertised as Tri-Band operating in the range of 240-260MHz that are not adaptable to frequencies below 240MHz due to their internal filtering.
