 |
 LHS Episode #389: Jailbird Jamboree

Welcome to Episode 389 of Linux in the Ham Shack. In this episode, the hosts discuss illegal activity on the air, the purpose of amateur radio, a remote head unit for the Icom IC-7100, Linux on the Apple M1 chip, a new frontier for Red Hat Enterprise Linux, ethical open-source licenses and much more. Thank you for tuning in and have a great week!
73 de The LHS Crew
Russ Woodman, K5TUX, co-hosts the Linux in the Ham Shack podcast which is available for download in both MP3 and OGG audio format. Contact him at [email protected].
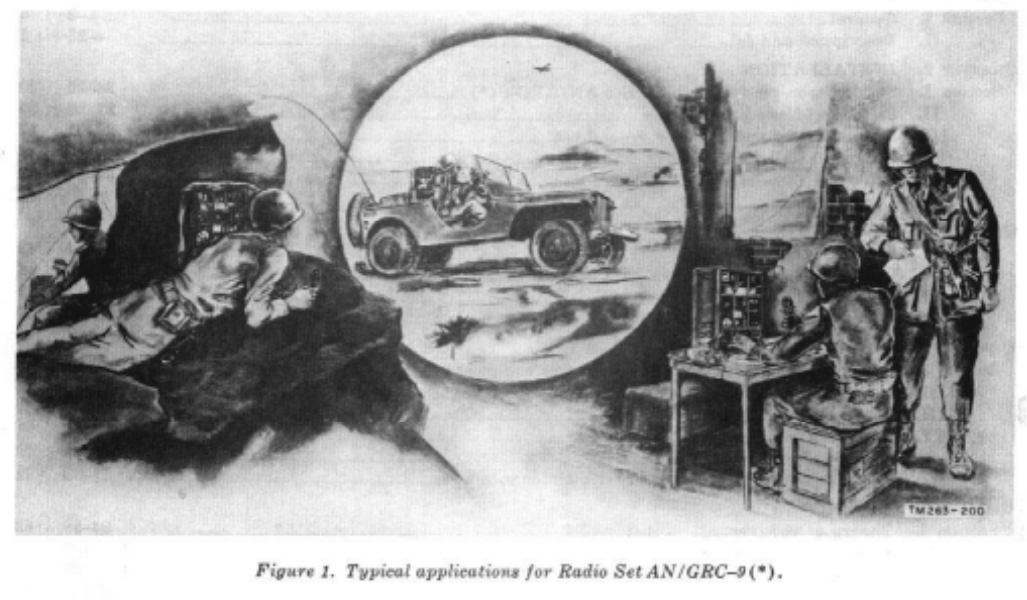
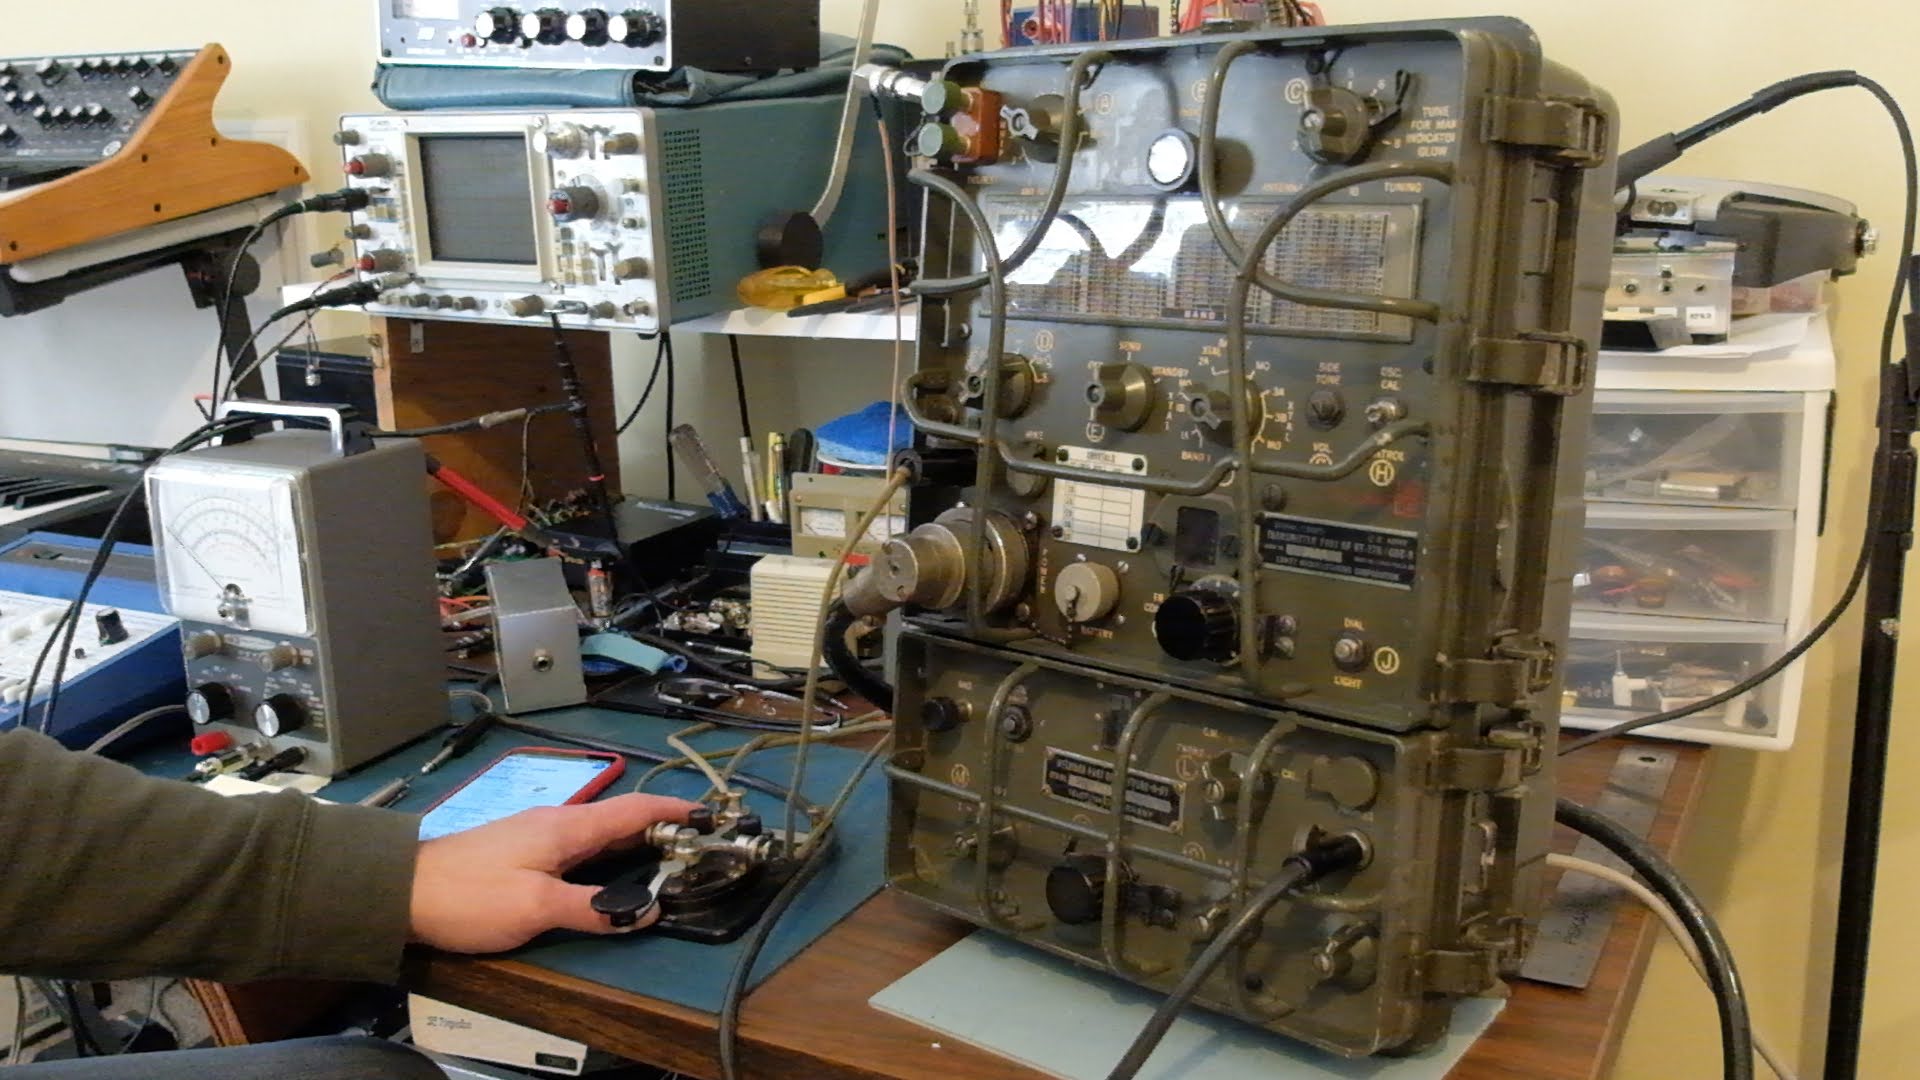
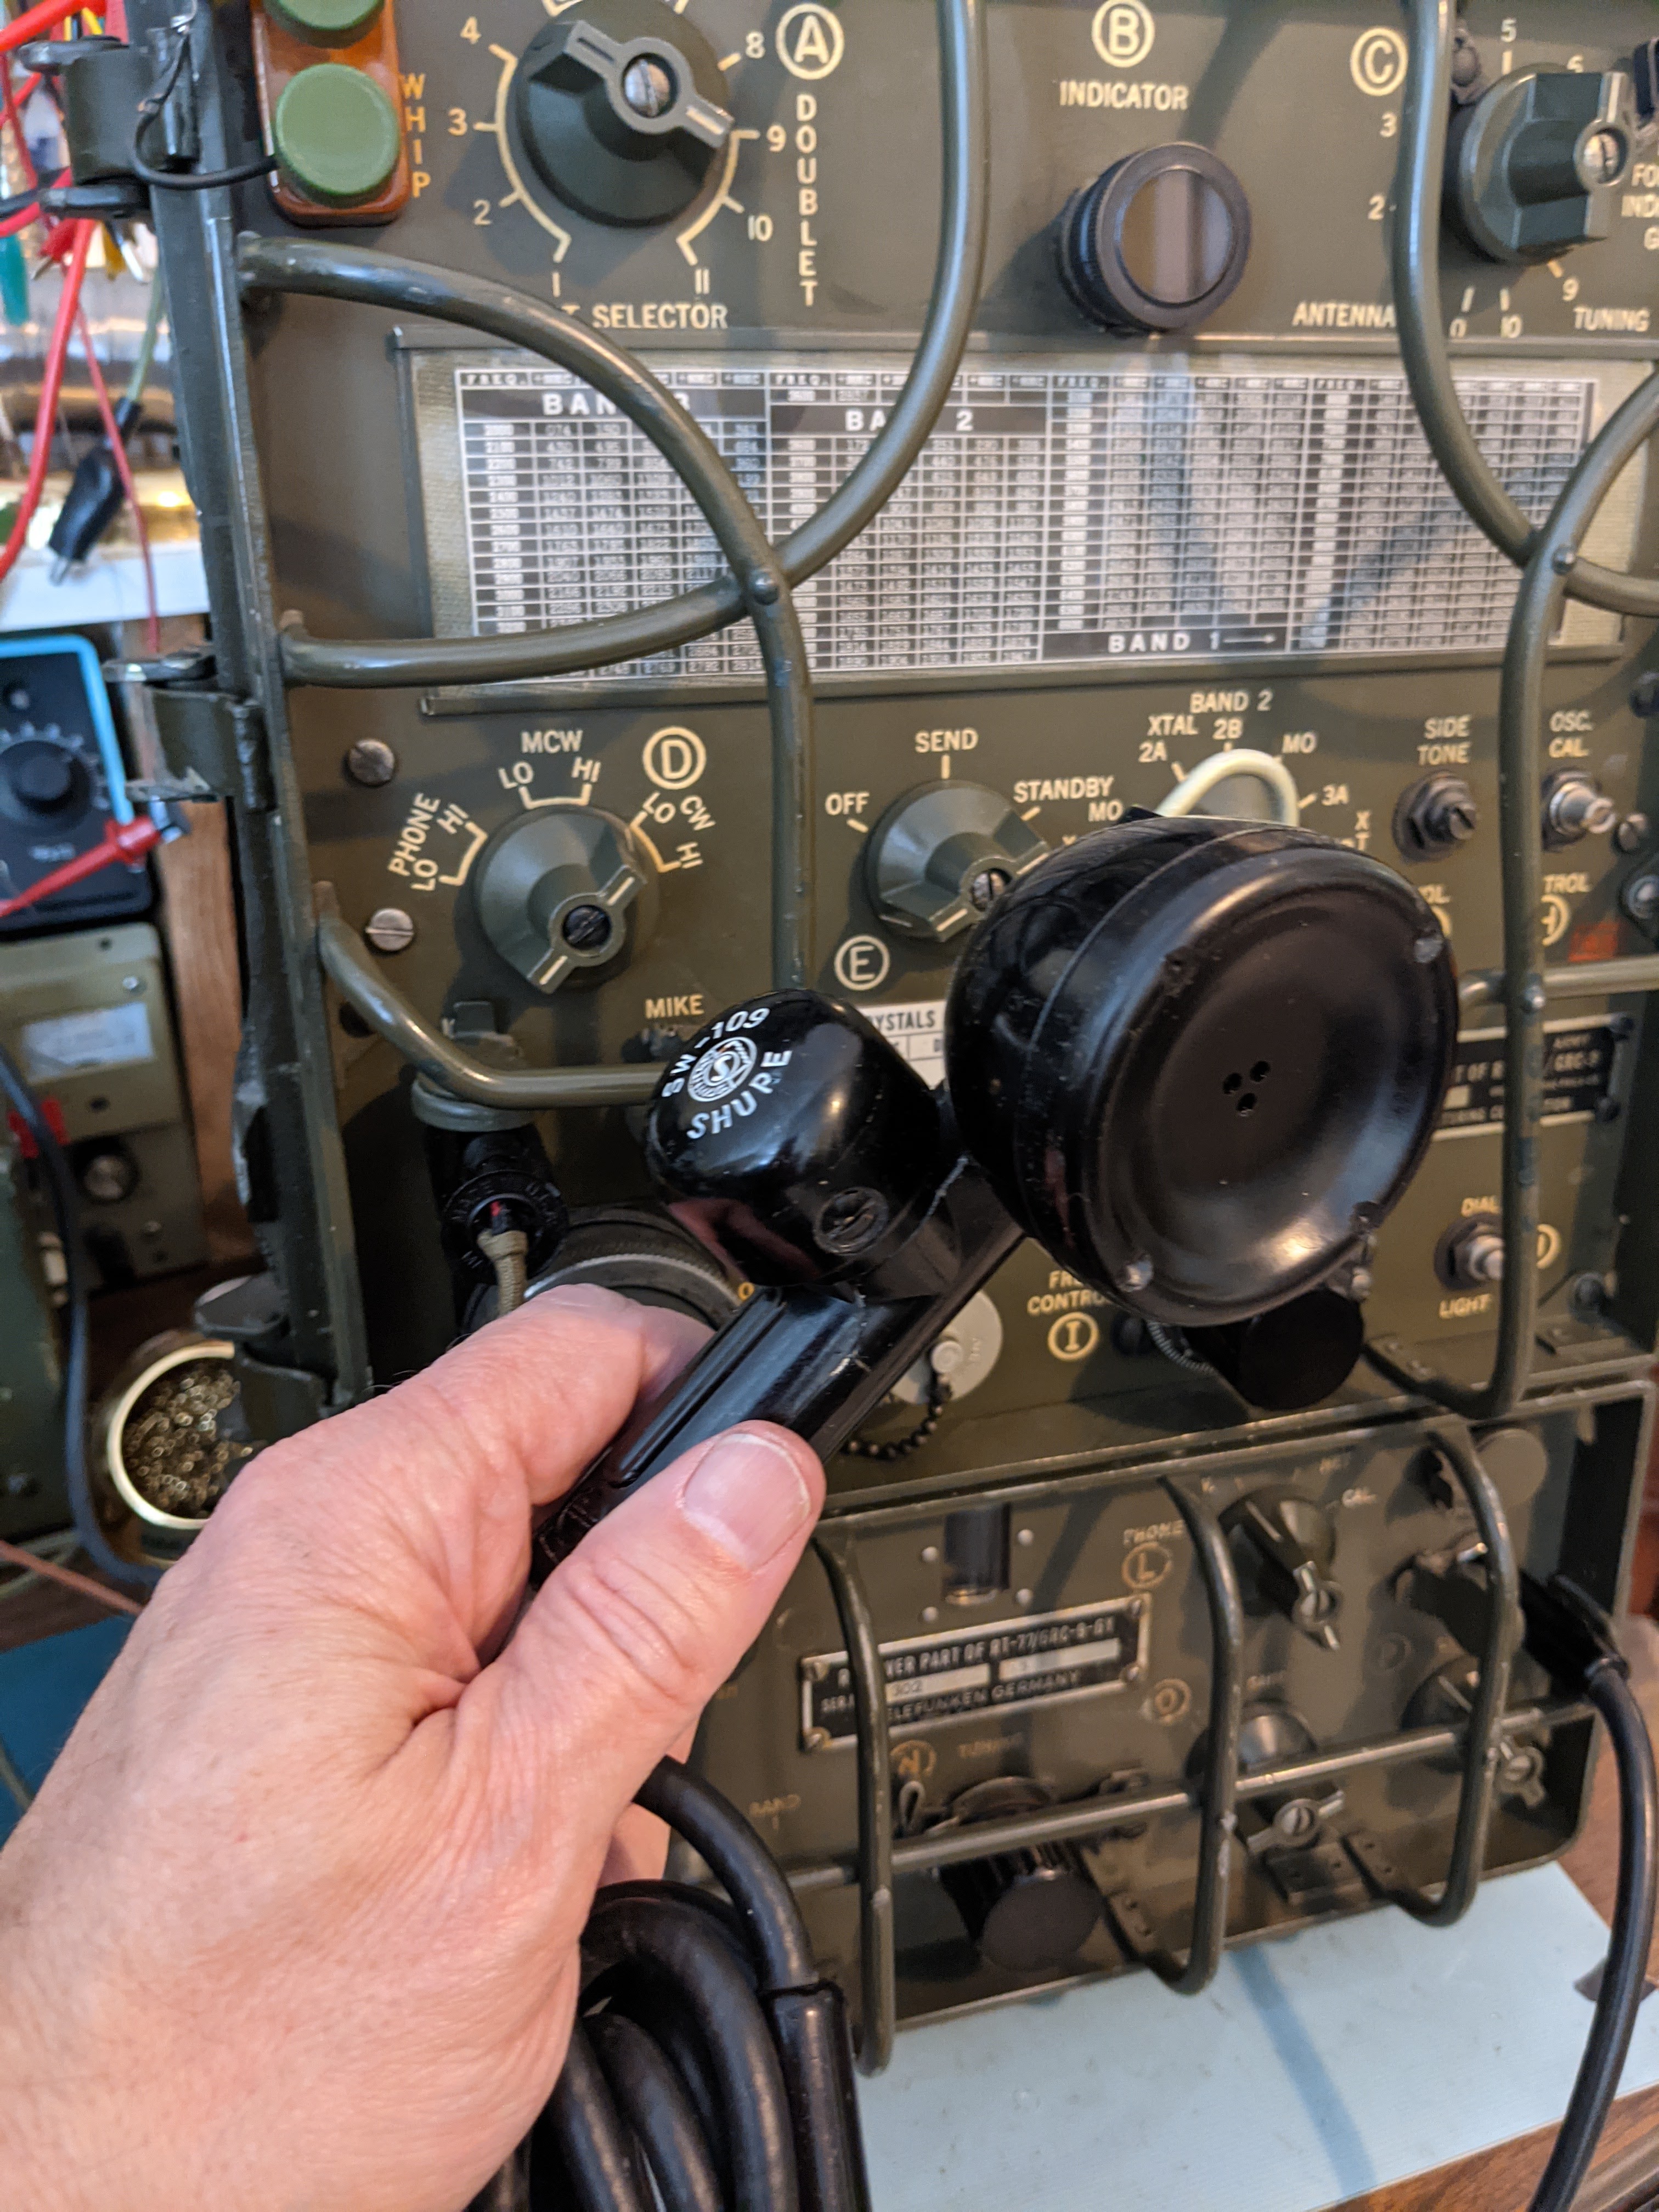
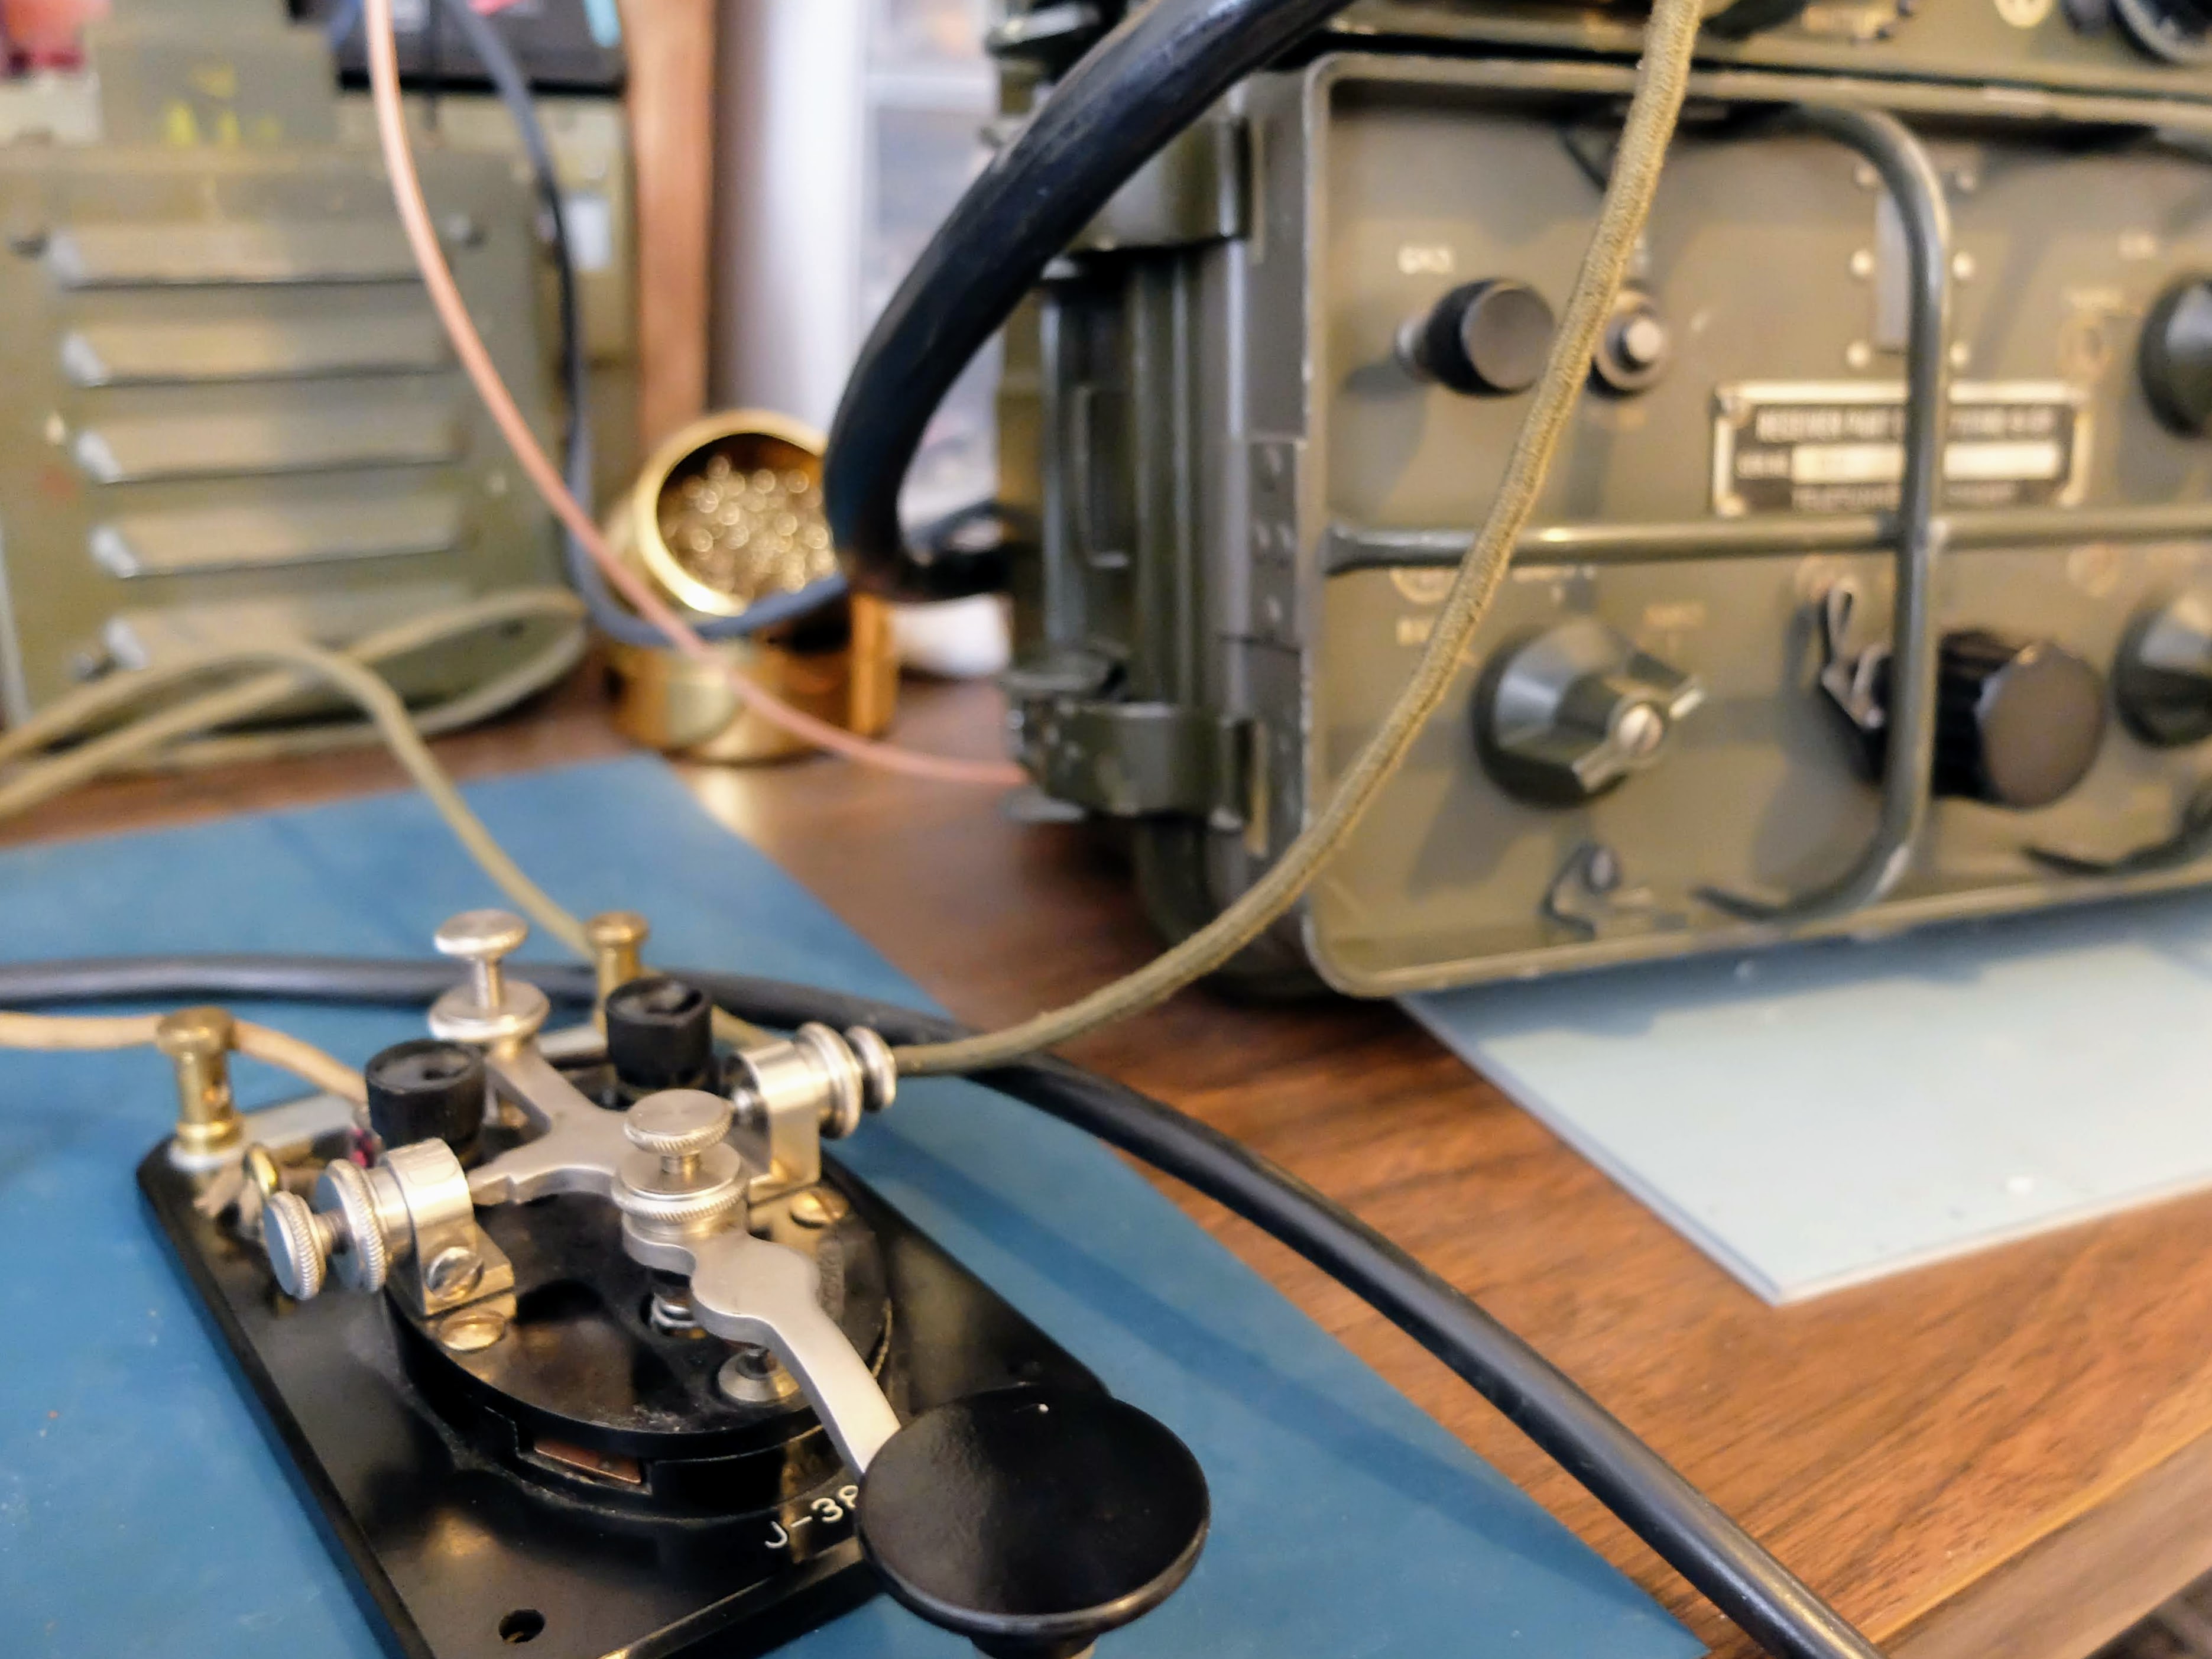
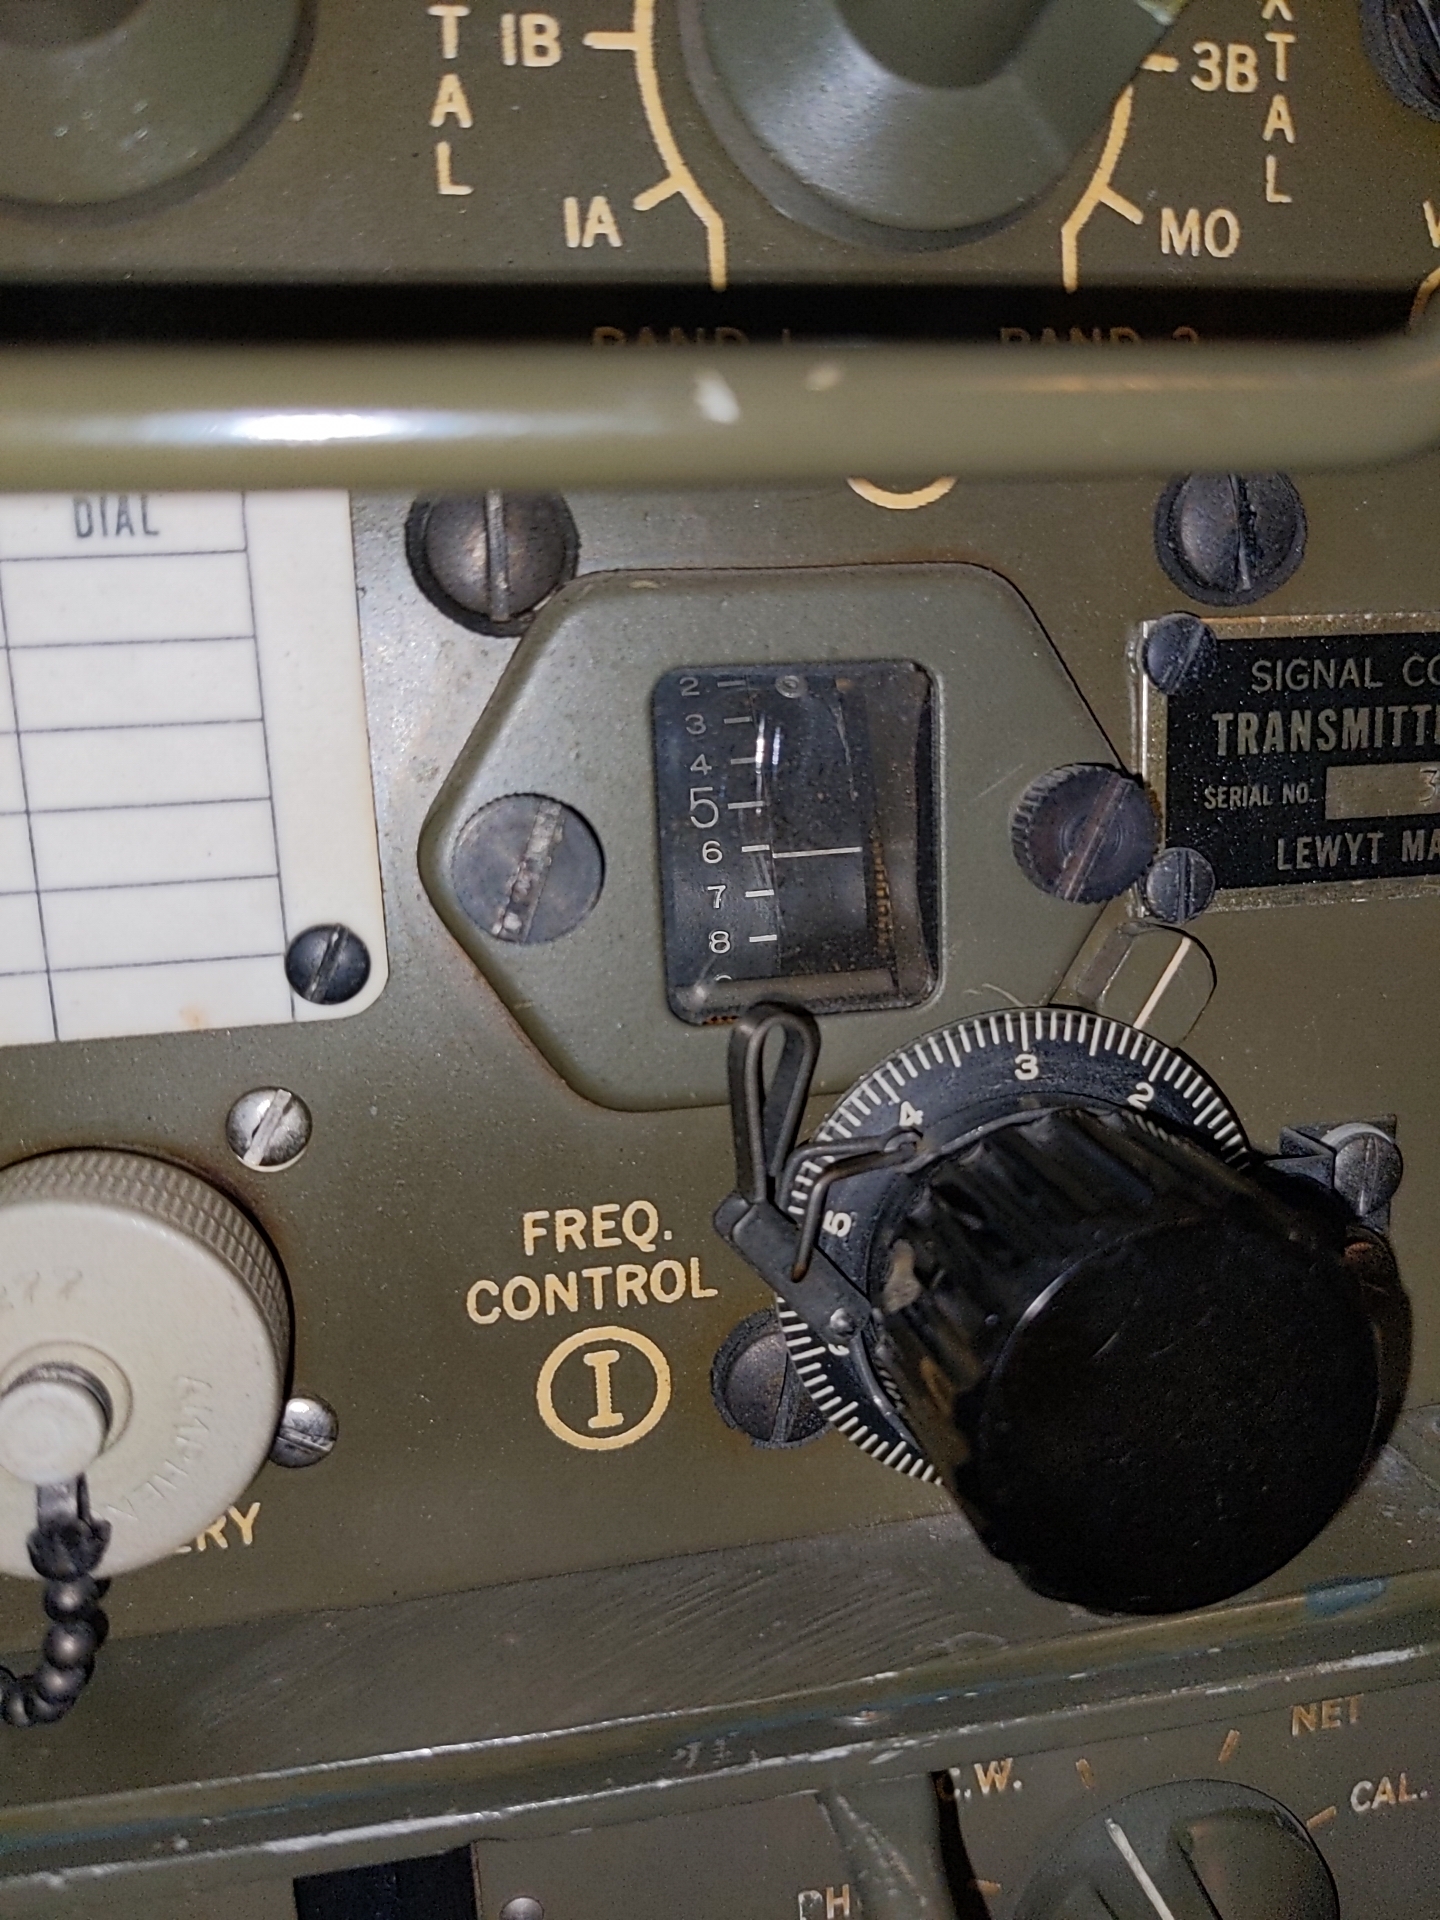
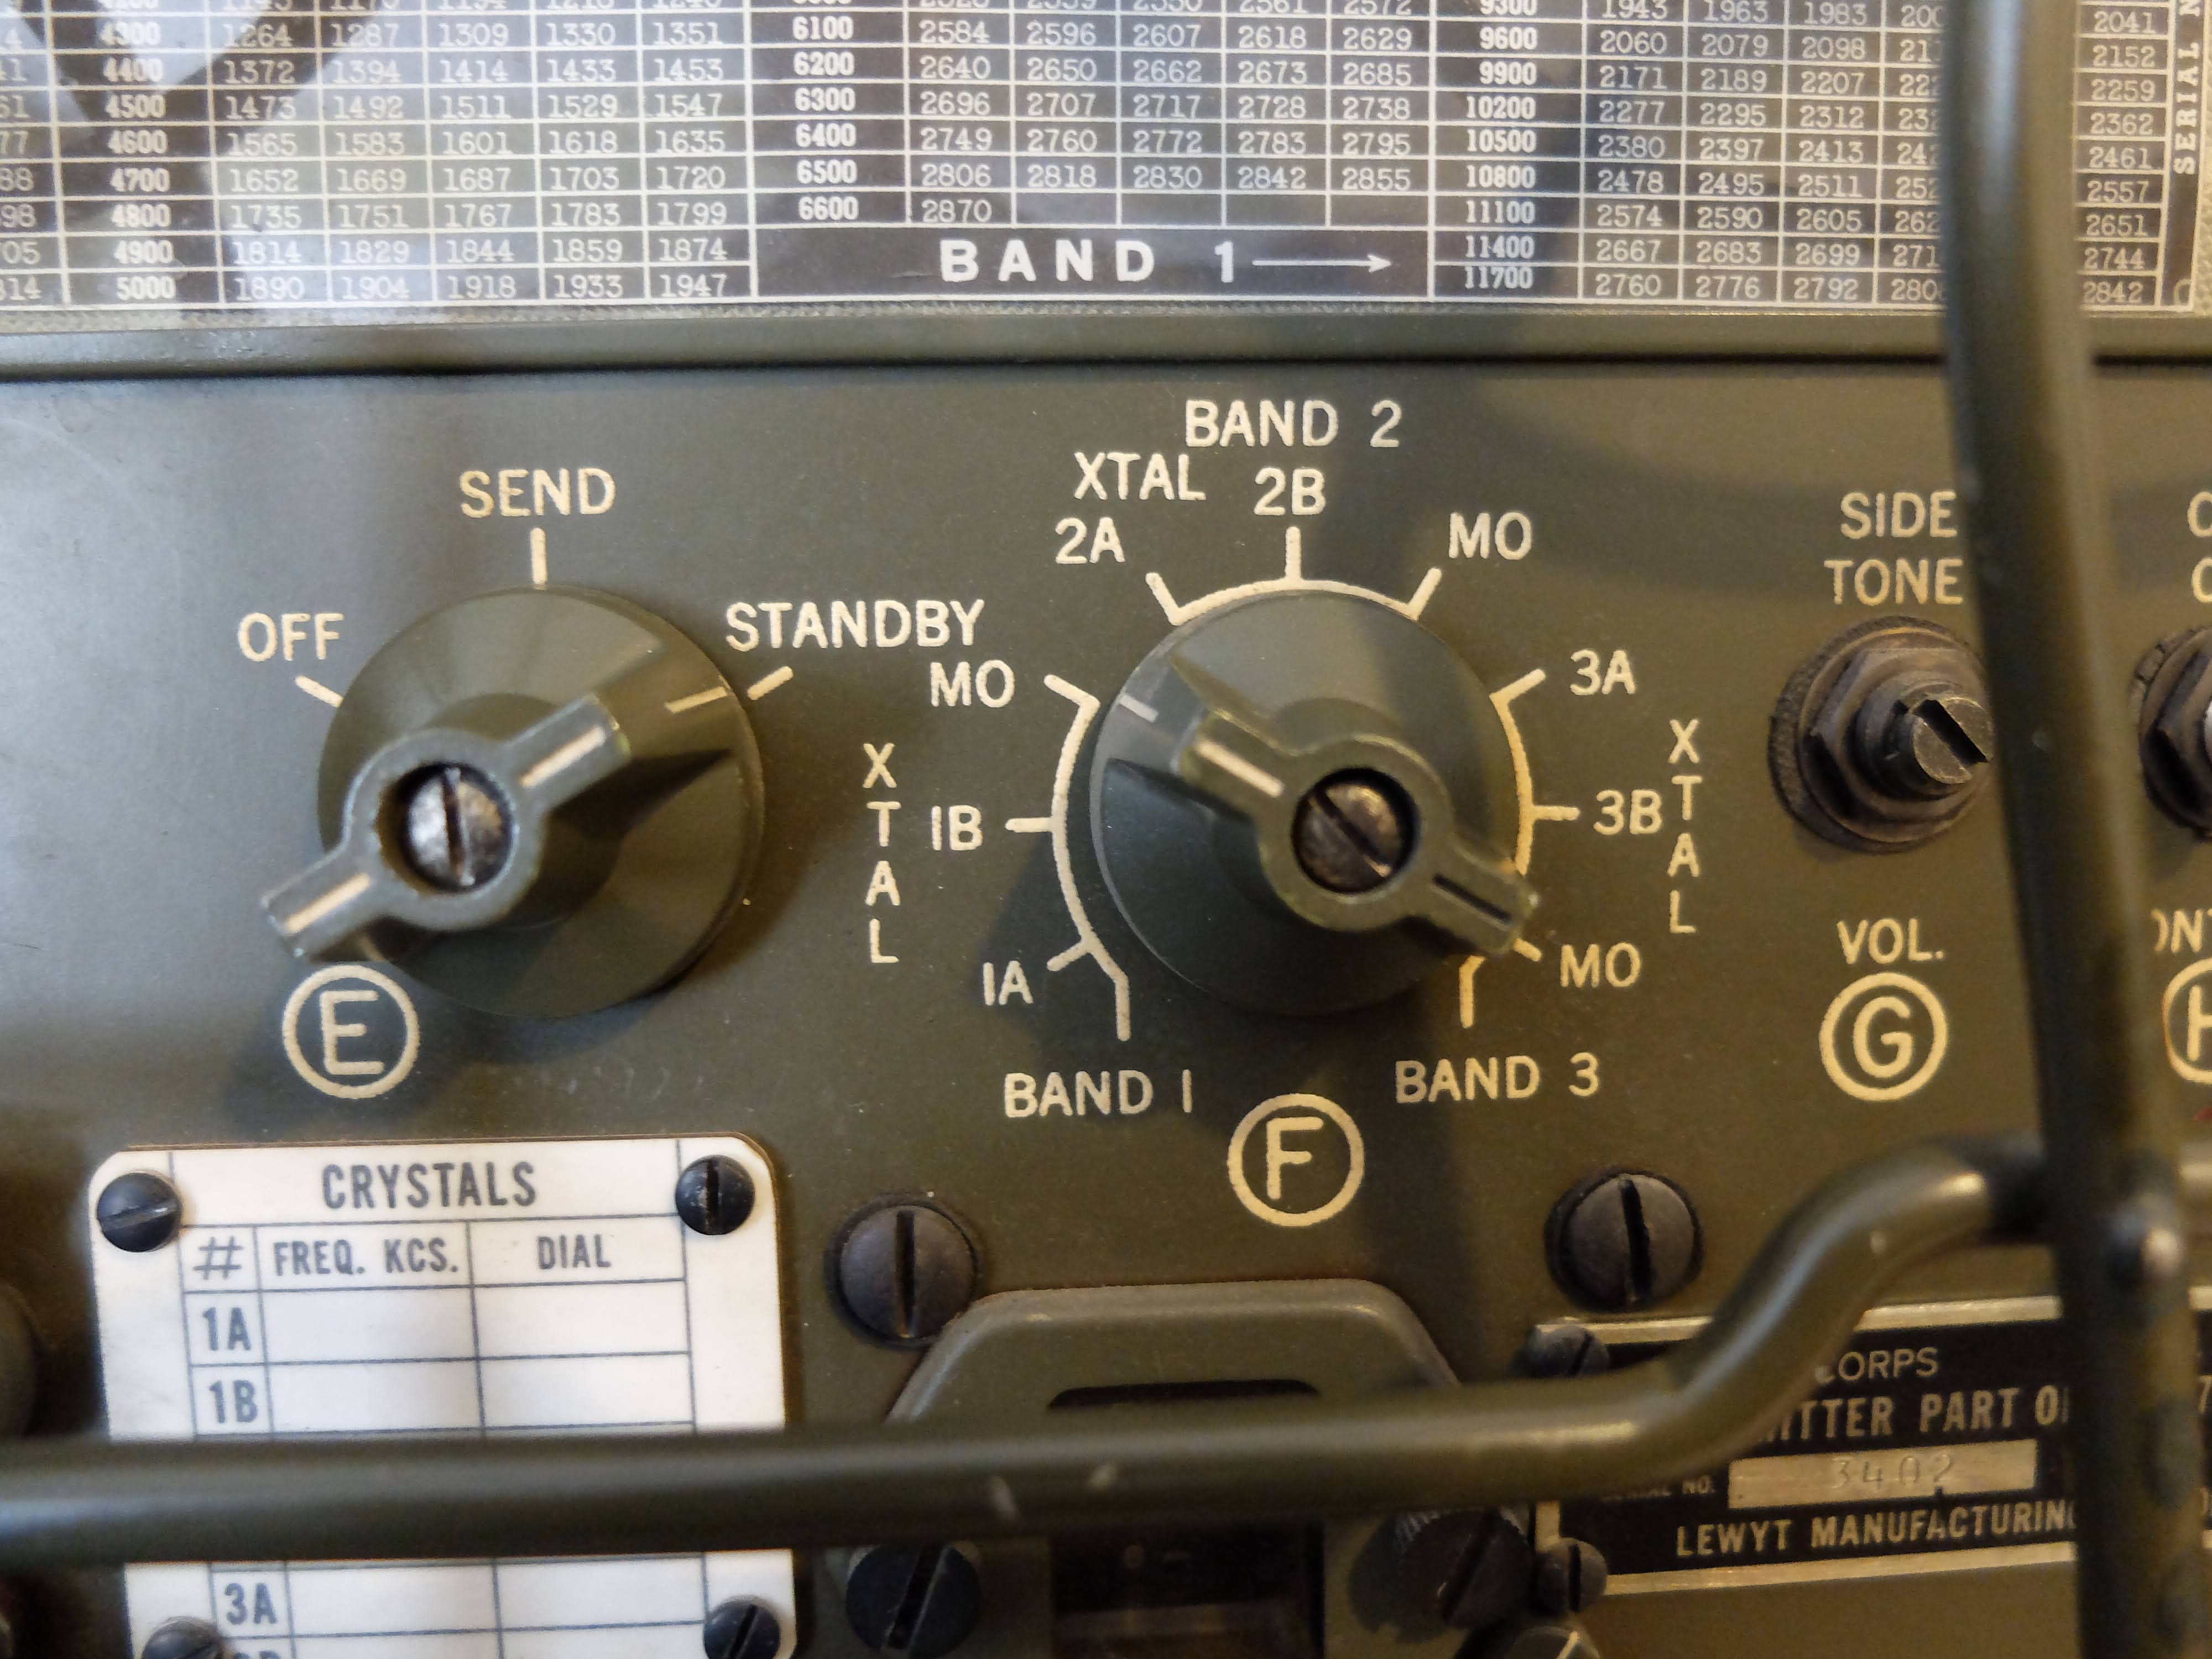
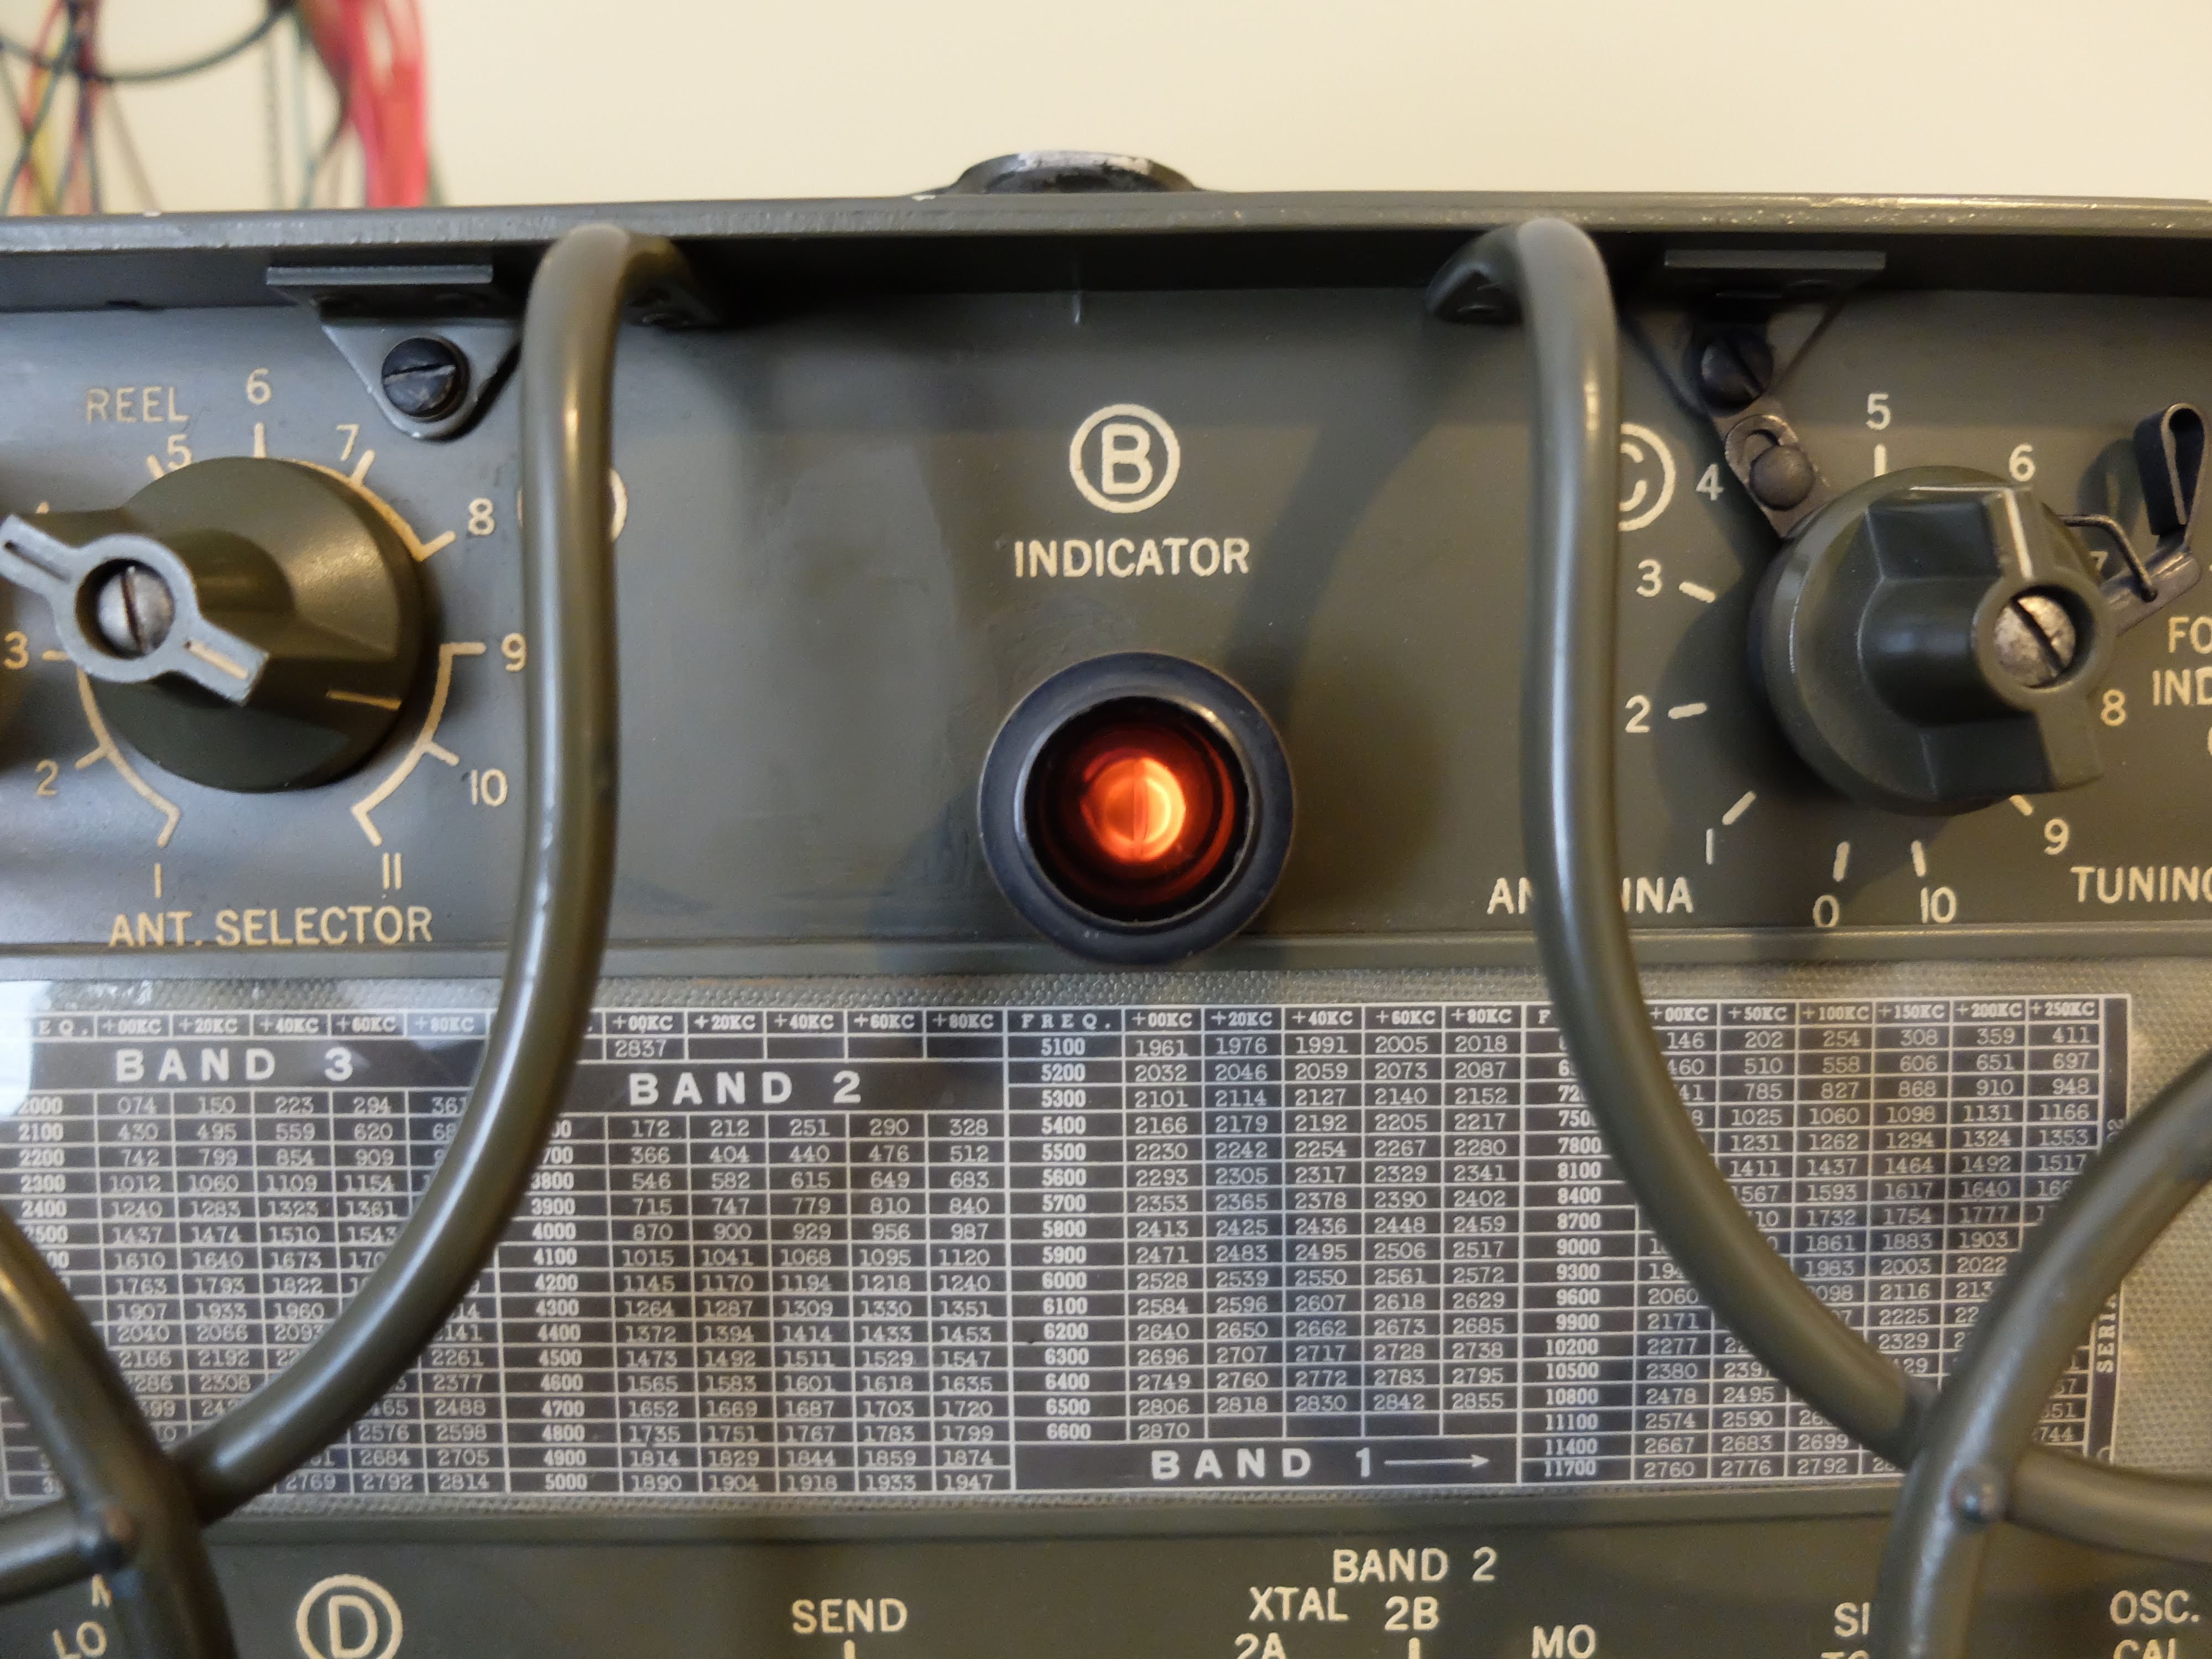
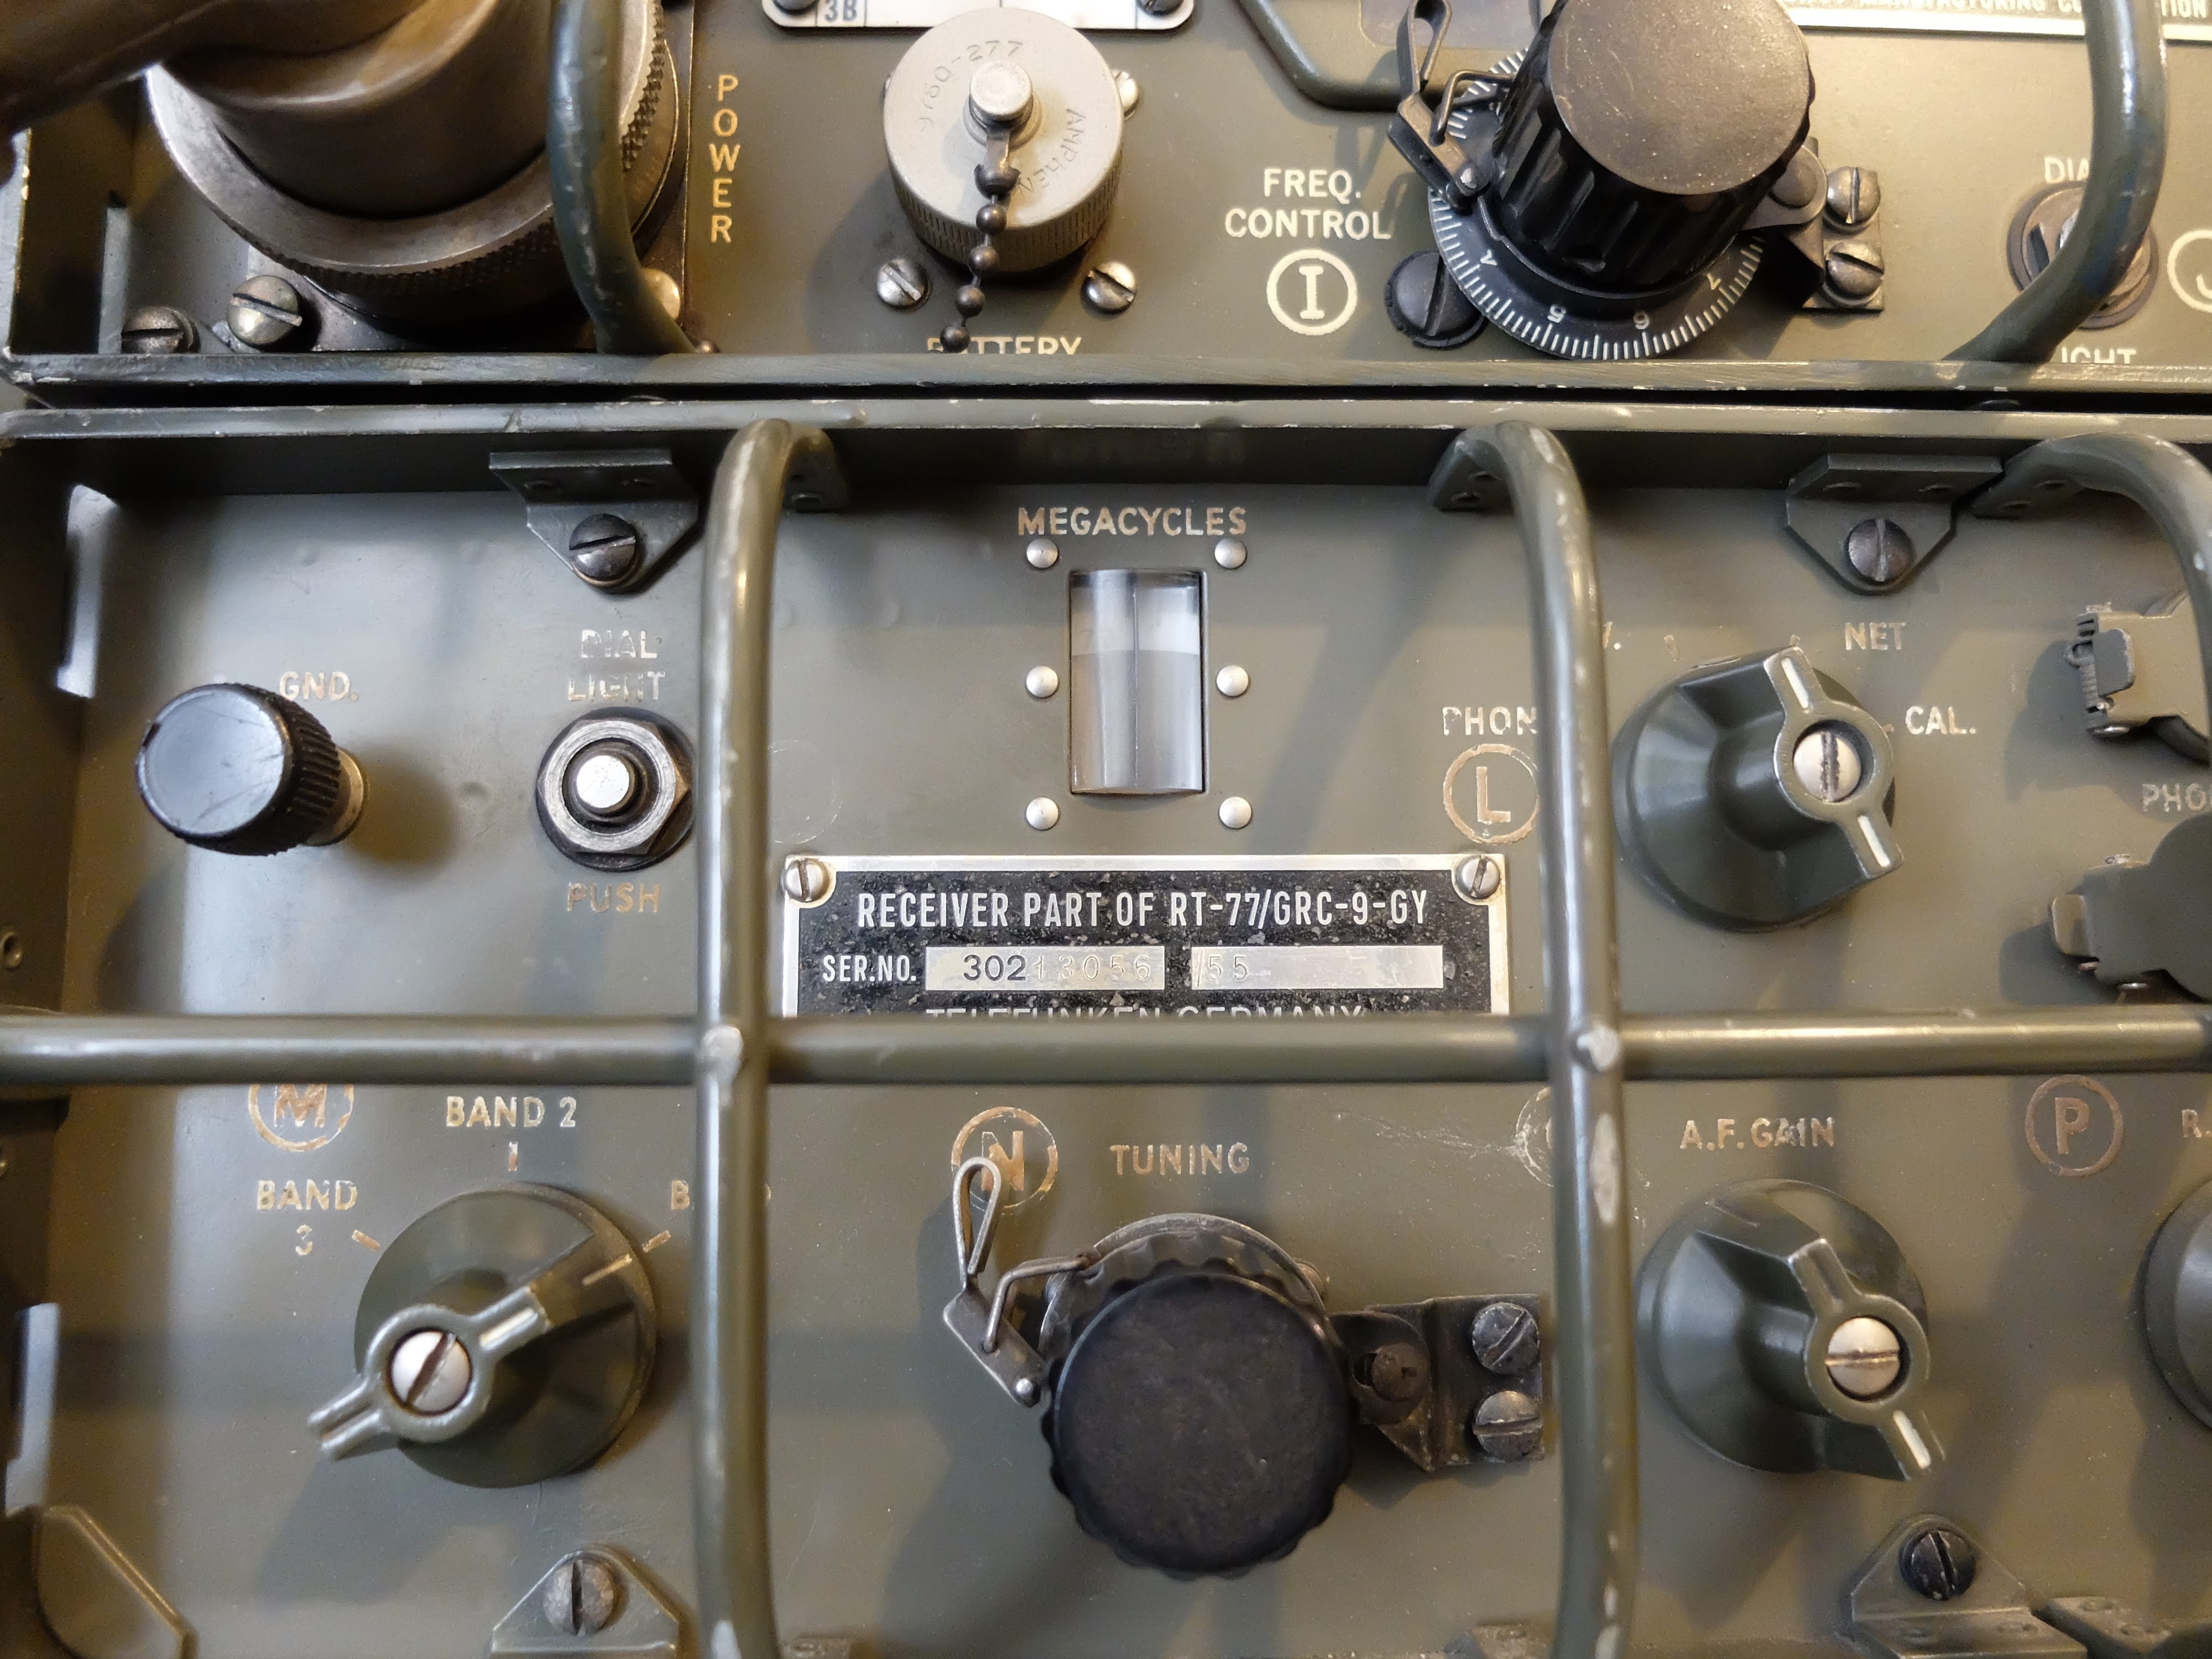
AN/GRC-9 aka “Angry Nine”
AN/GRC-9 - Long lived military comms
 |
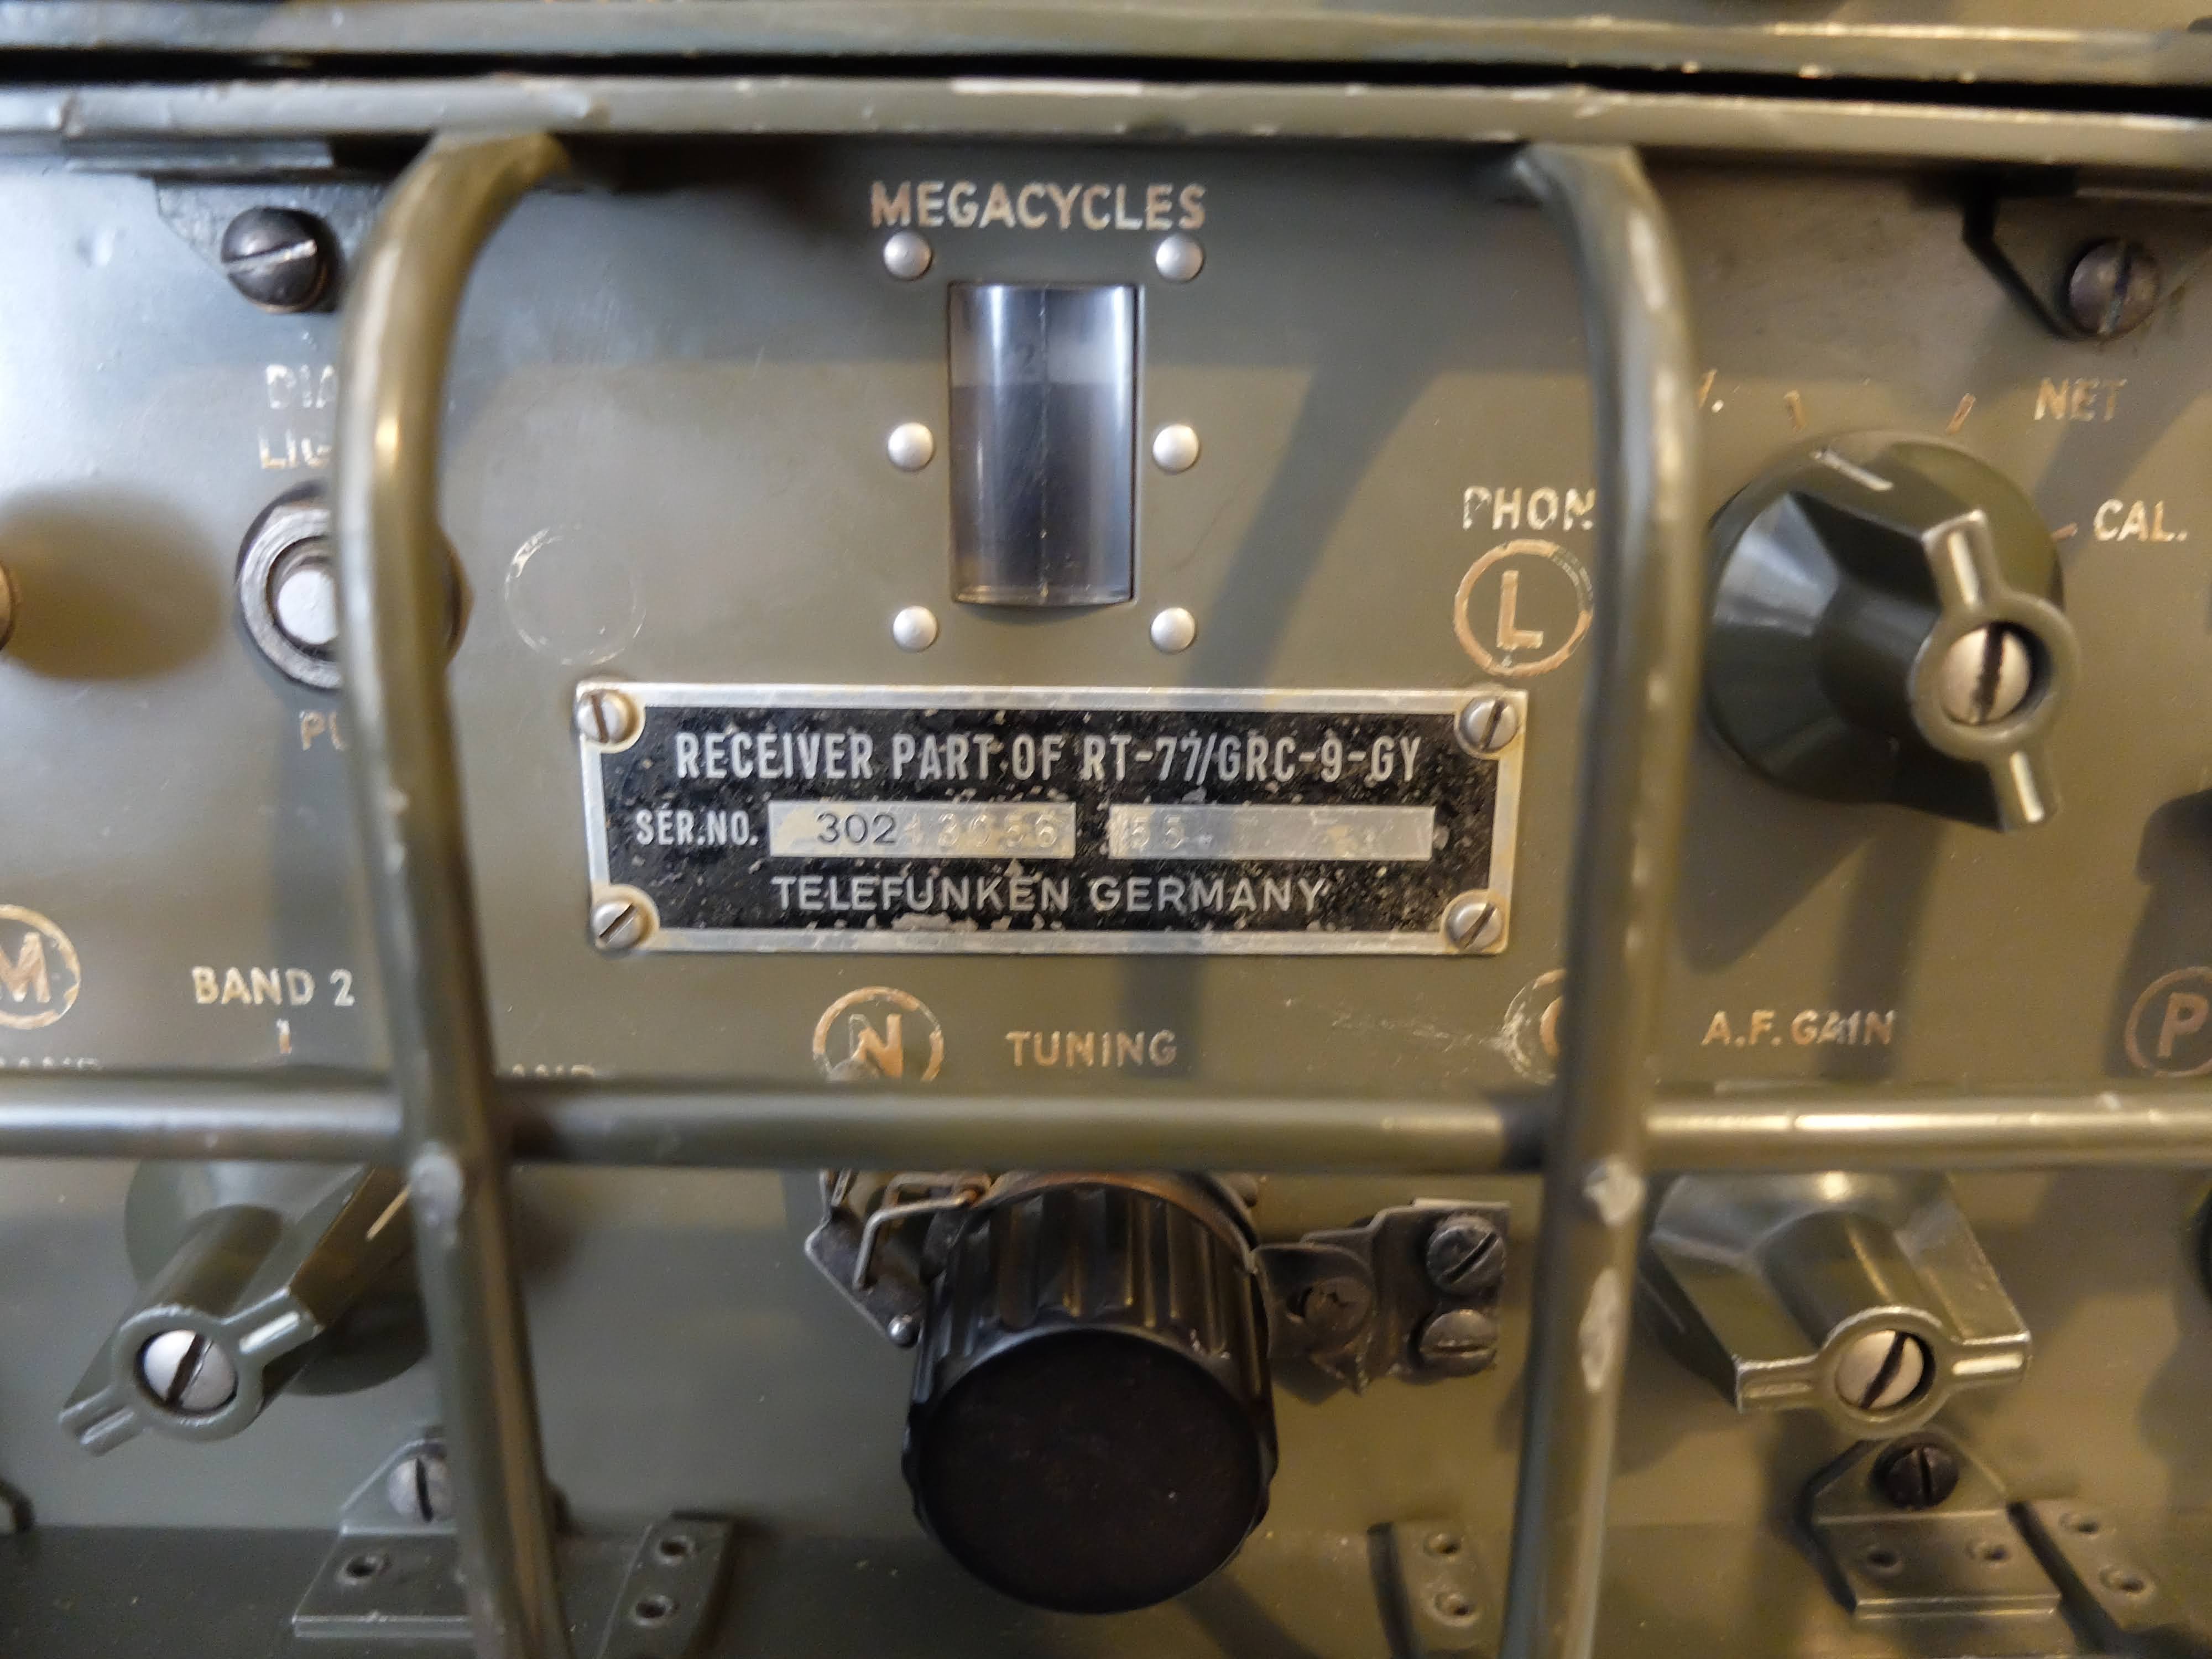
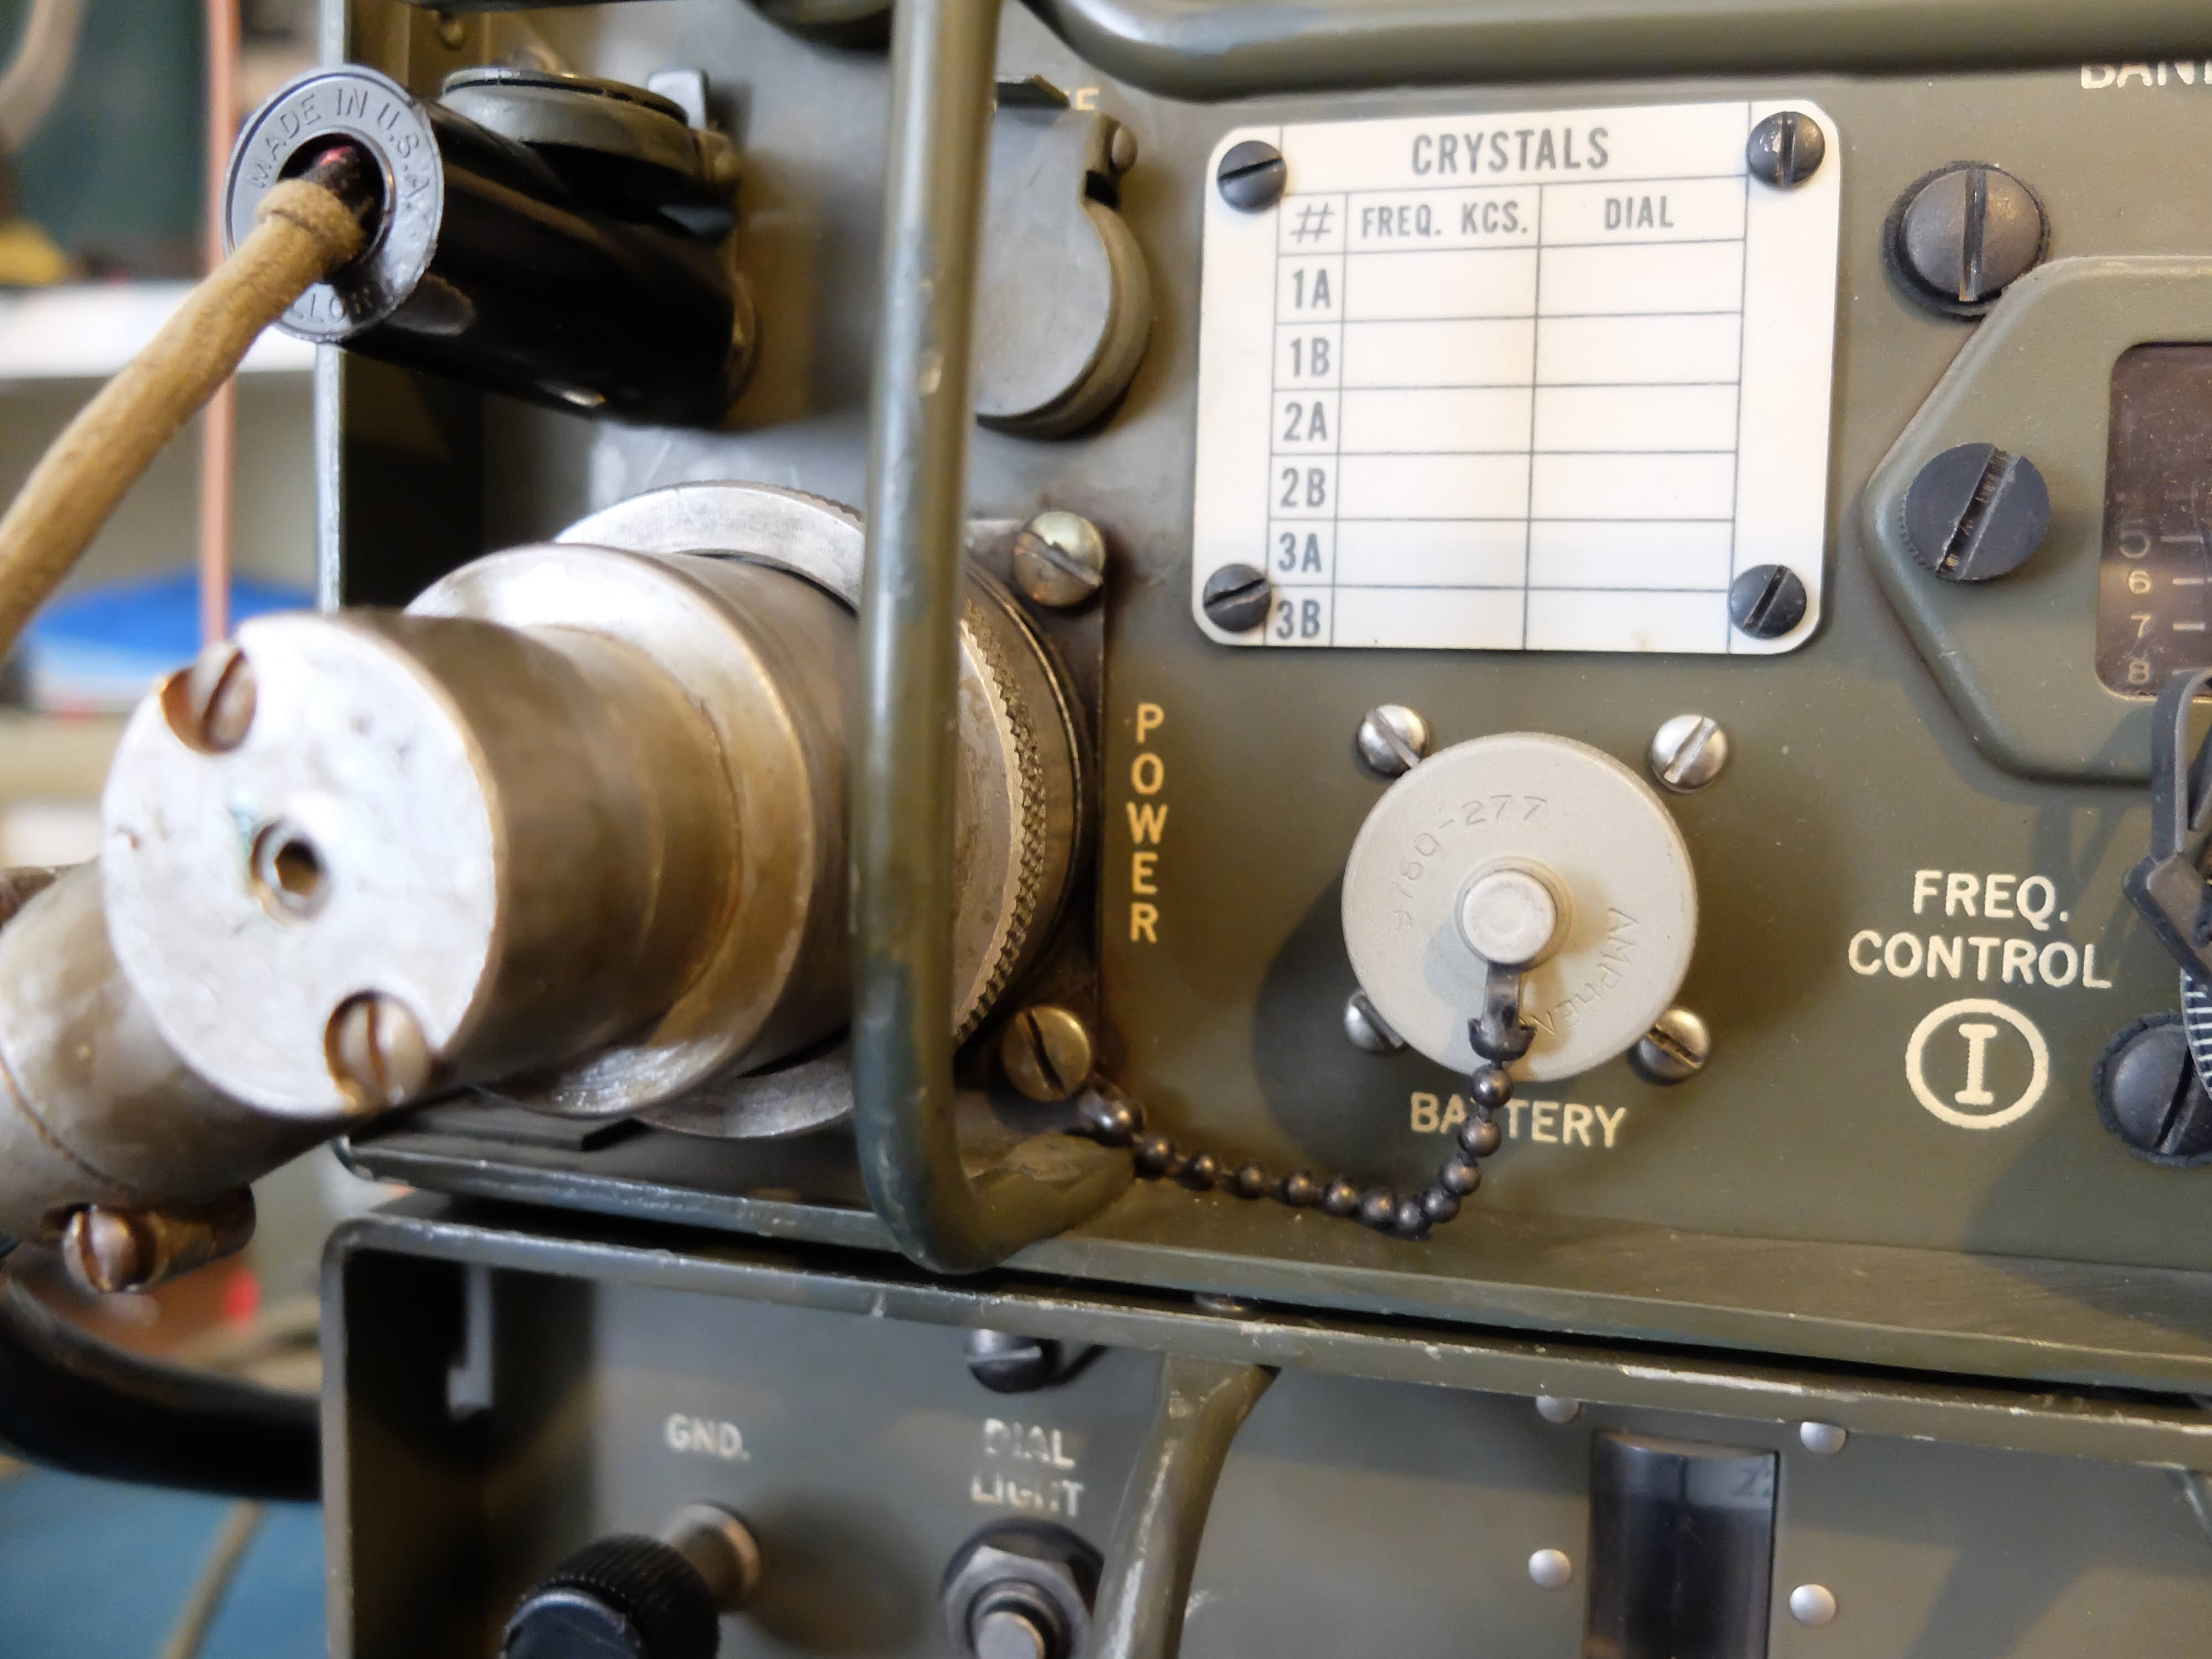
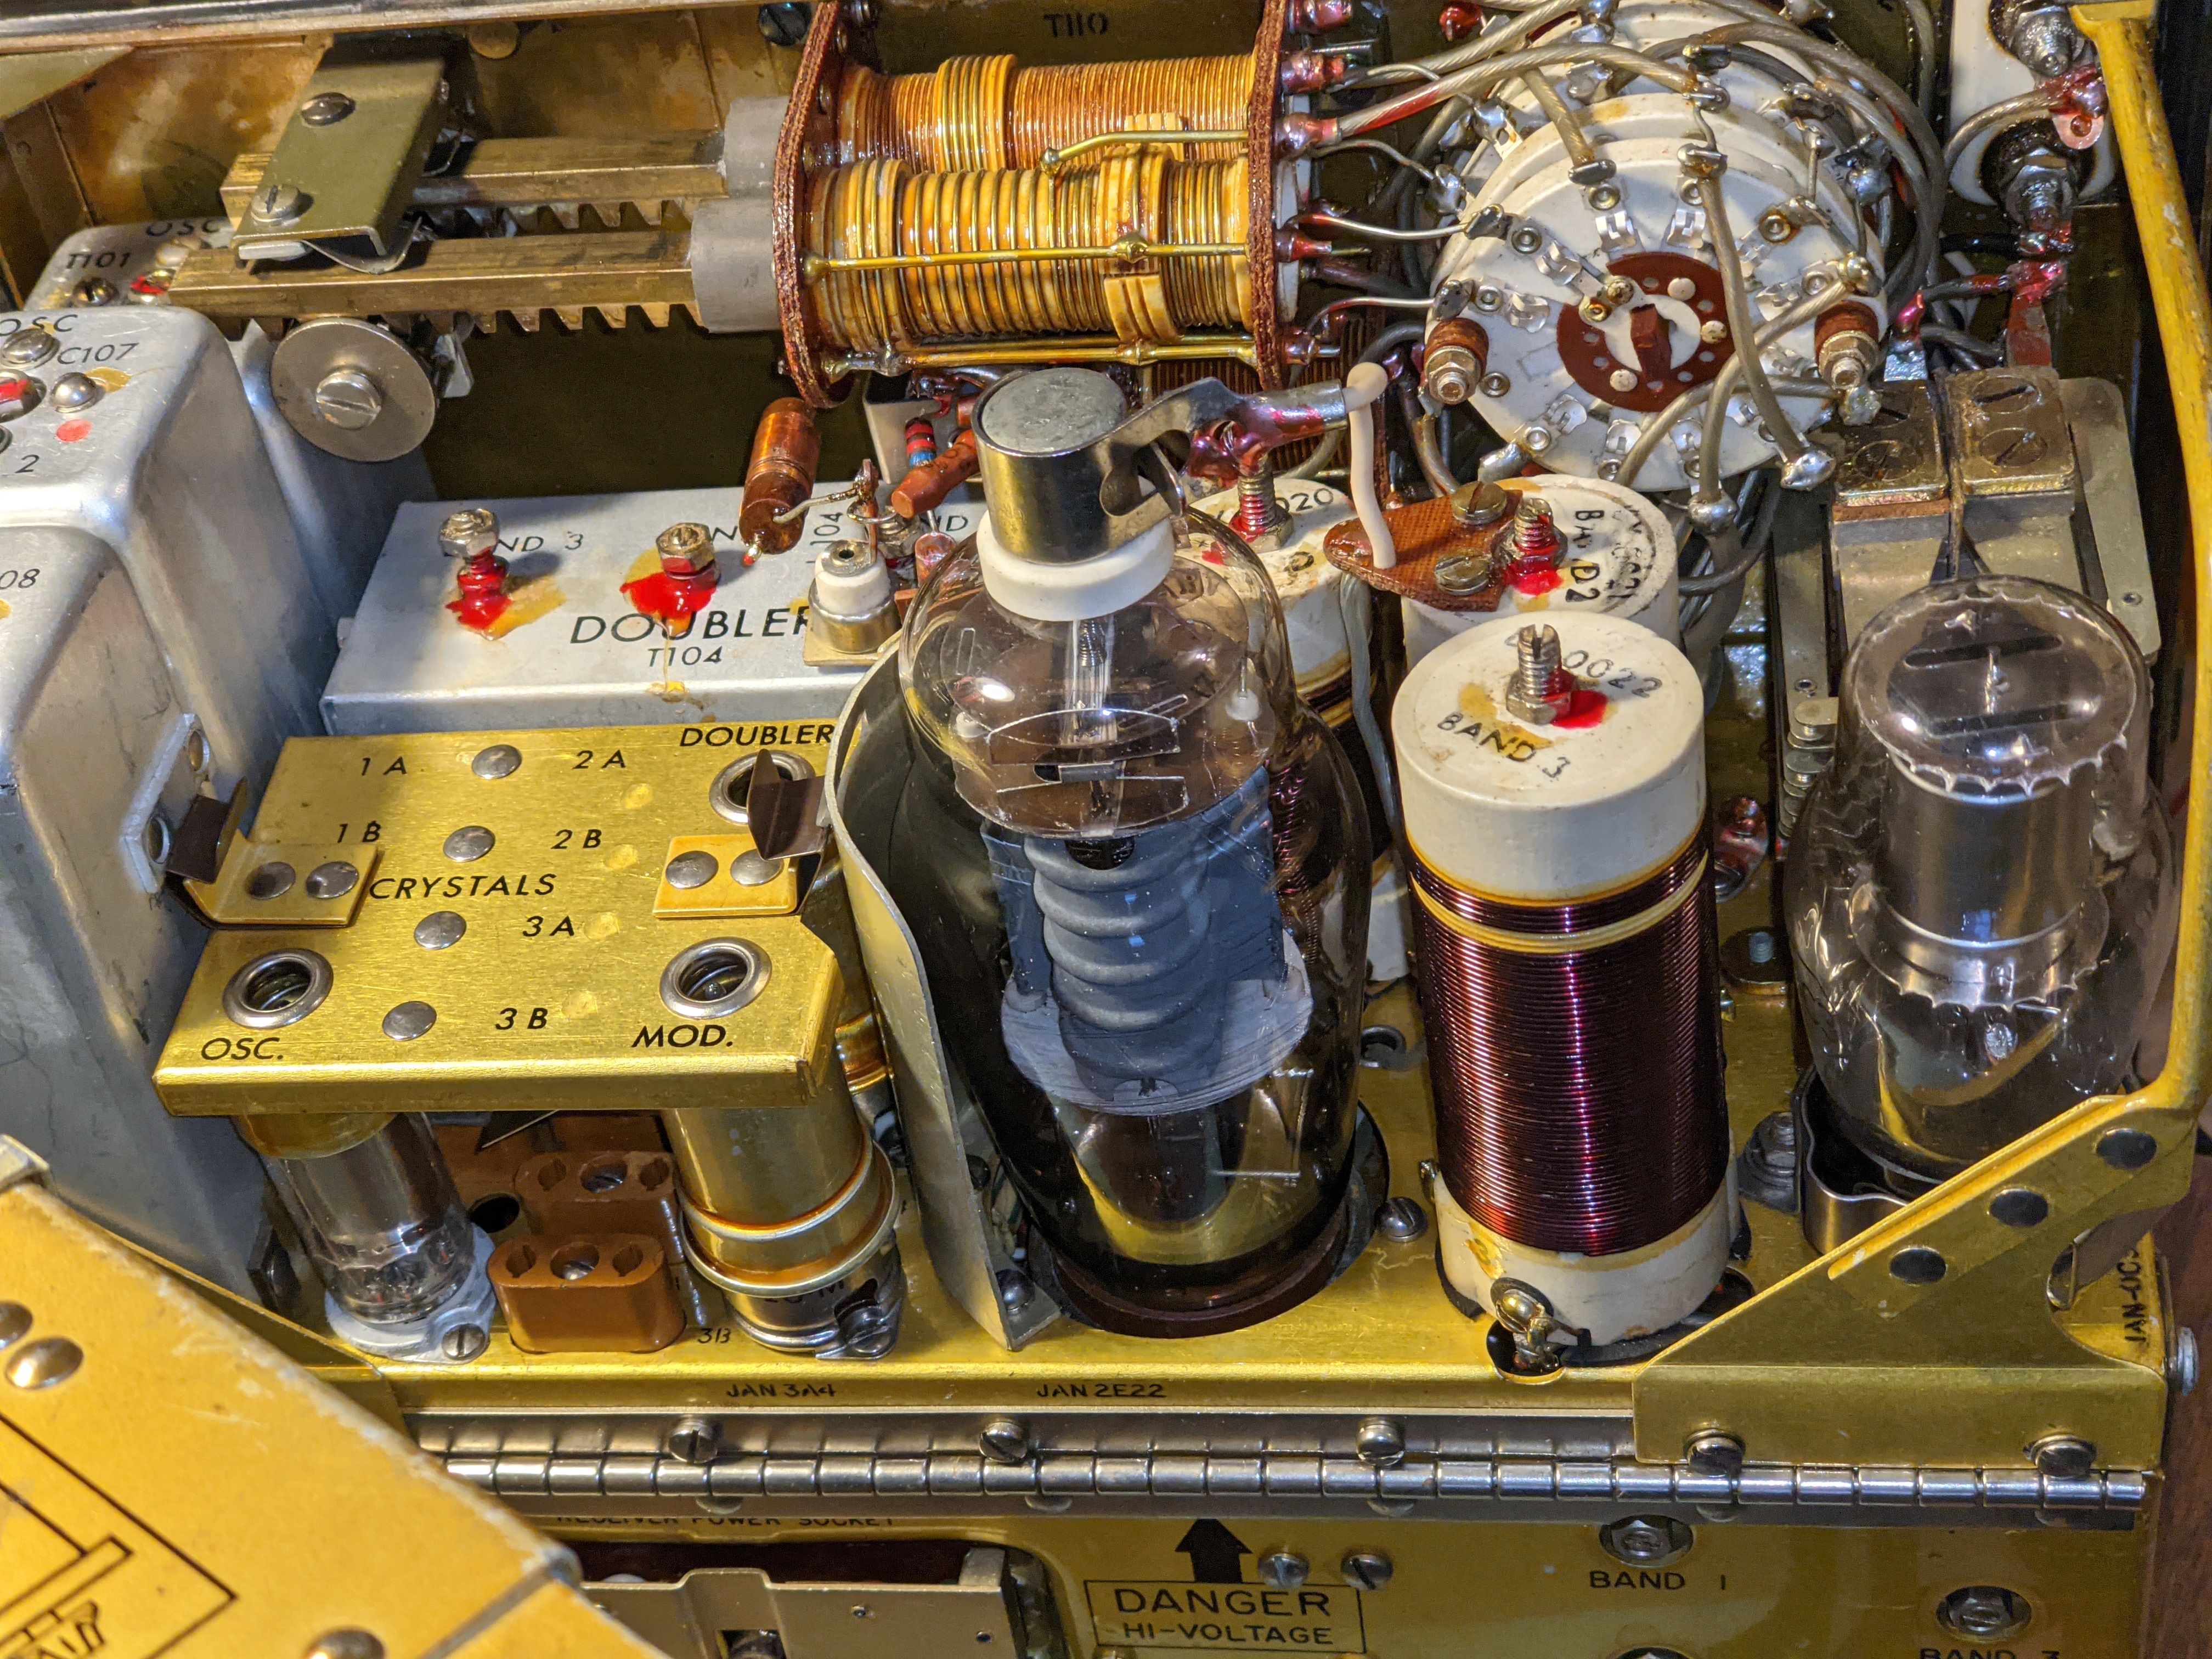
| My lovely (and radioactive) RT/77-GRC/9 |
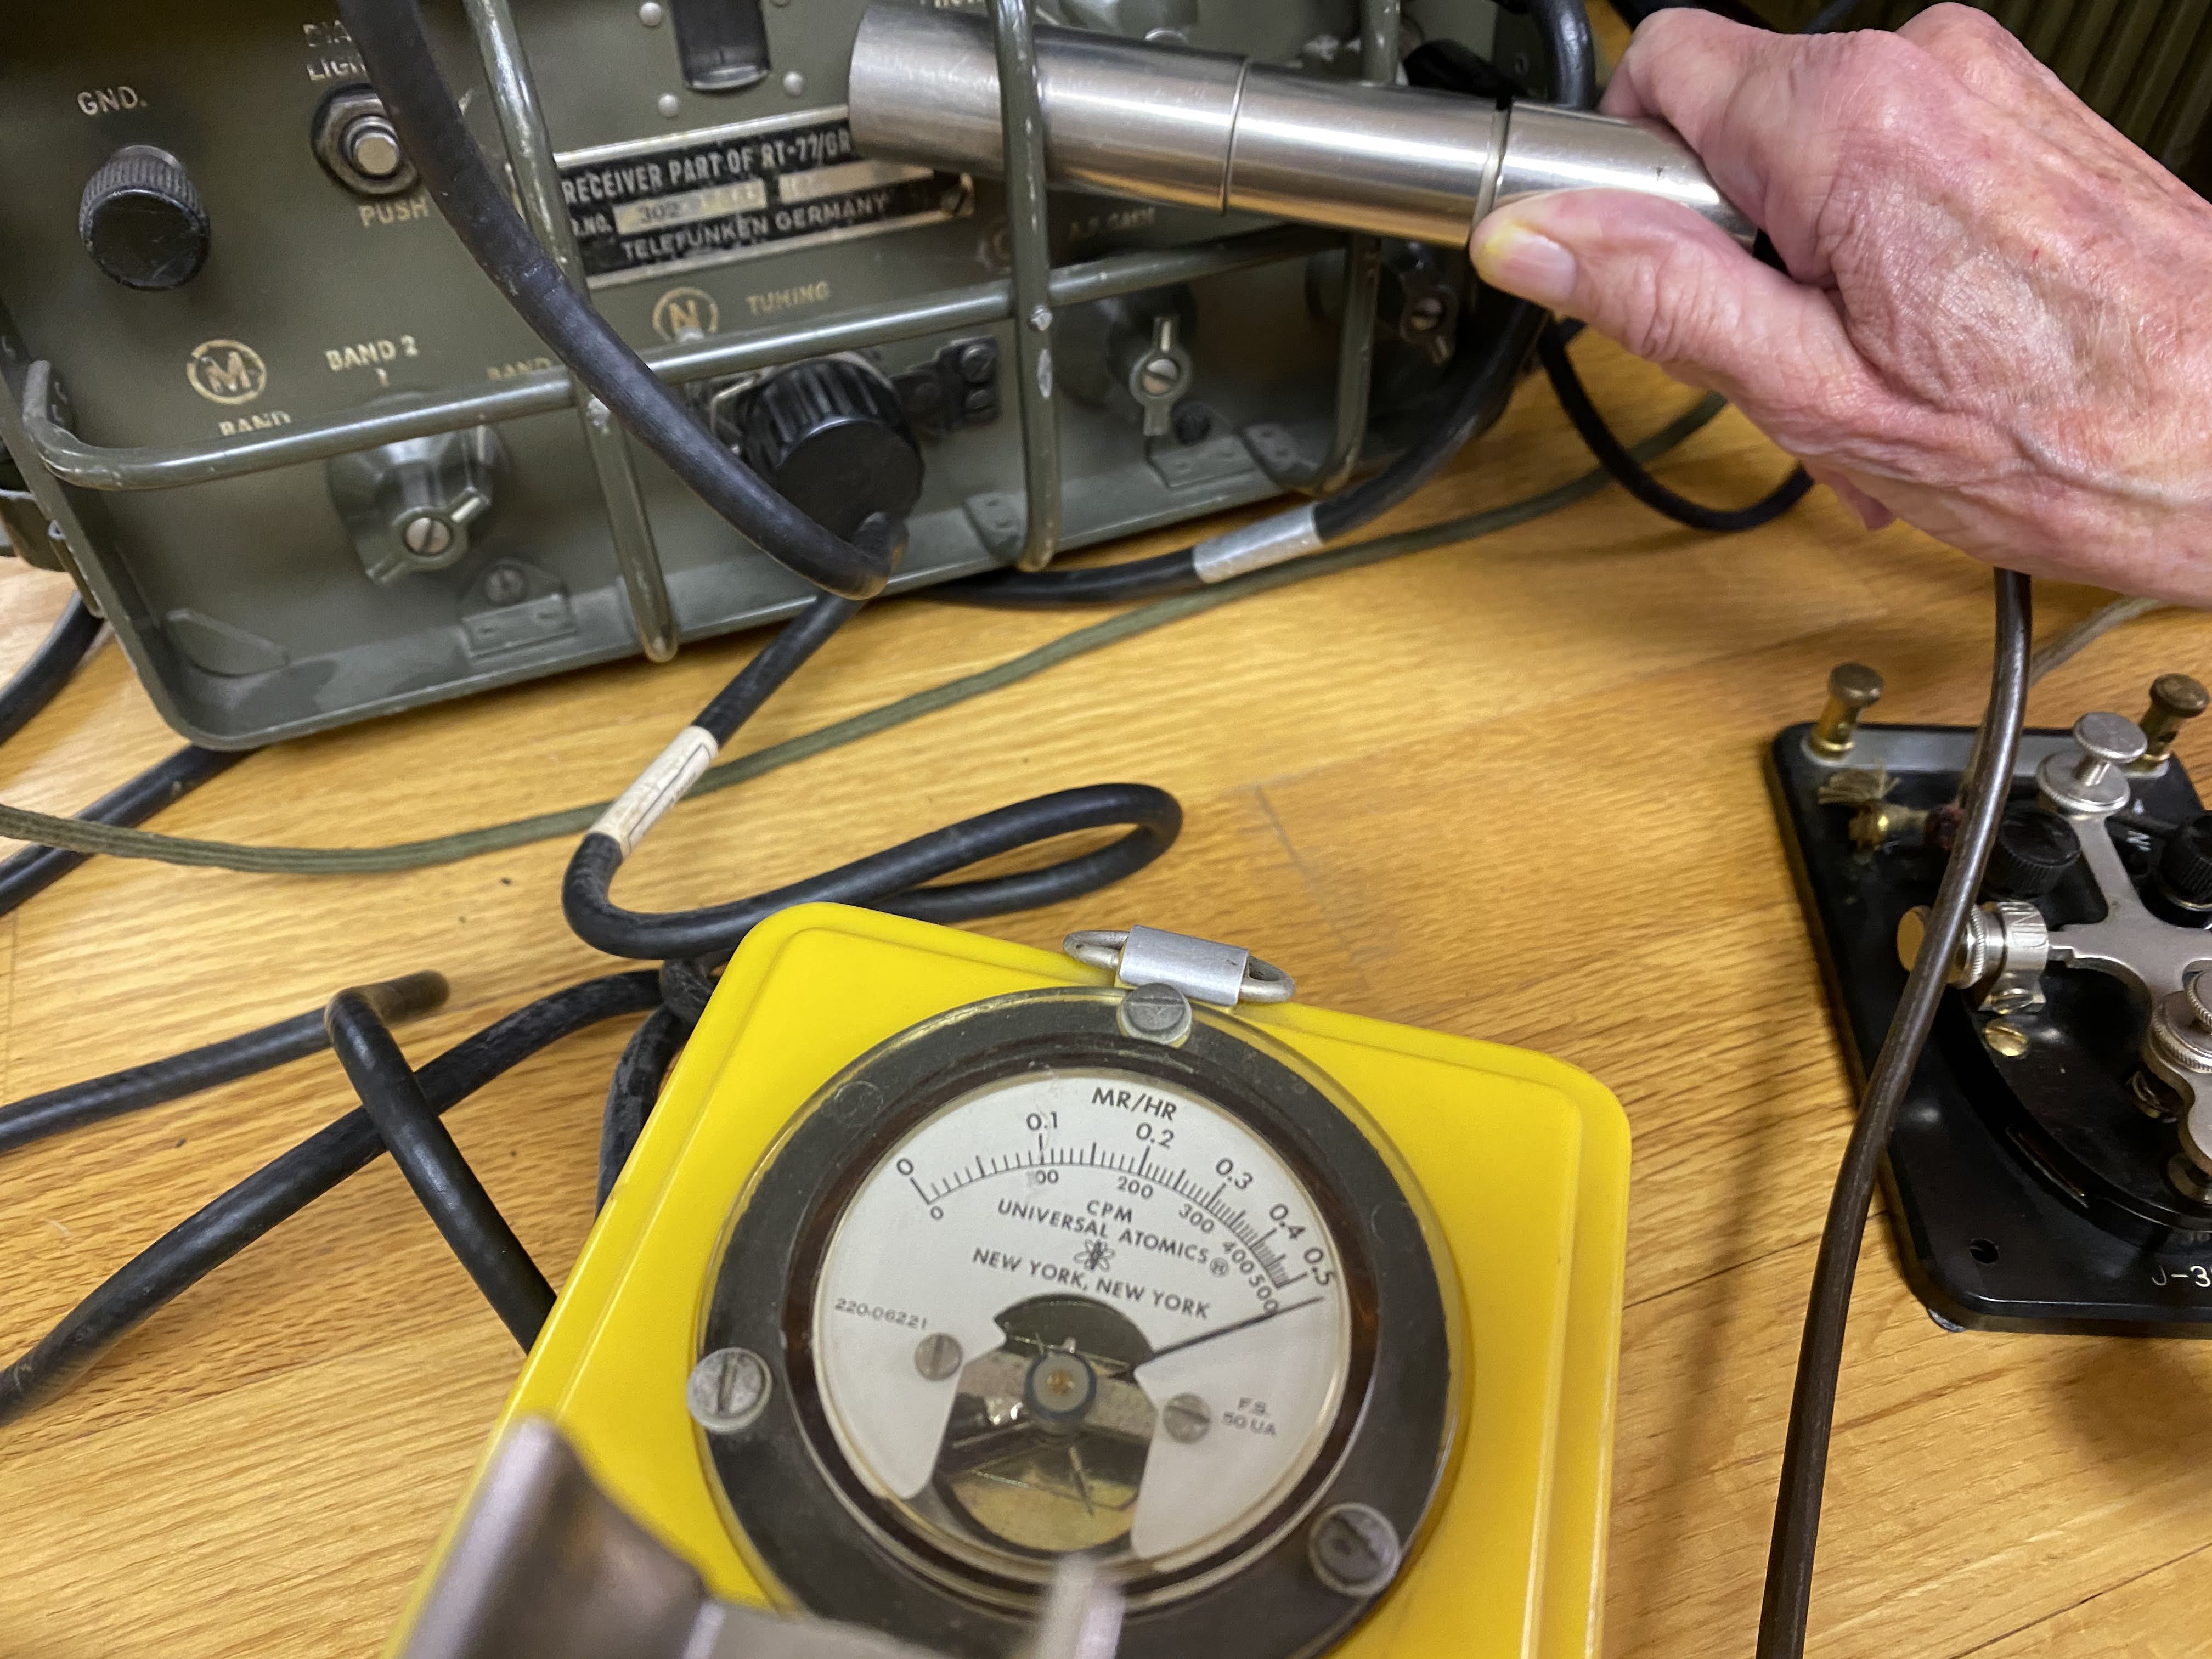 |
| Hot receiver, in more ways than one |
 |
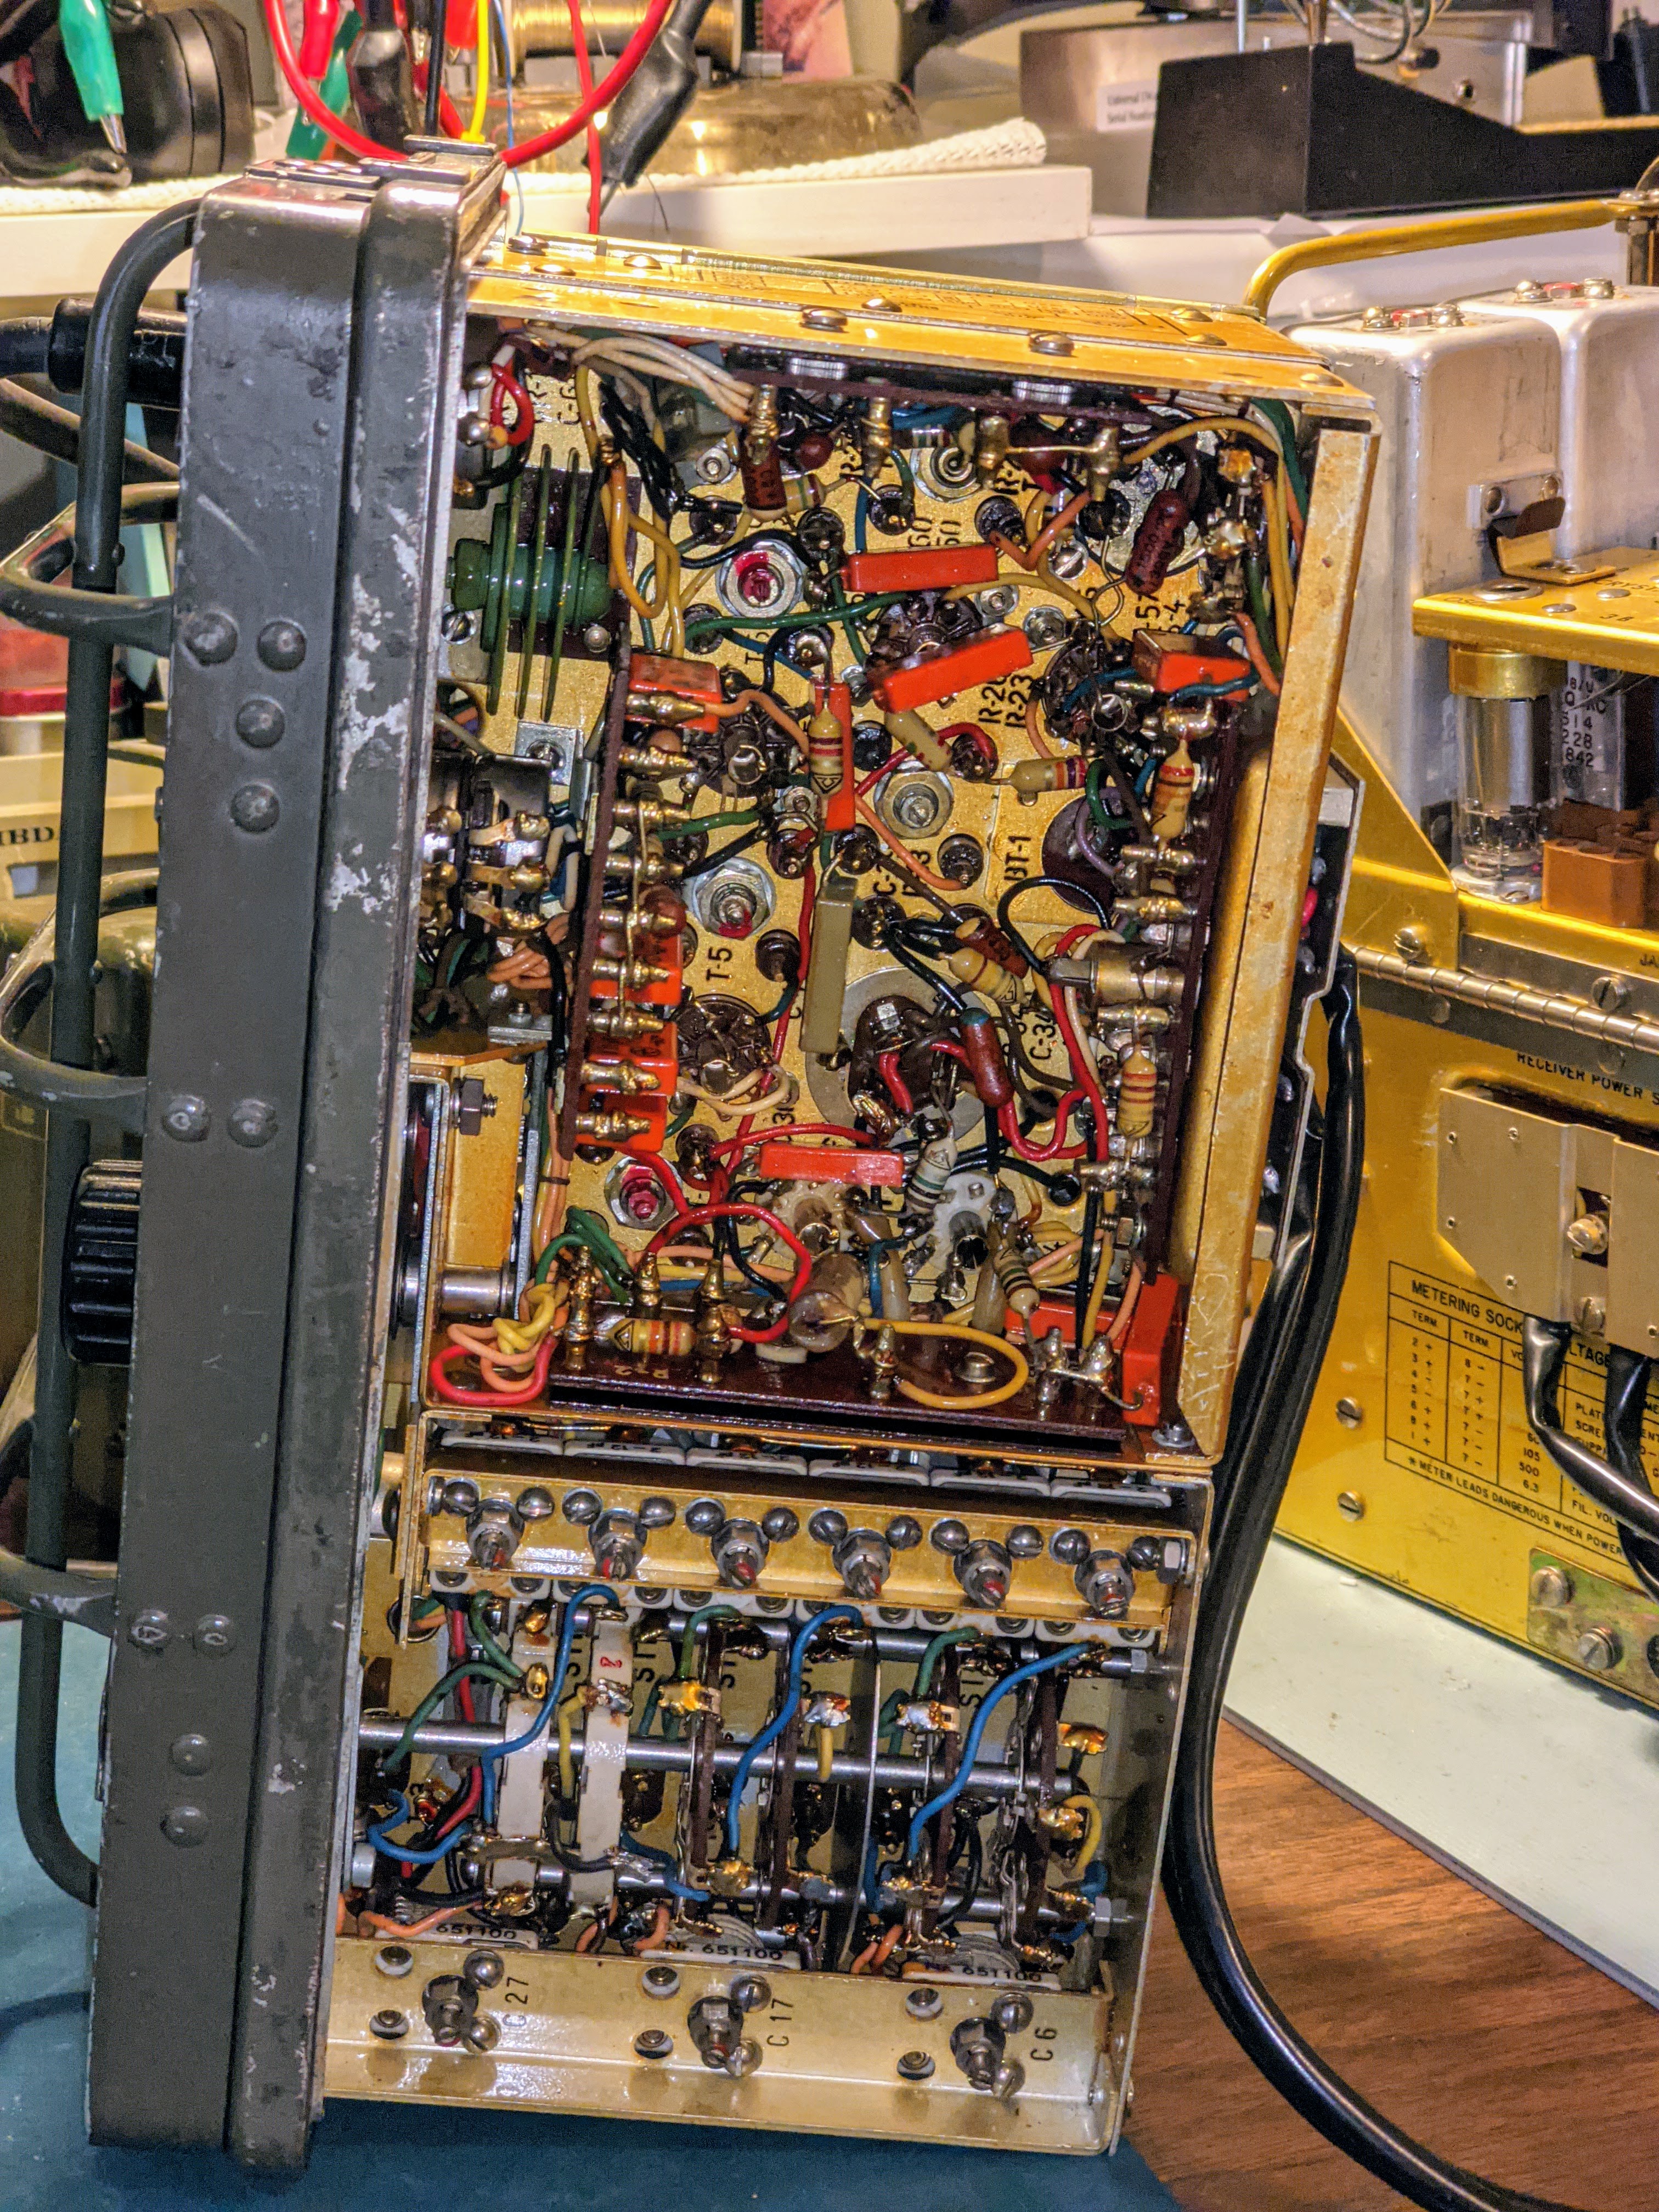
| Out of the case, tracing a low B+ power problem |

Power on the move
- Transmitter Plates -- 475 - 580 v @ 100ma
- Transmitter Filaments -- 6.5 - 6.6 v@ 2 amps
- Receiver Plates -- 105 - 120 v @ 45ma
- Receiver Filaments -- 1.35 - 1.5 v @ 500ma
- Keying Relay -- 6.0 - 6.9 v @ 575ma
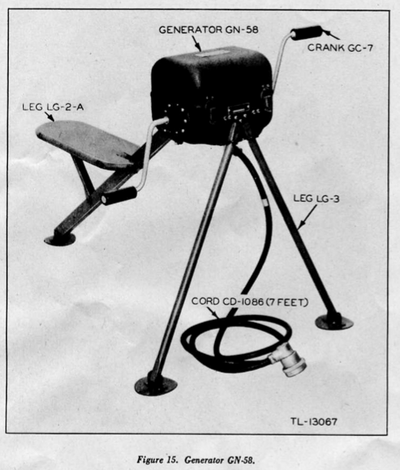
That's a tall order for mobile and portable power supplies but designers in the 1940's were quite clever in packing power supply units. I managed to obtain both the hand cranked GN-58 generator with the base chassis and seat for portable operations, and a DY-88 for fixed / mobile operations.
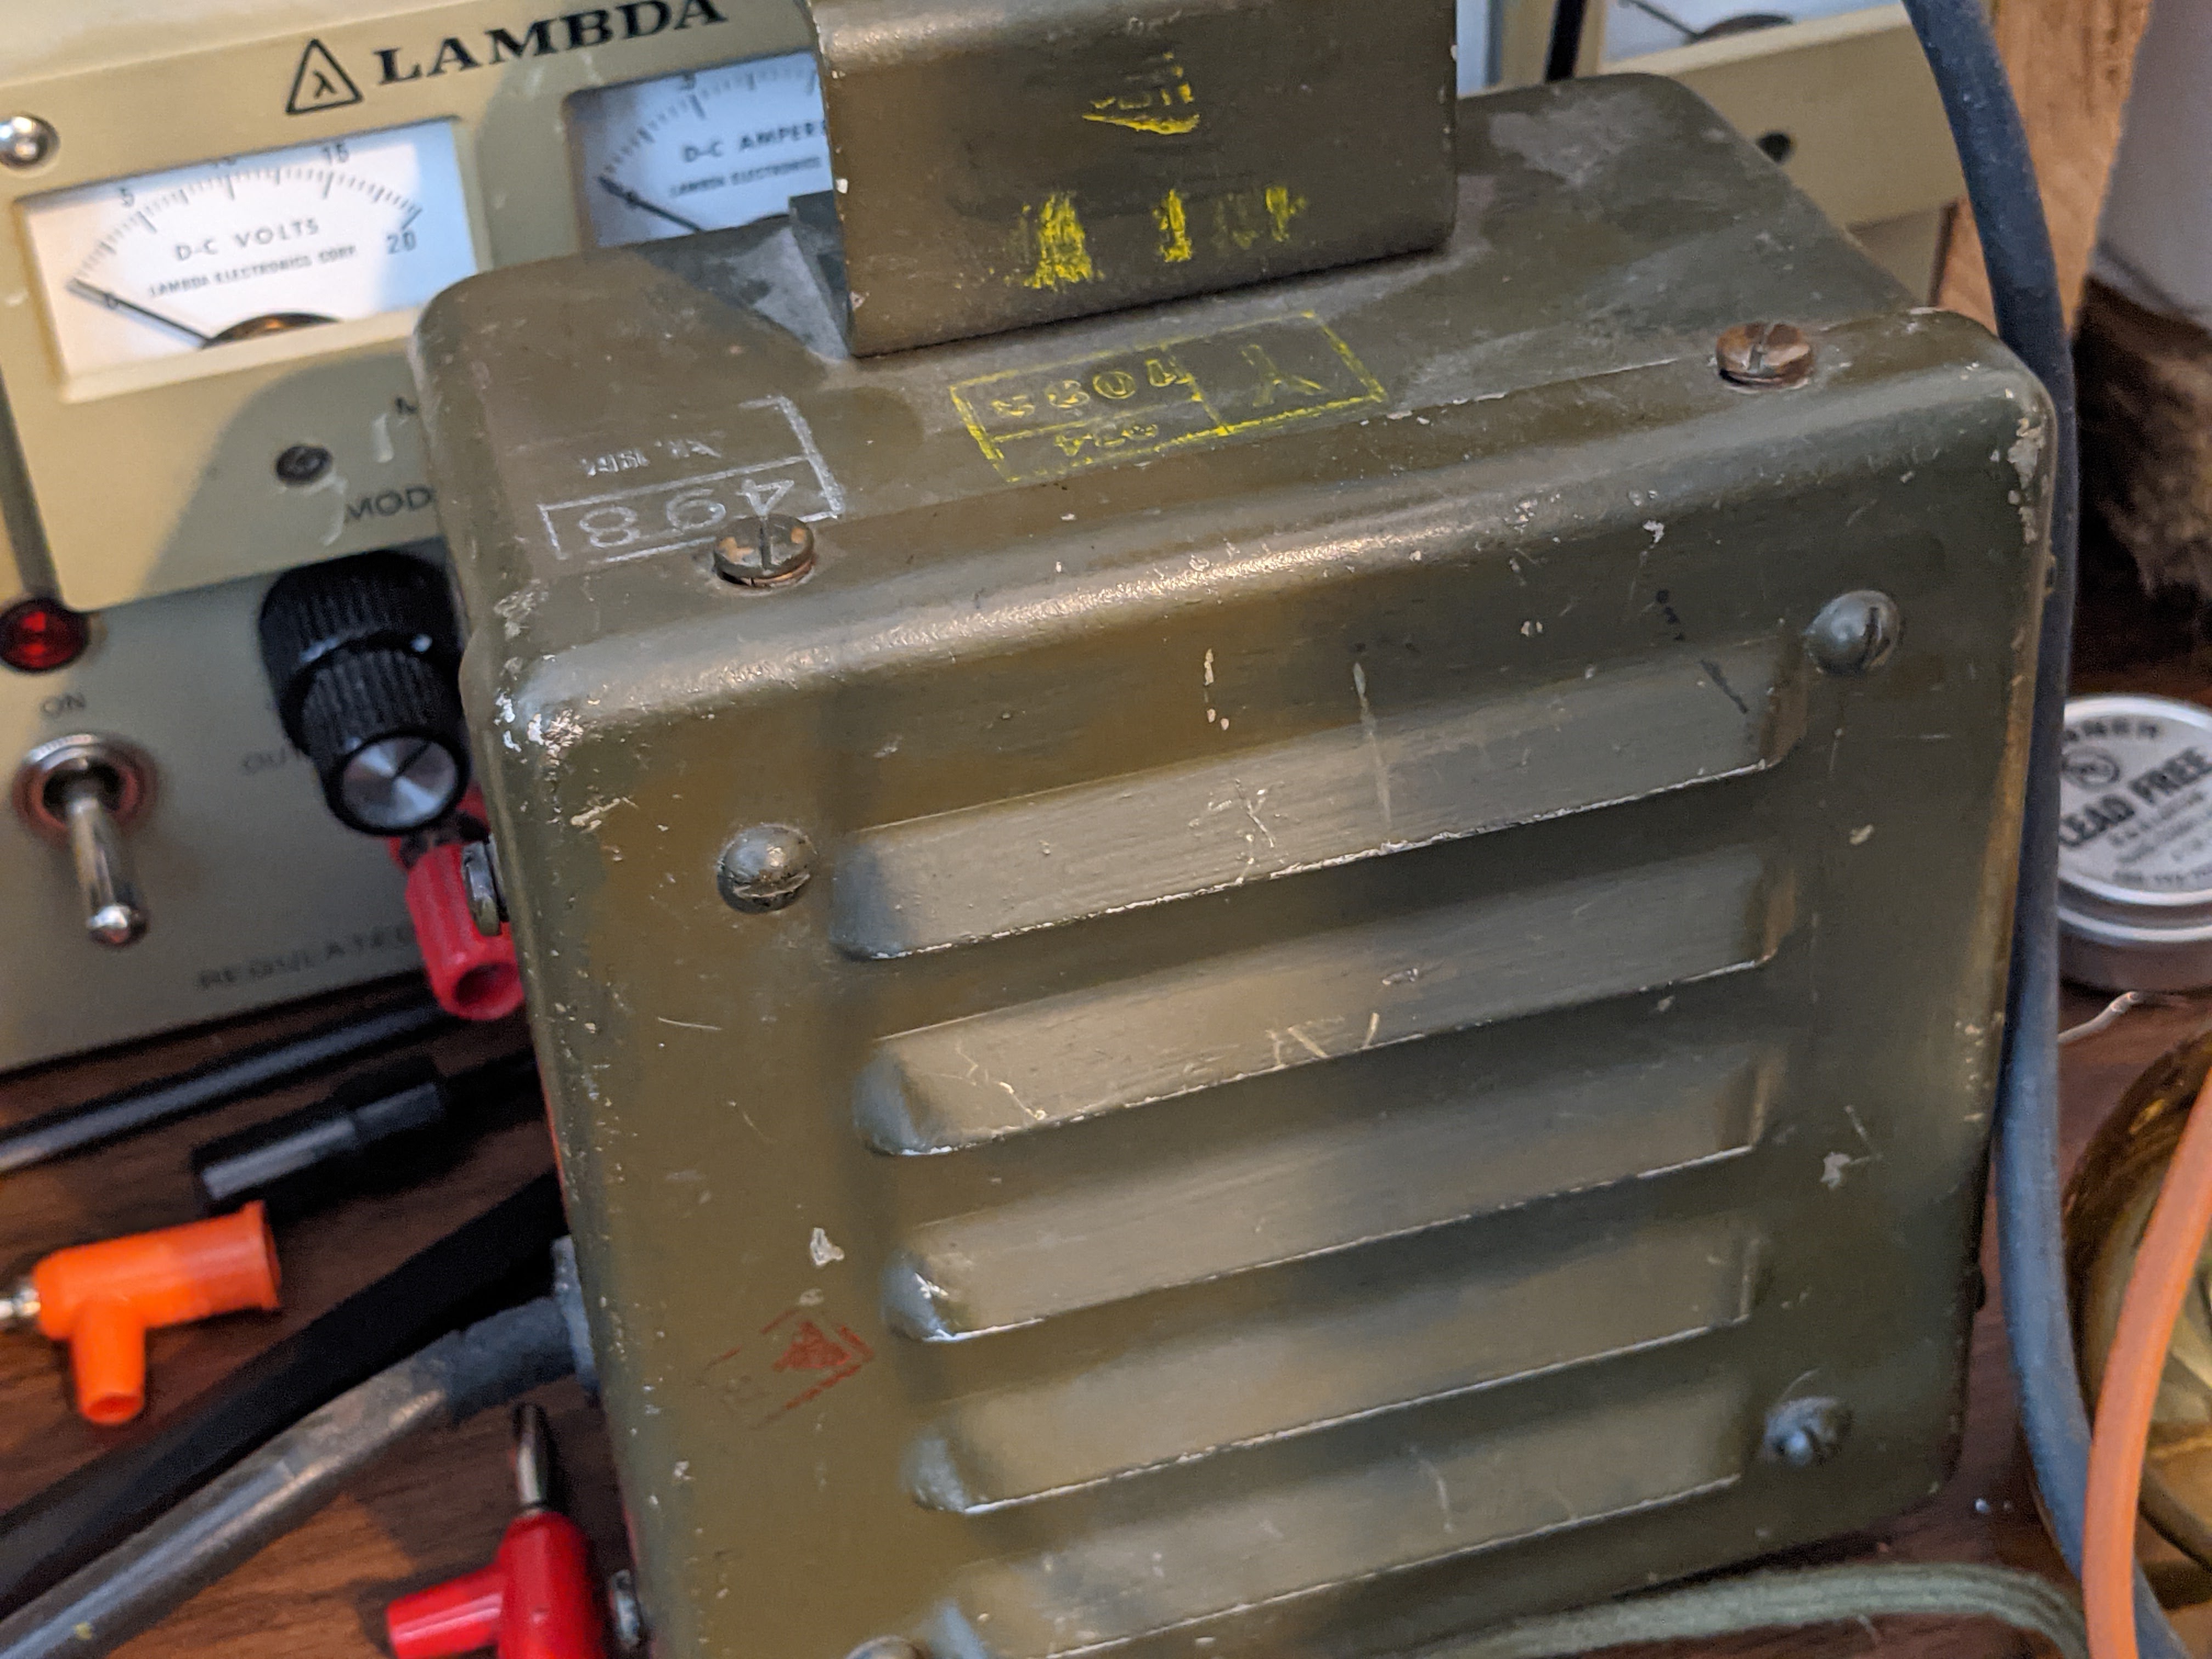
DY-88 mobile power supply
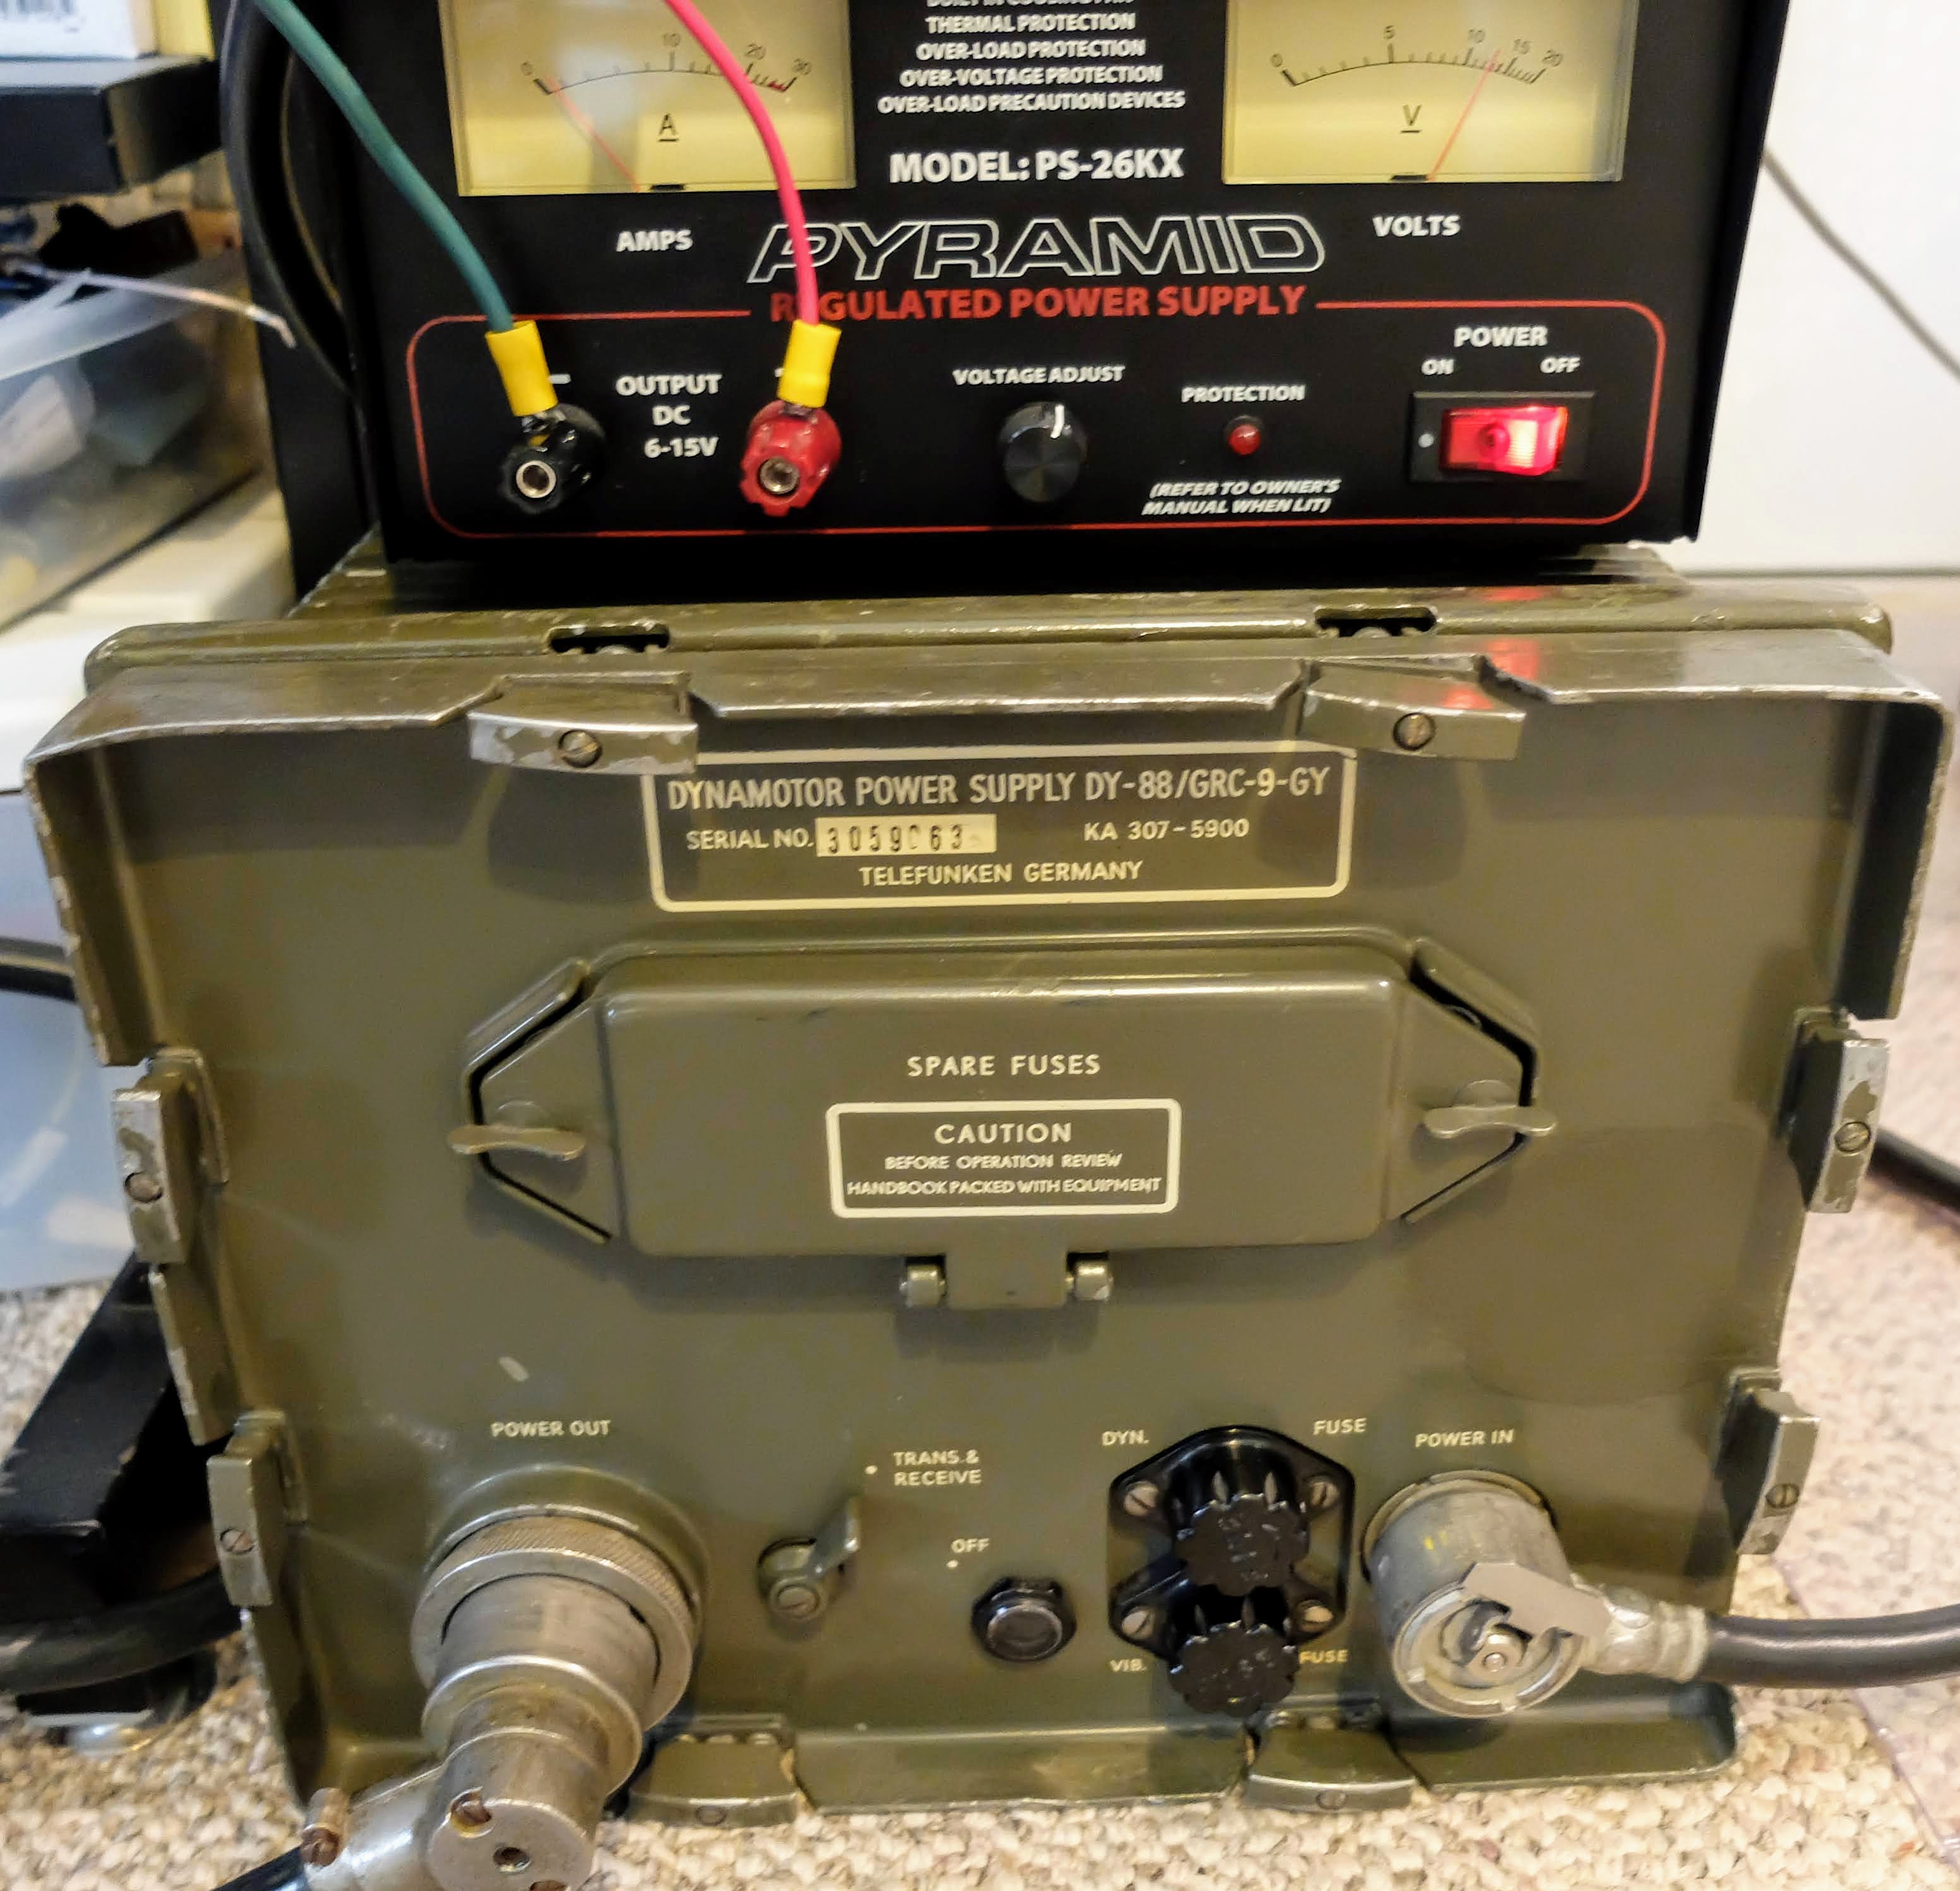 |
| DY-88 set to 12v powered by Amateur 12v supply |
 |
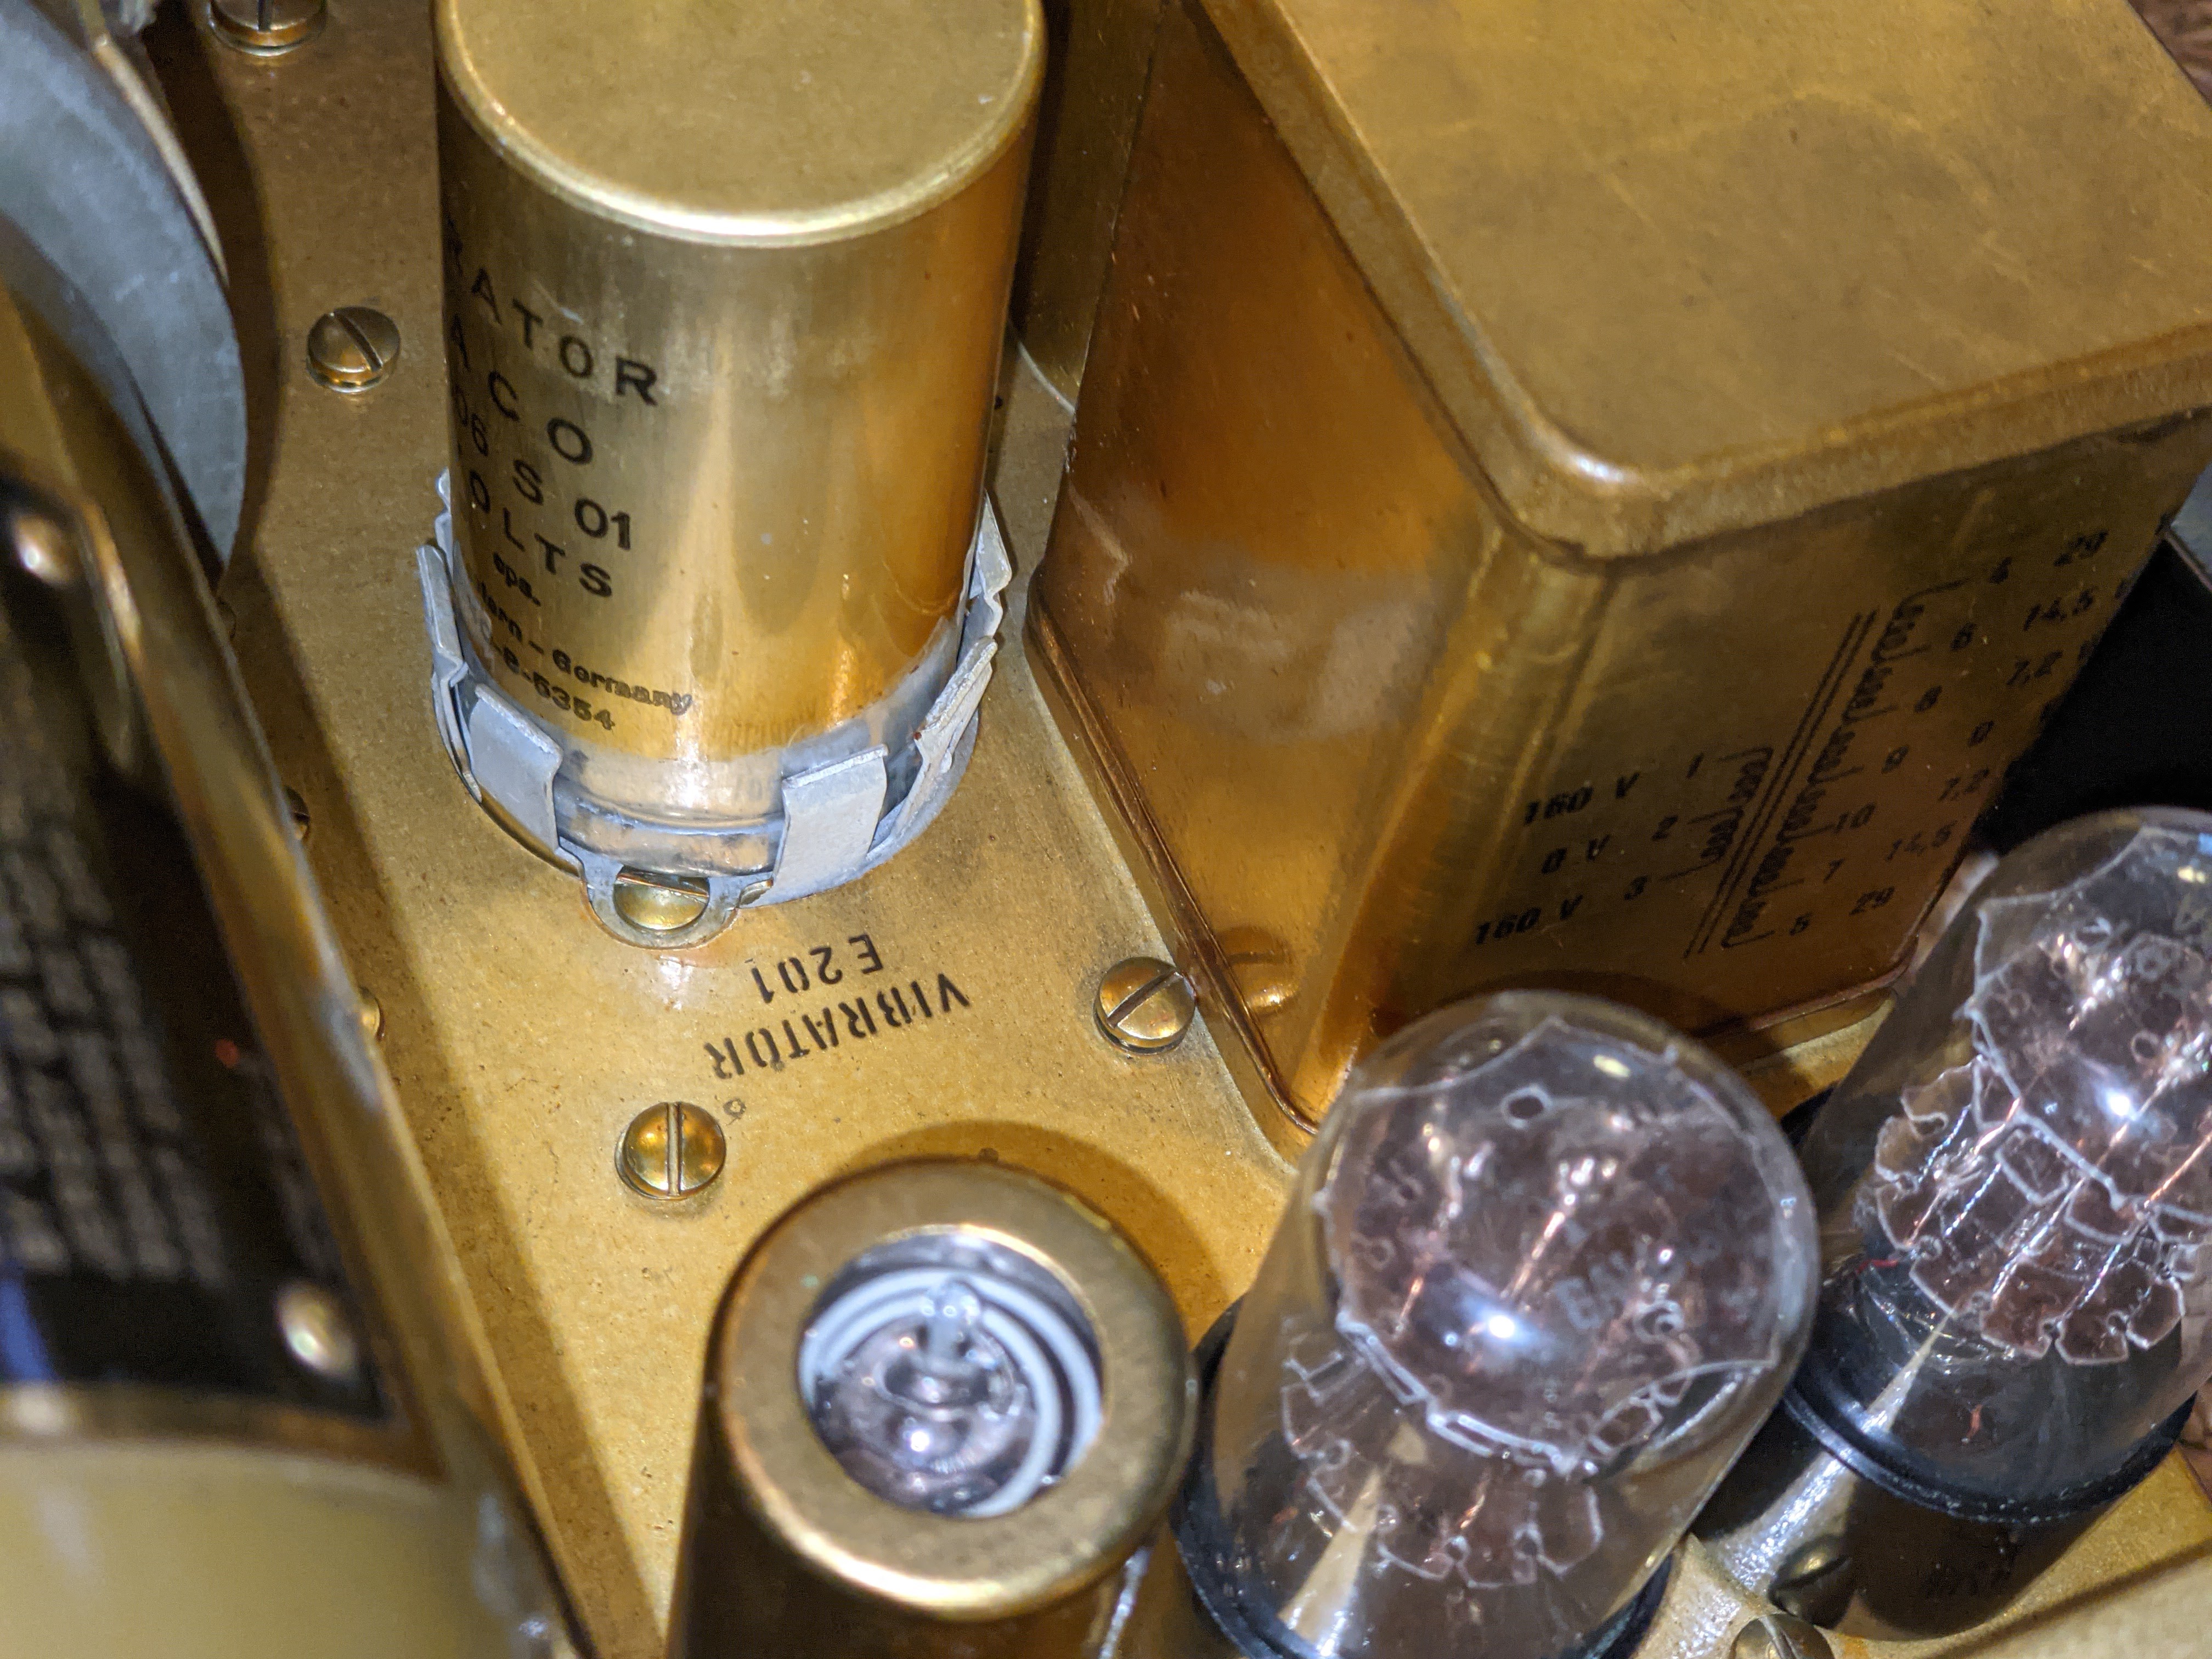
| Vibrator power supply for low B+ |
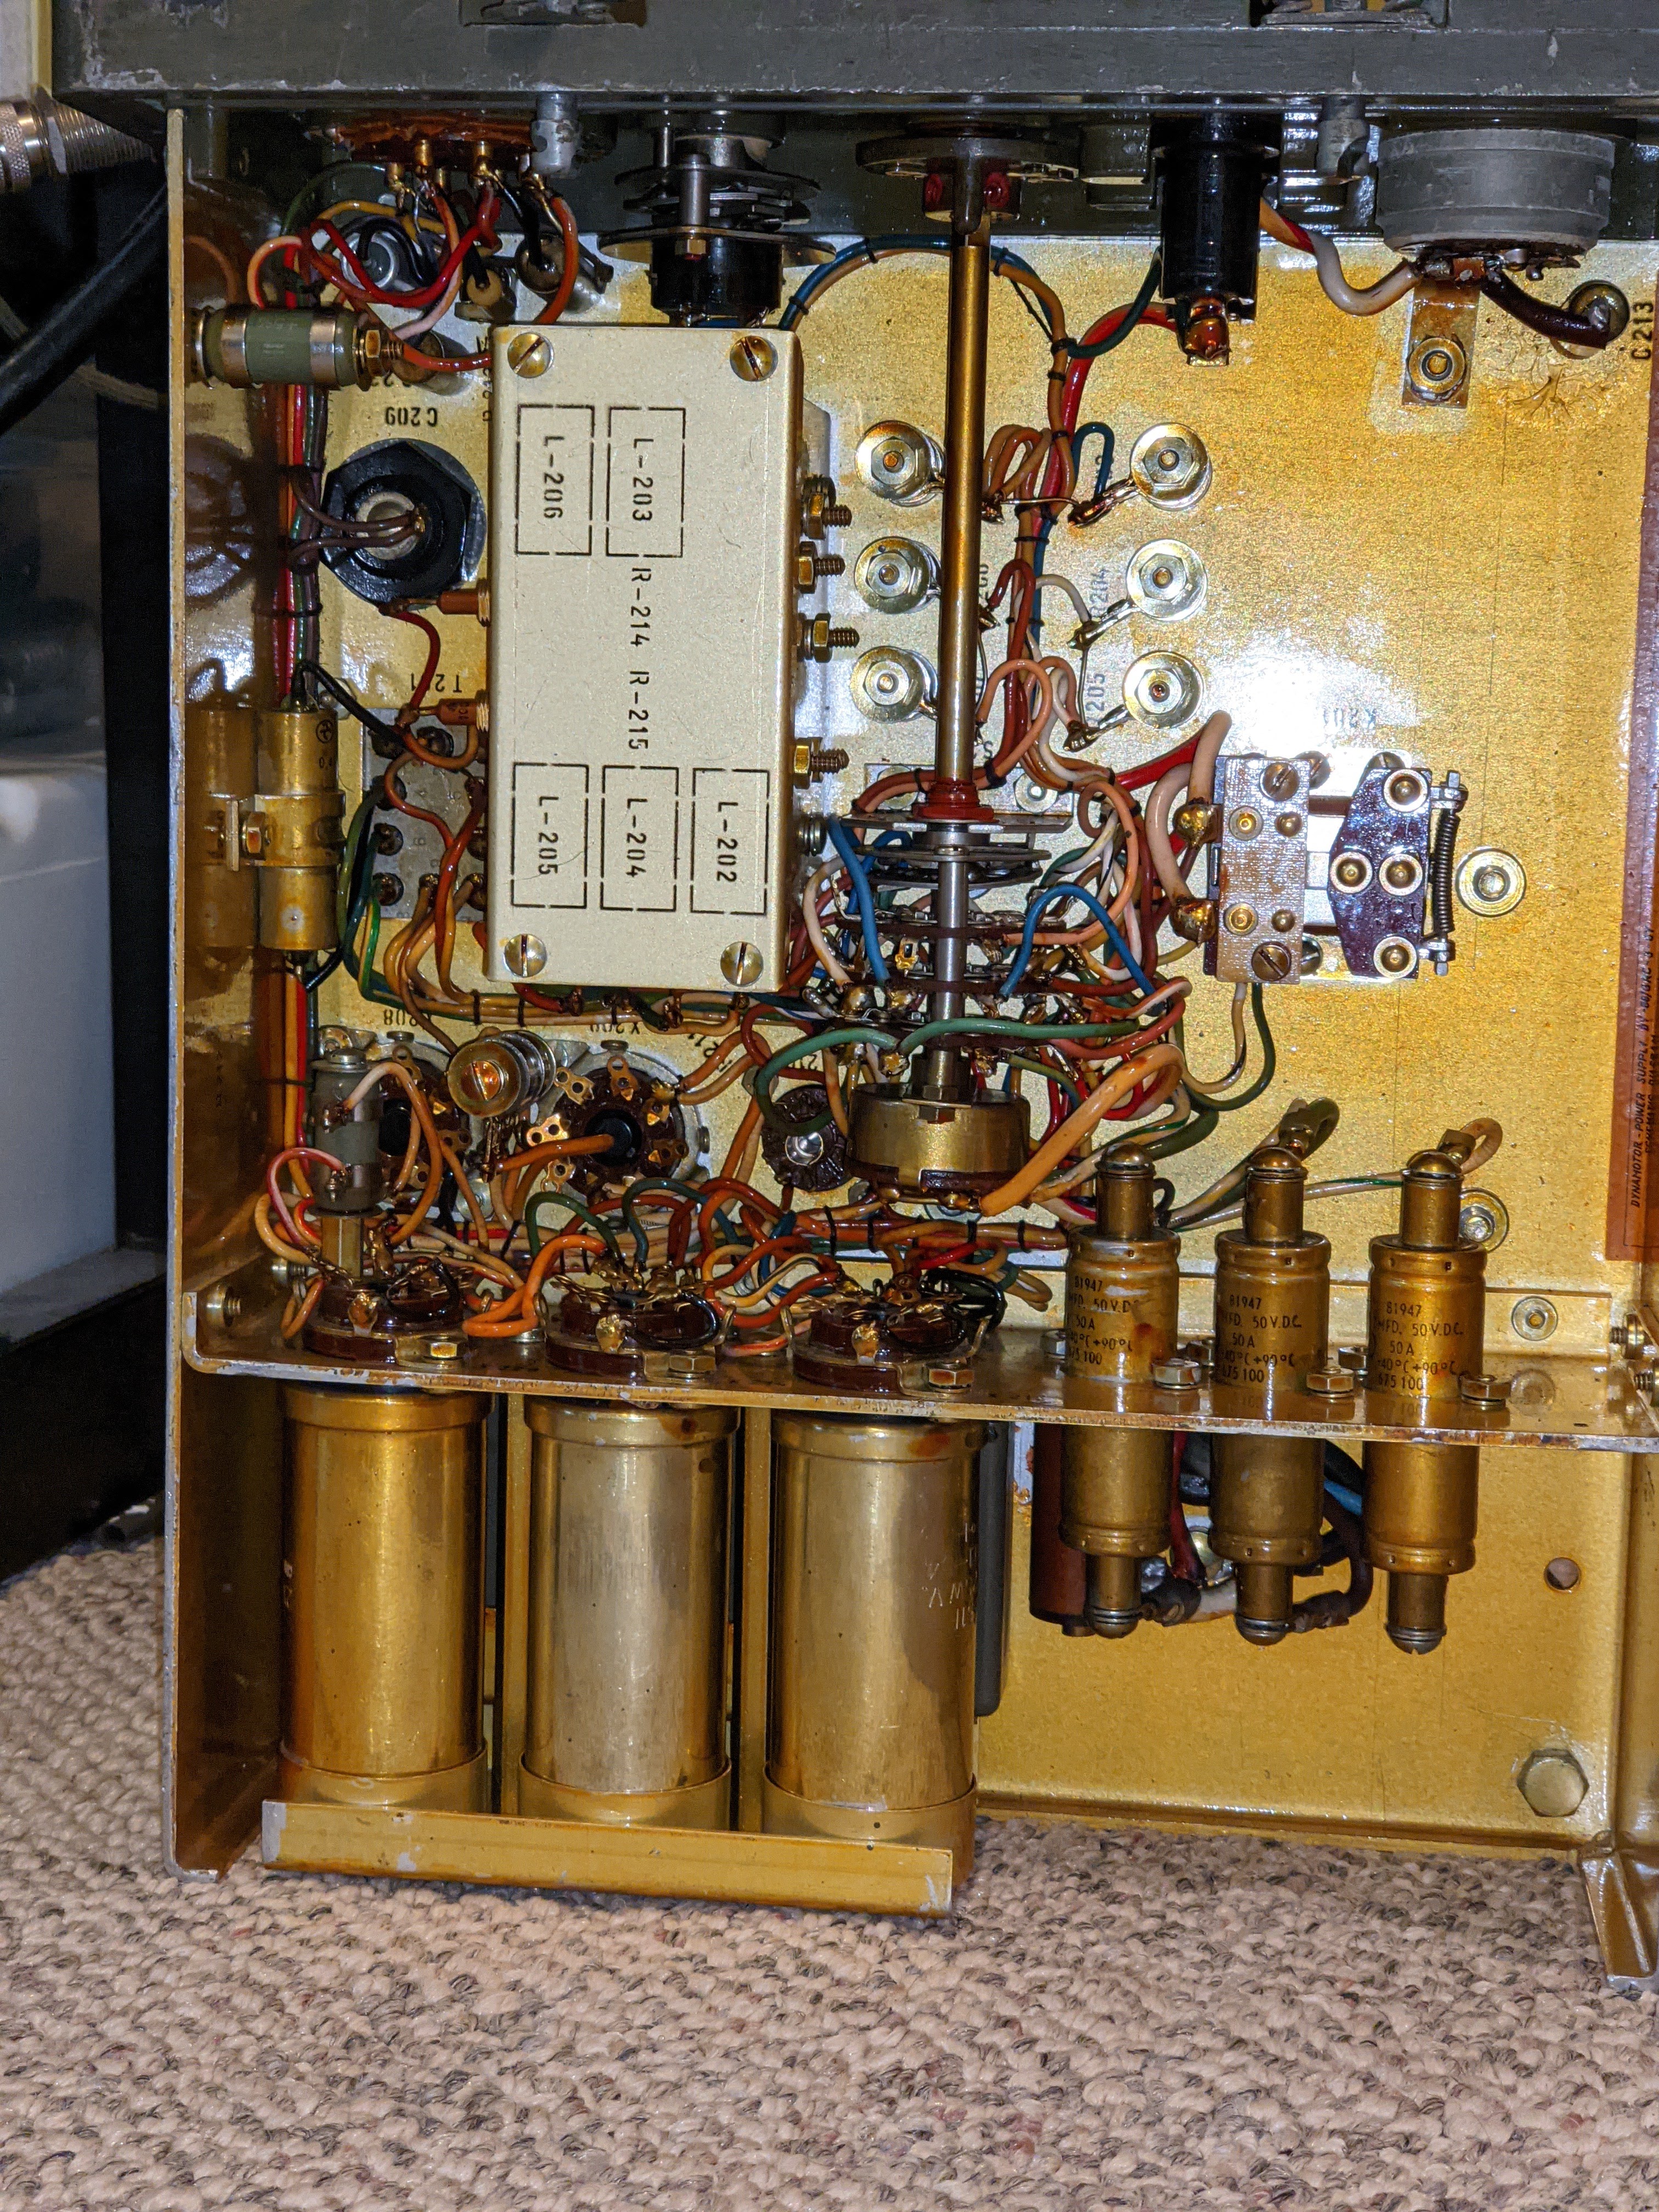 |
| Power filtering |
I supply the DY-88 from either an RV battery or an amateur 12v power supply. When in Standby the DY-88 draws less than 1 amp, but placing the radio in Send mode switches on the Dynamotor which draws 12 amps @12v, without key-down and up to 14 amps on high-output key-down. It will drain an RV battery pretty quickly at that rate if the radio is left in Send mode, and works an amateur power supply pretty hard as well. So don't expect to operate remote off a battery alone for too long if your having lengthy QSOs. An added benefit of the DY-88 is that when the enclosed Dynamotor is running you'll have a nice extra 85 dB of generator noise to accompany your listening pleasure.
GN-58 portable field hand-cranked power supply
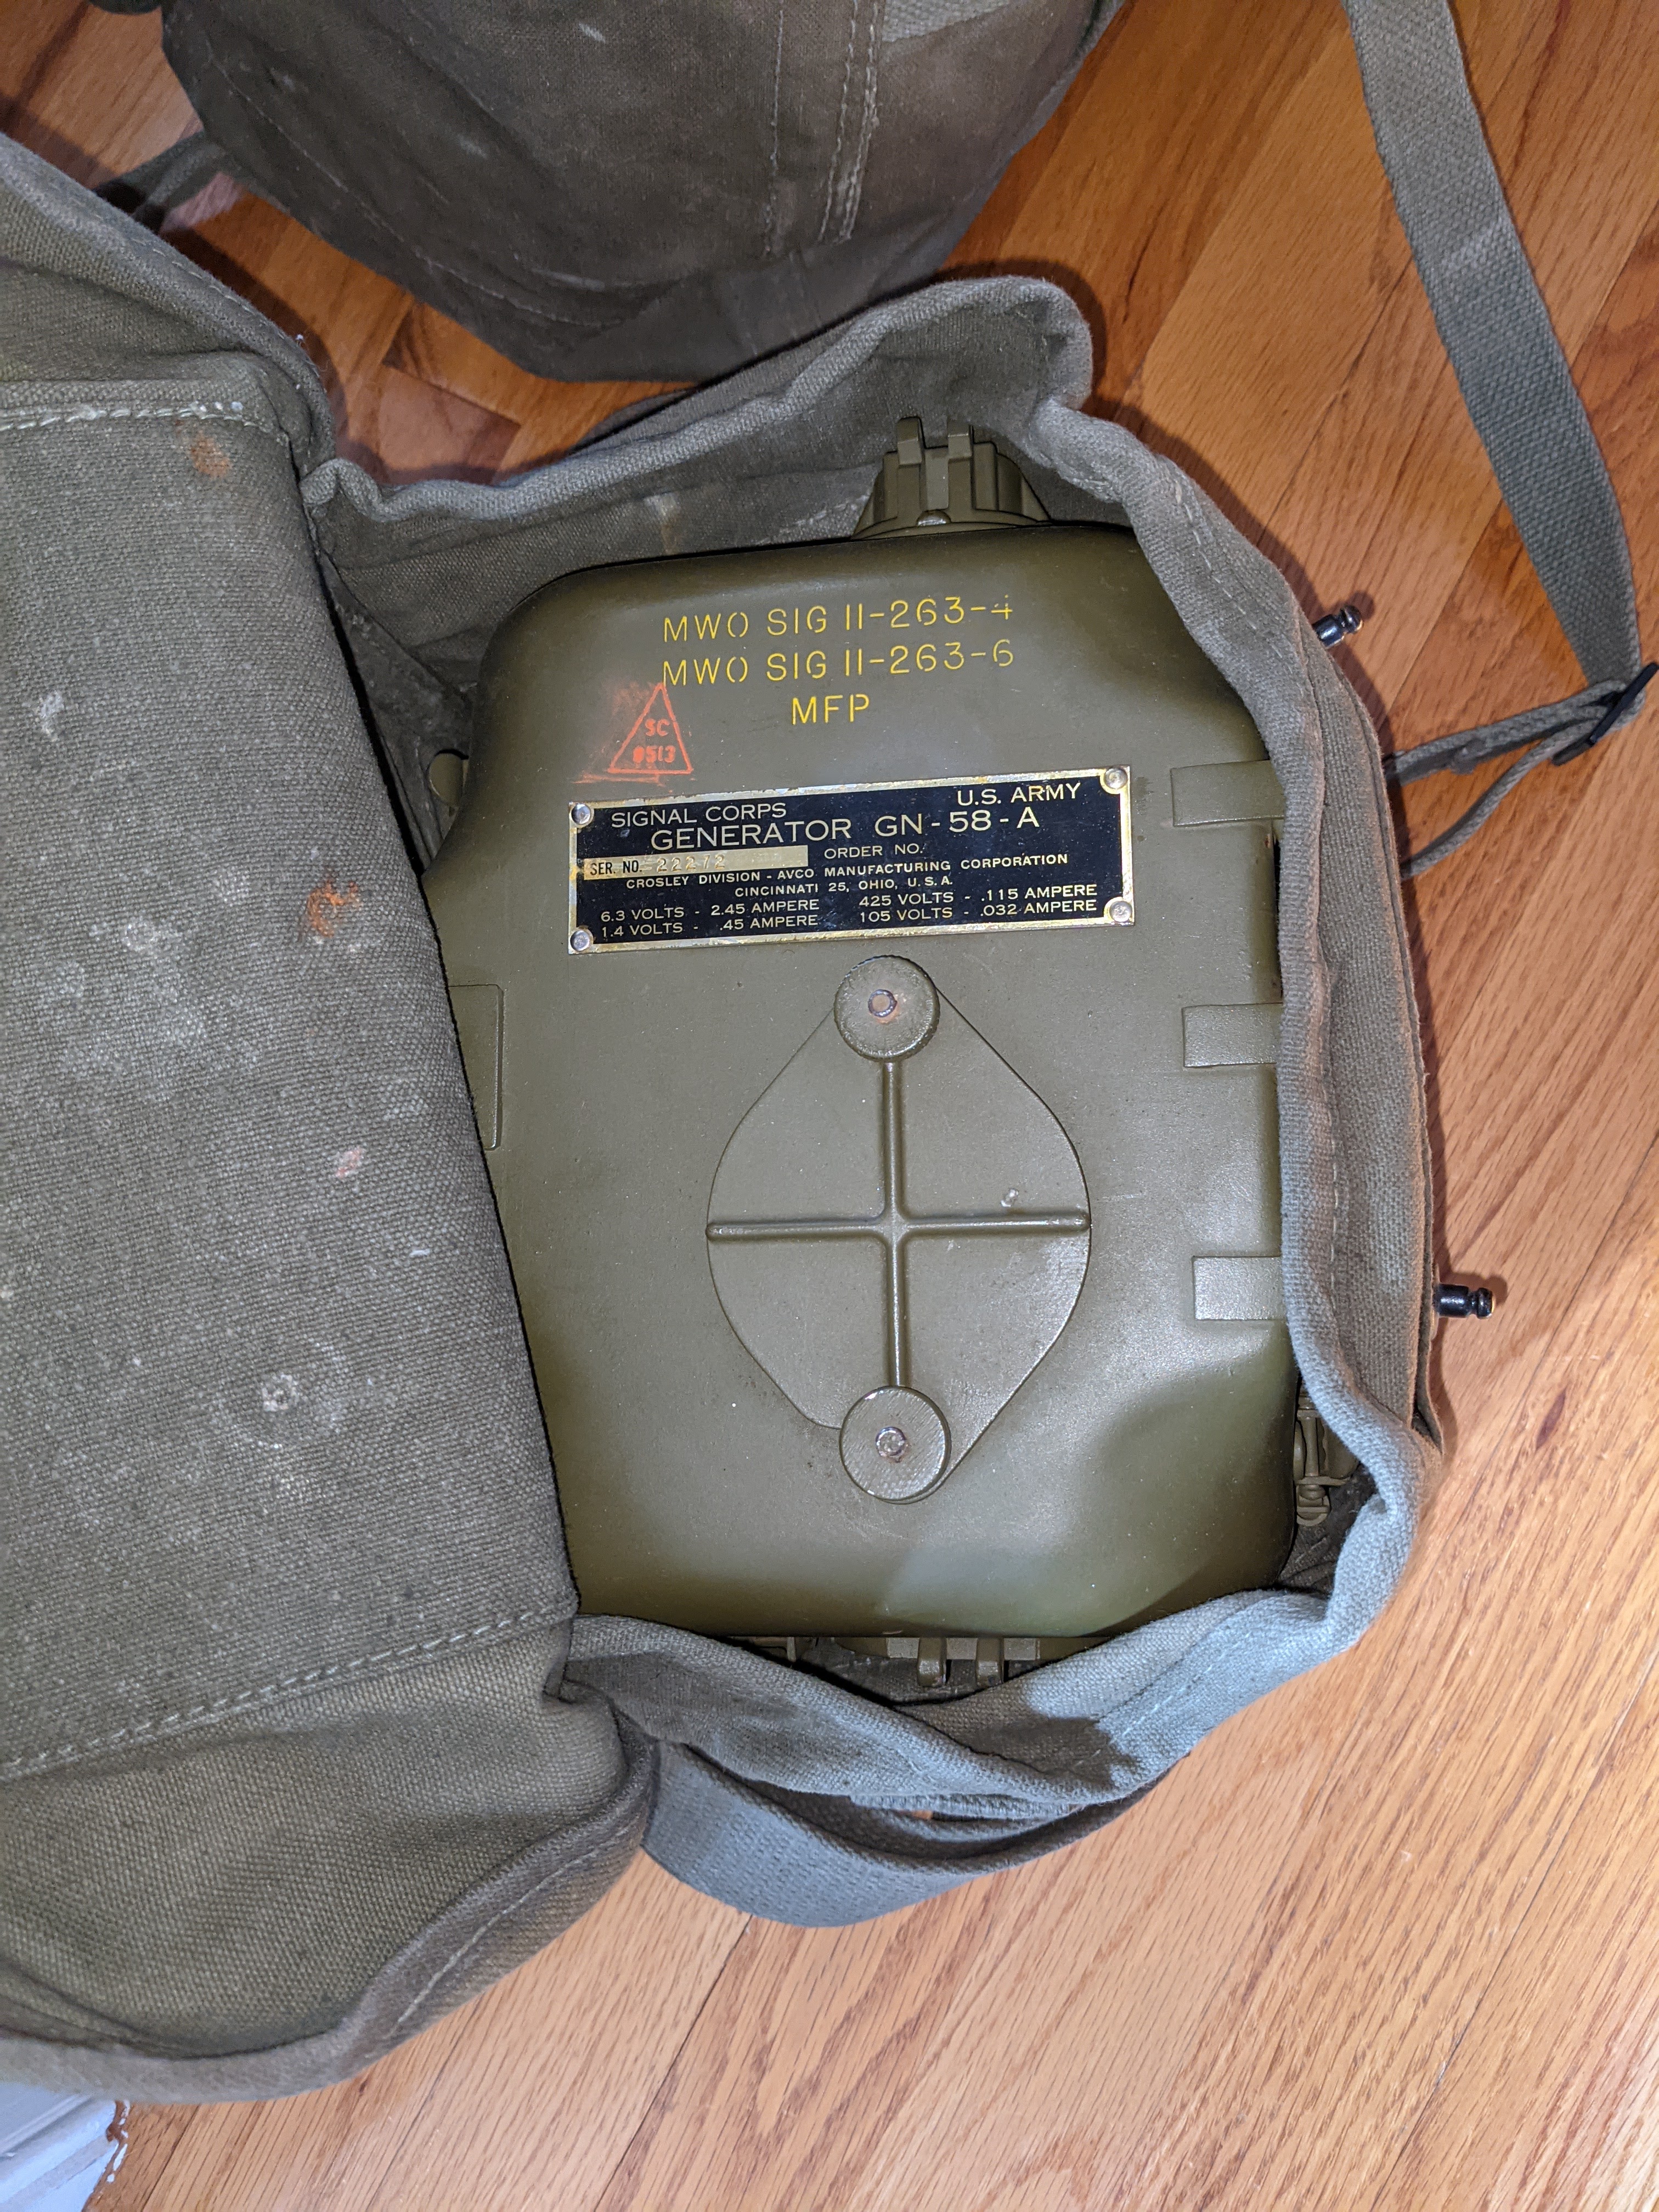 |
| Generator head in carry bag |
 |
| NOS Shiny |
 |
| Deployed |
If you have a BC-48 battery hooked up then your human power supply can pause cranking while your receiving. I have a BC-48 battery enclosure that has been gutted of the original, long-dead material and replaced with 10x 9v batteries in series for the low B+ and two D-Cell batteries in parallel for the receiver filament supply.
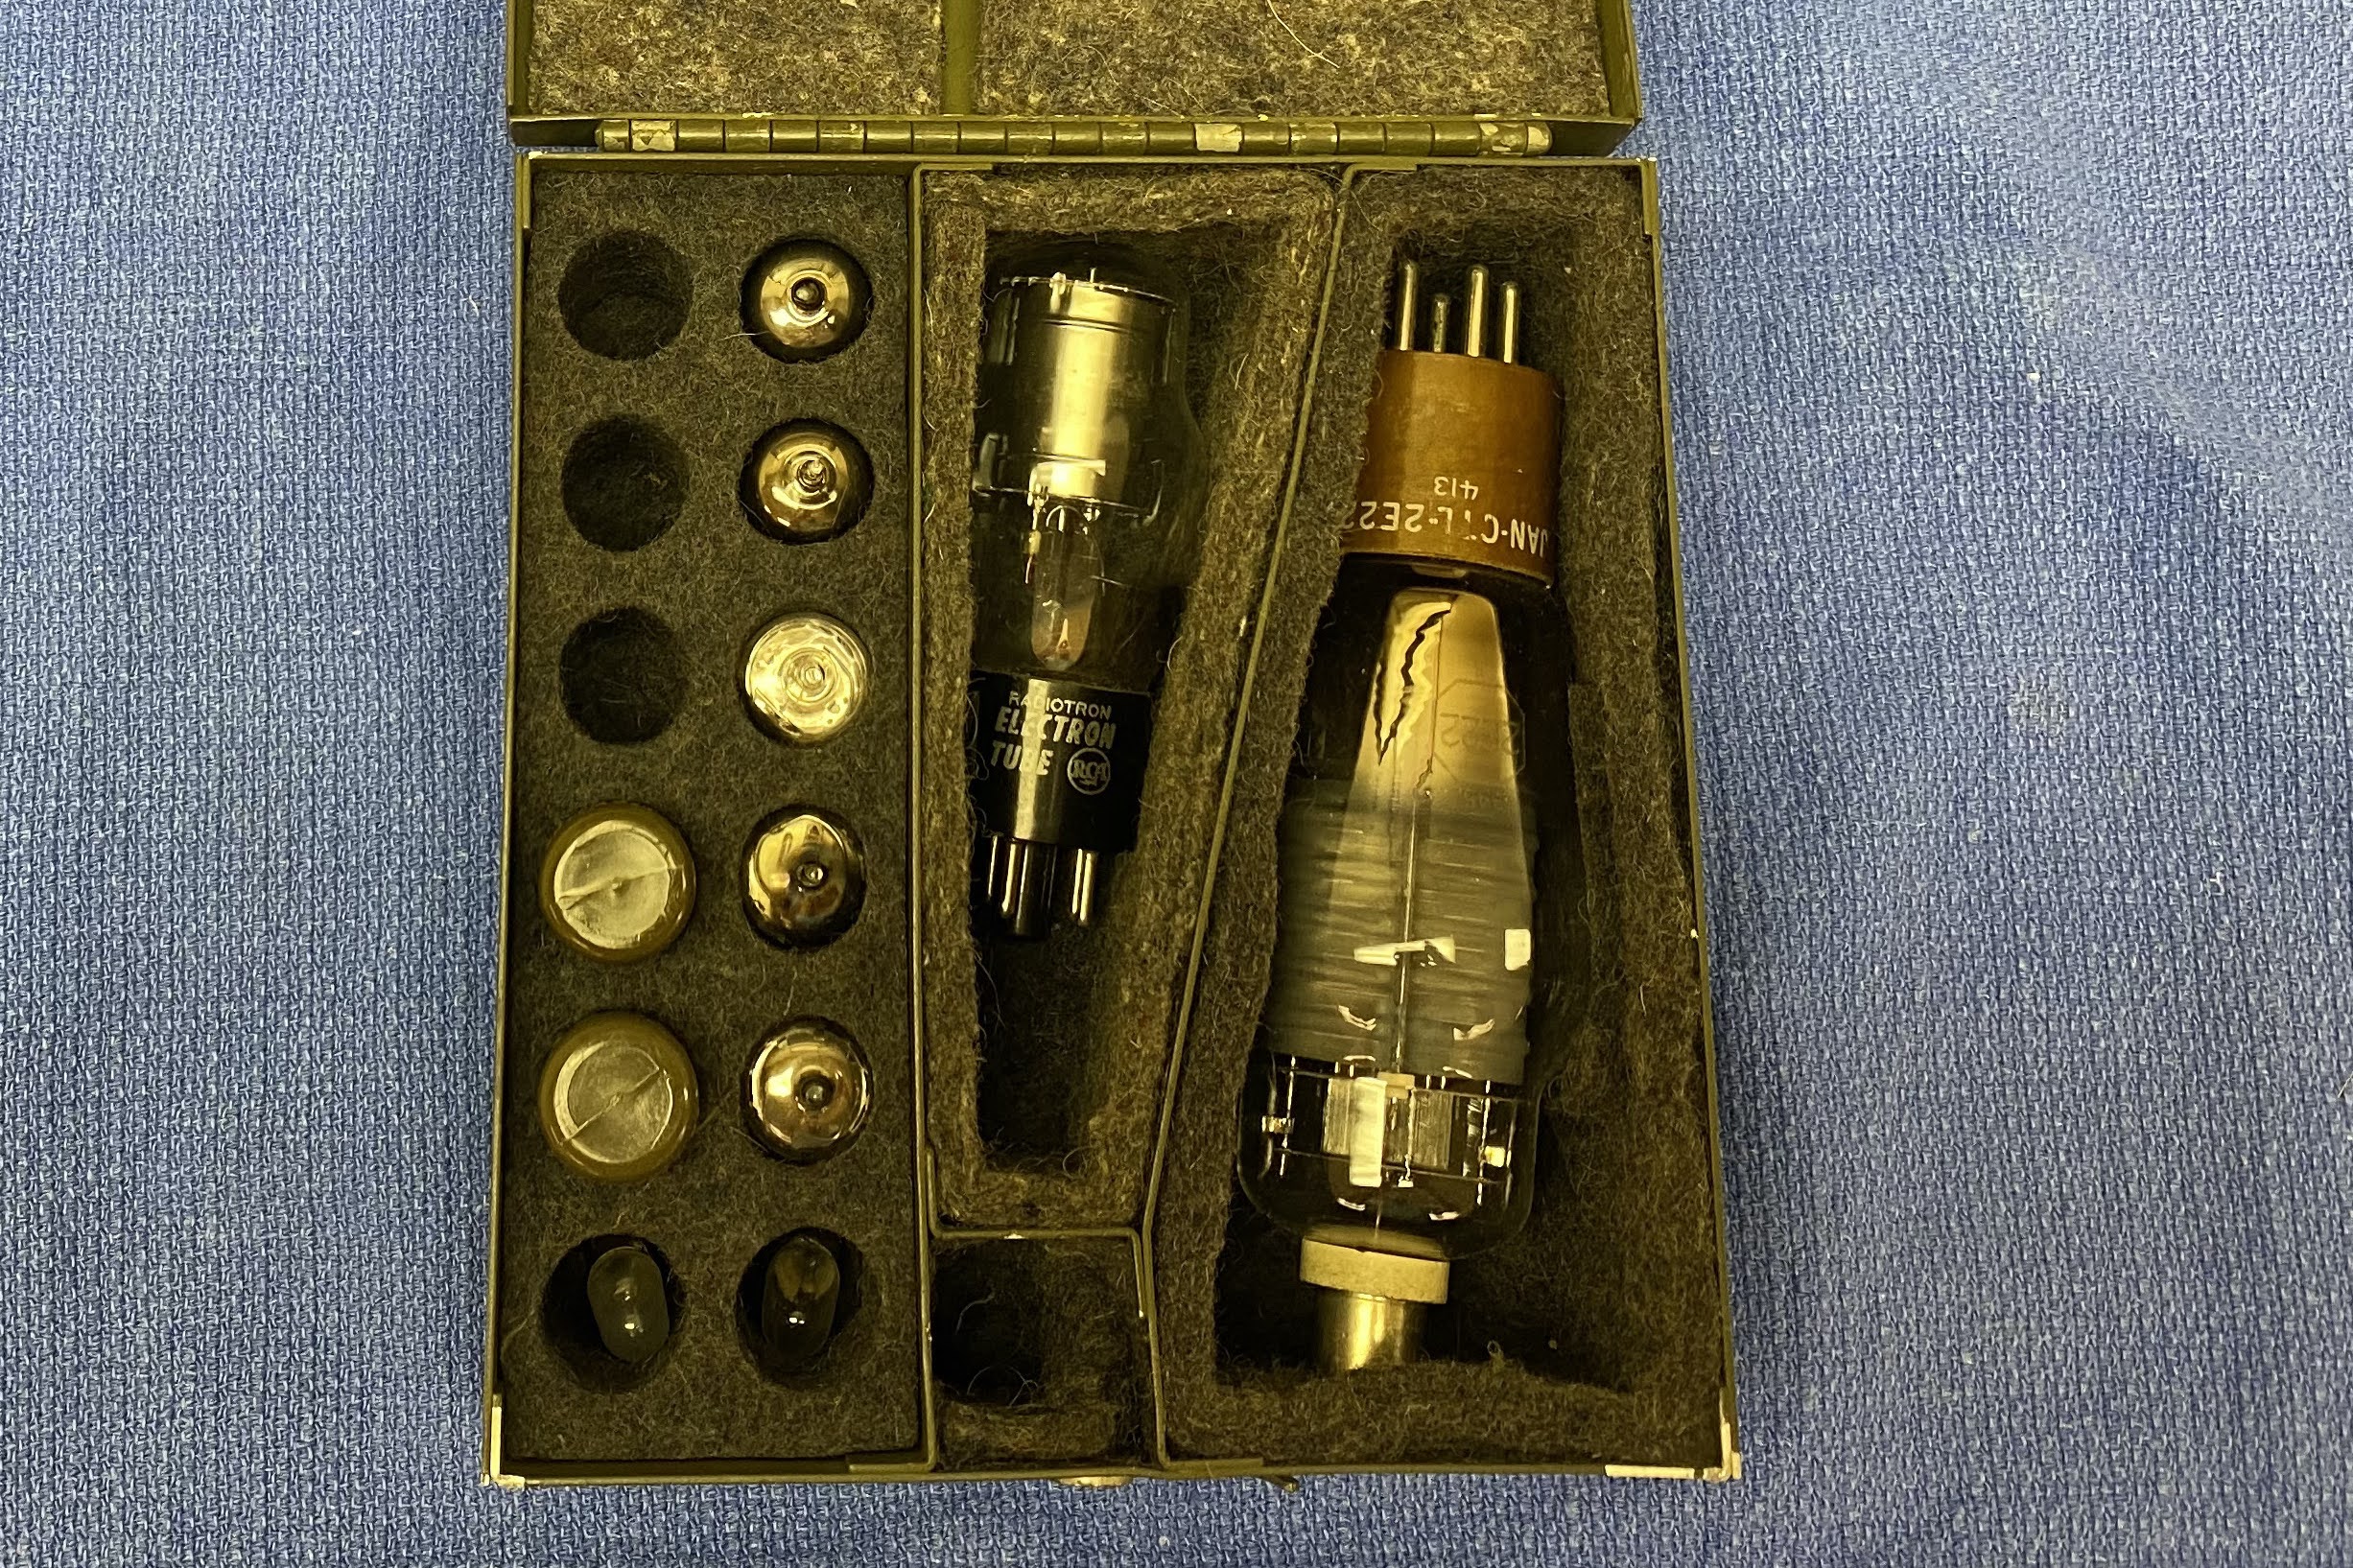
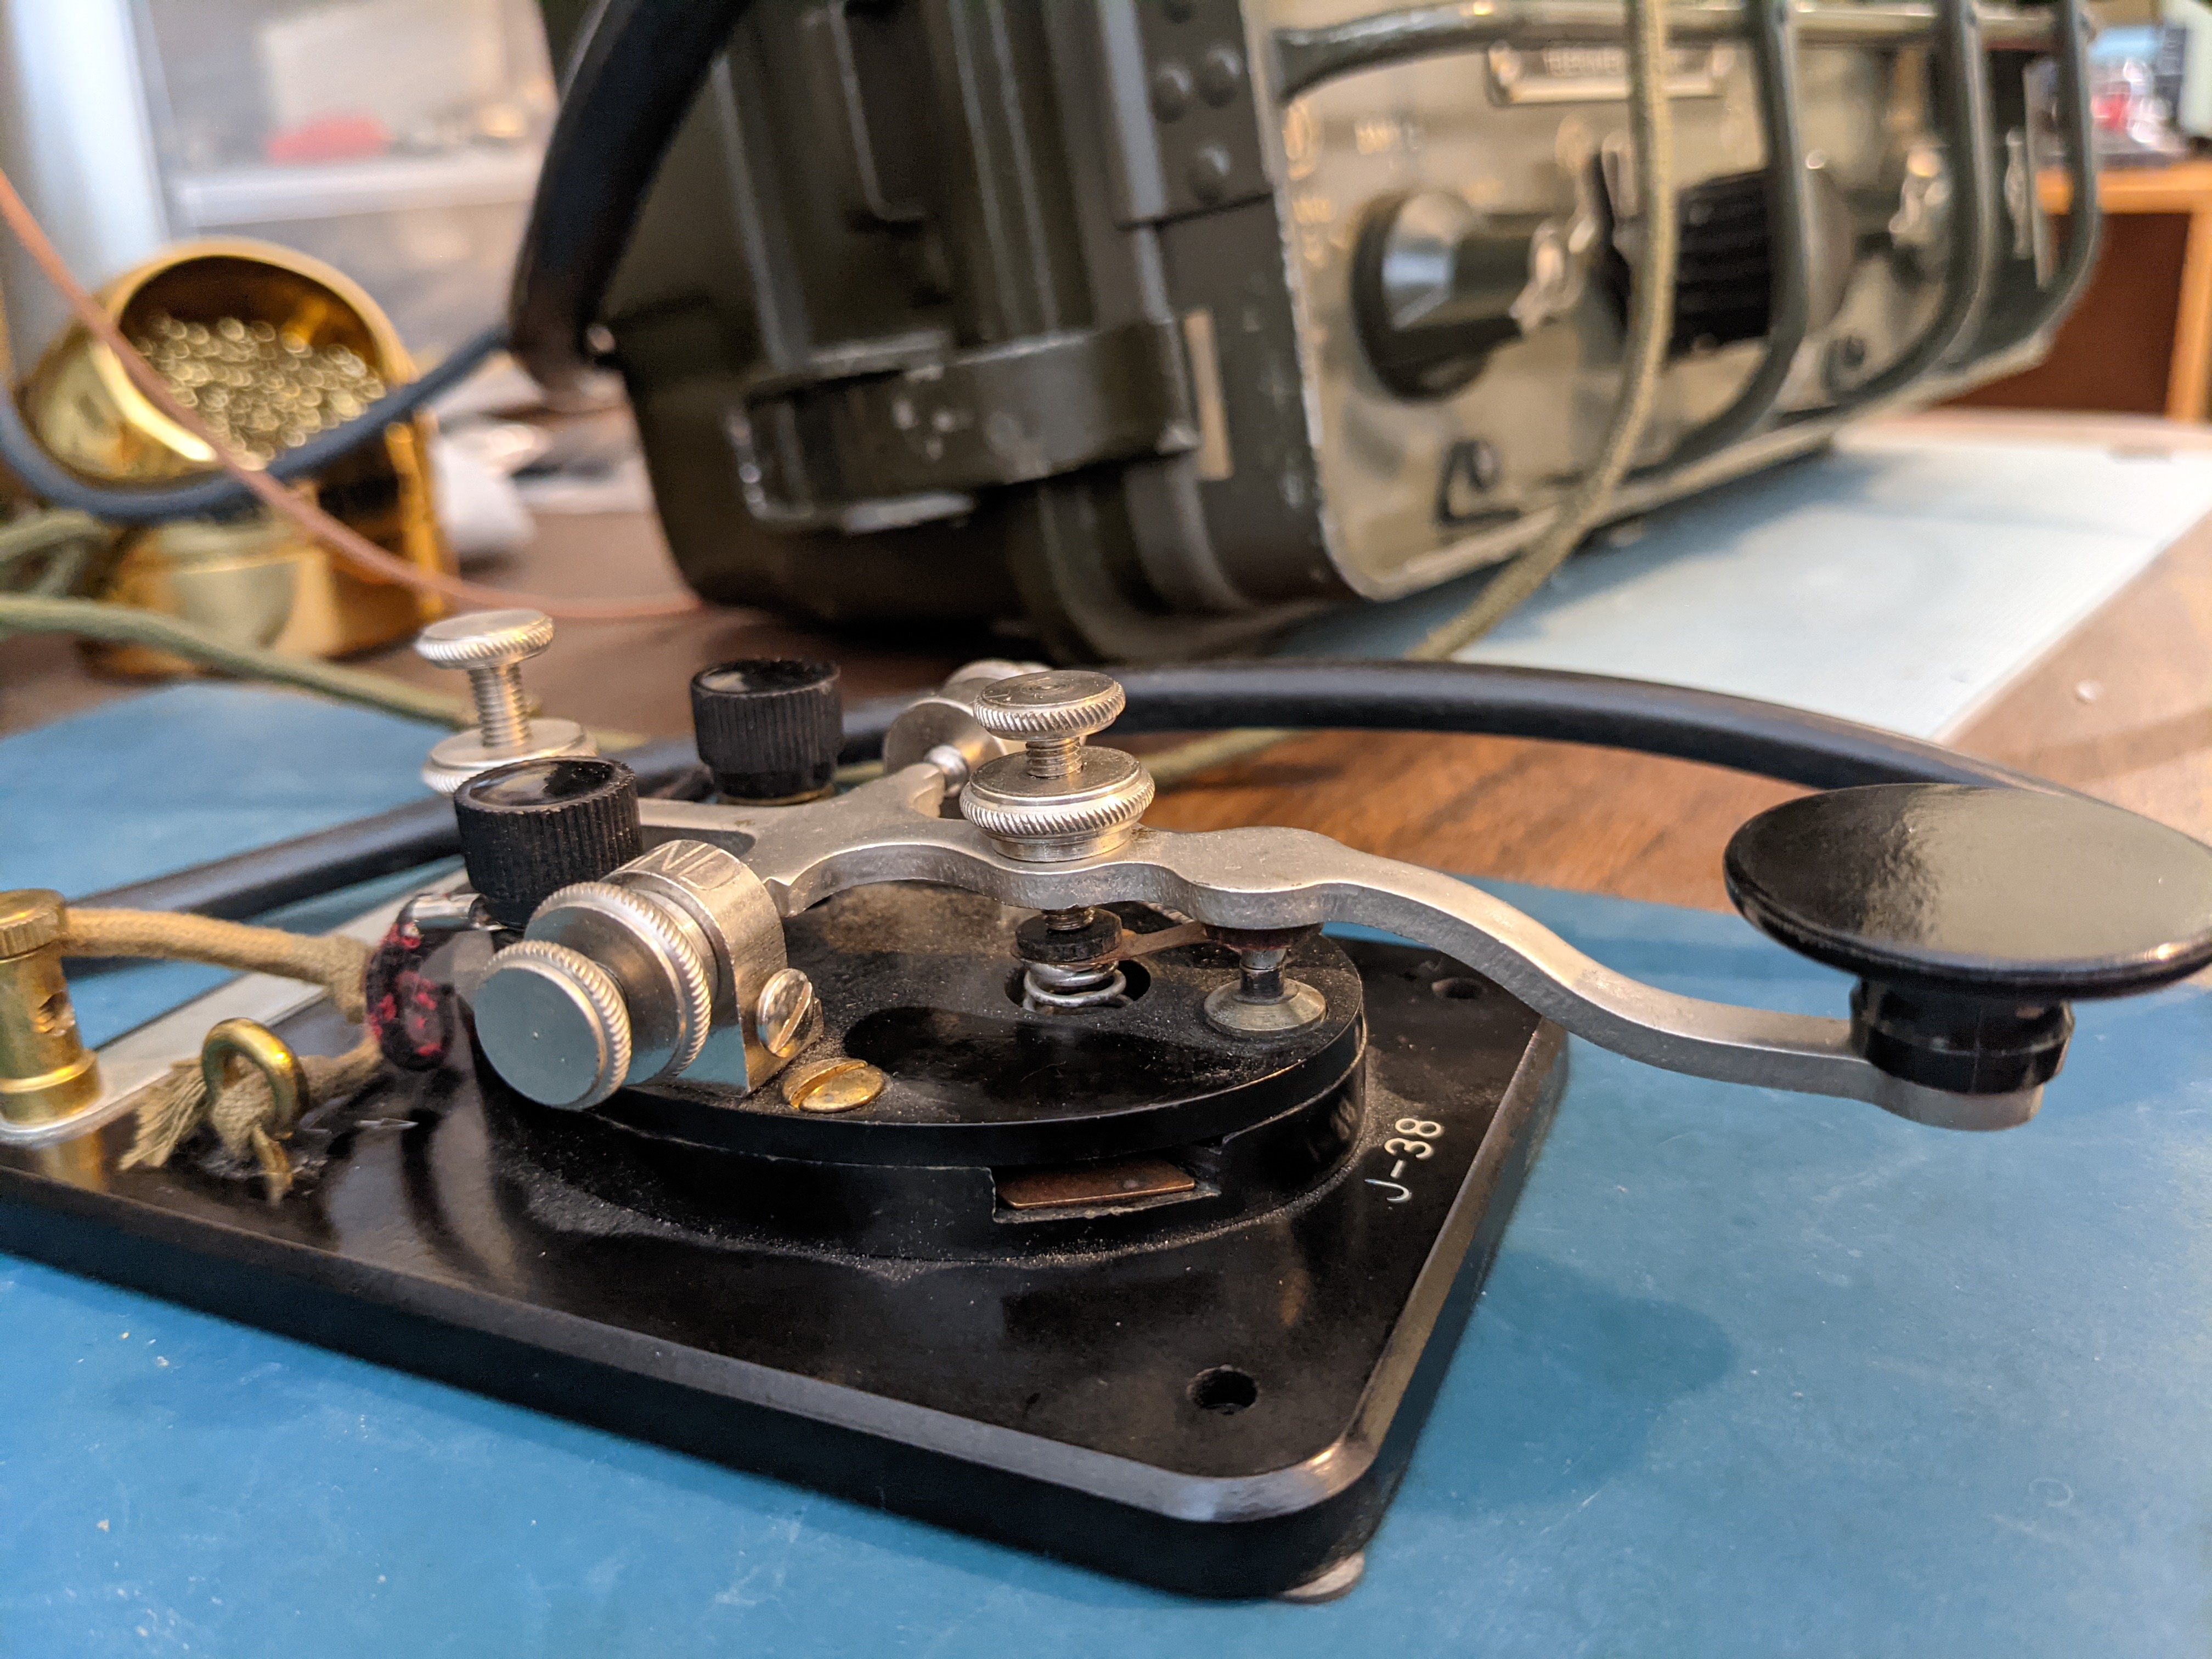
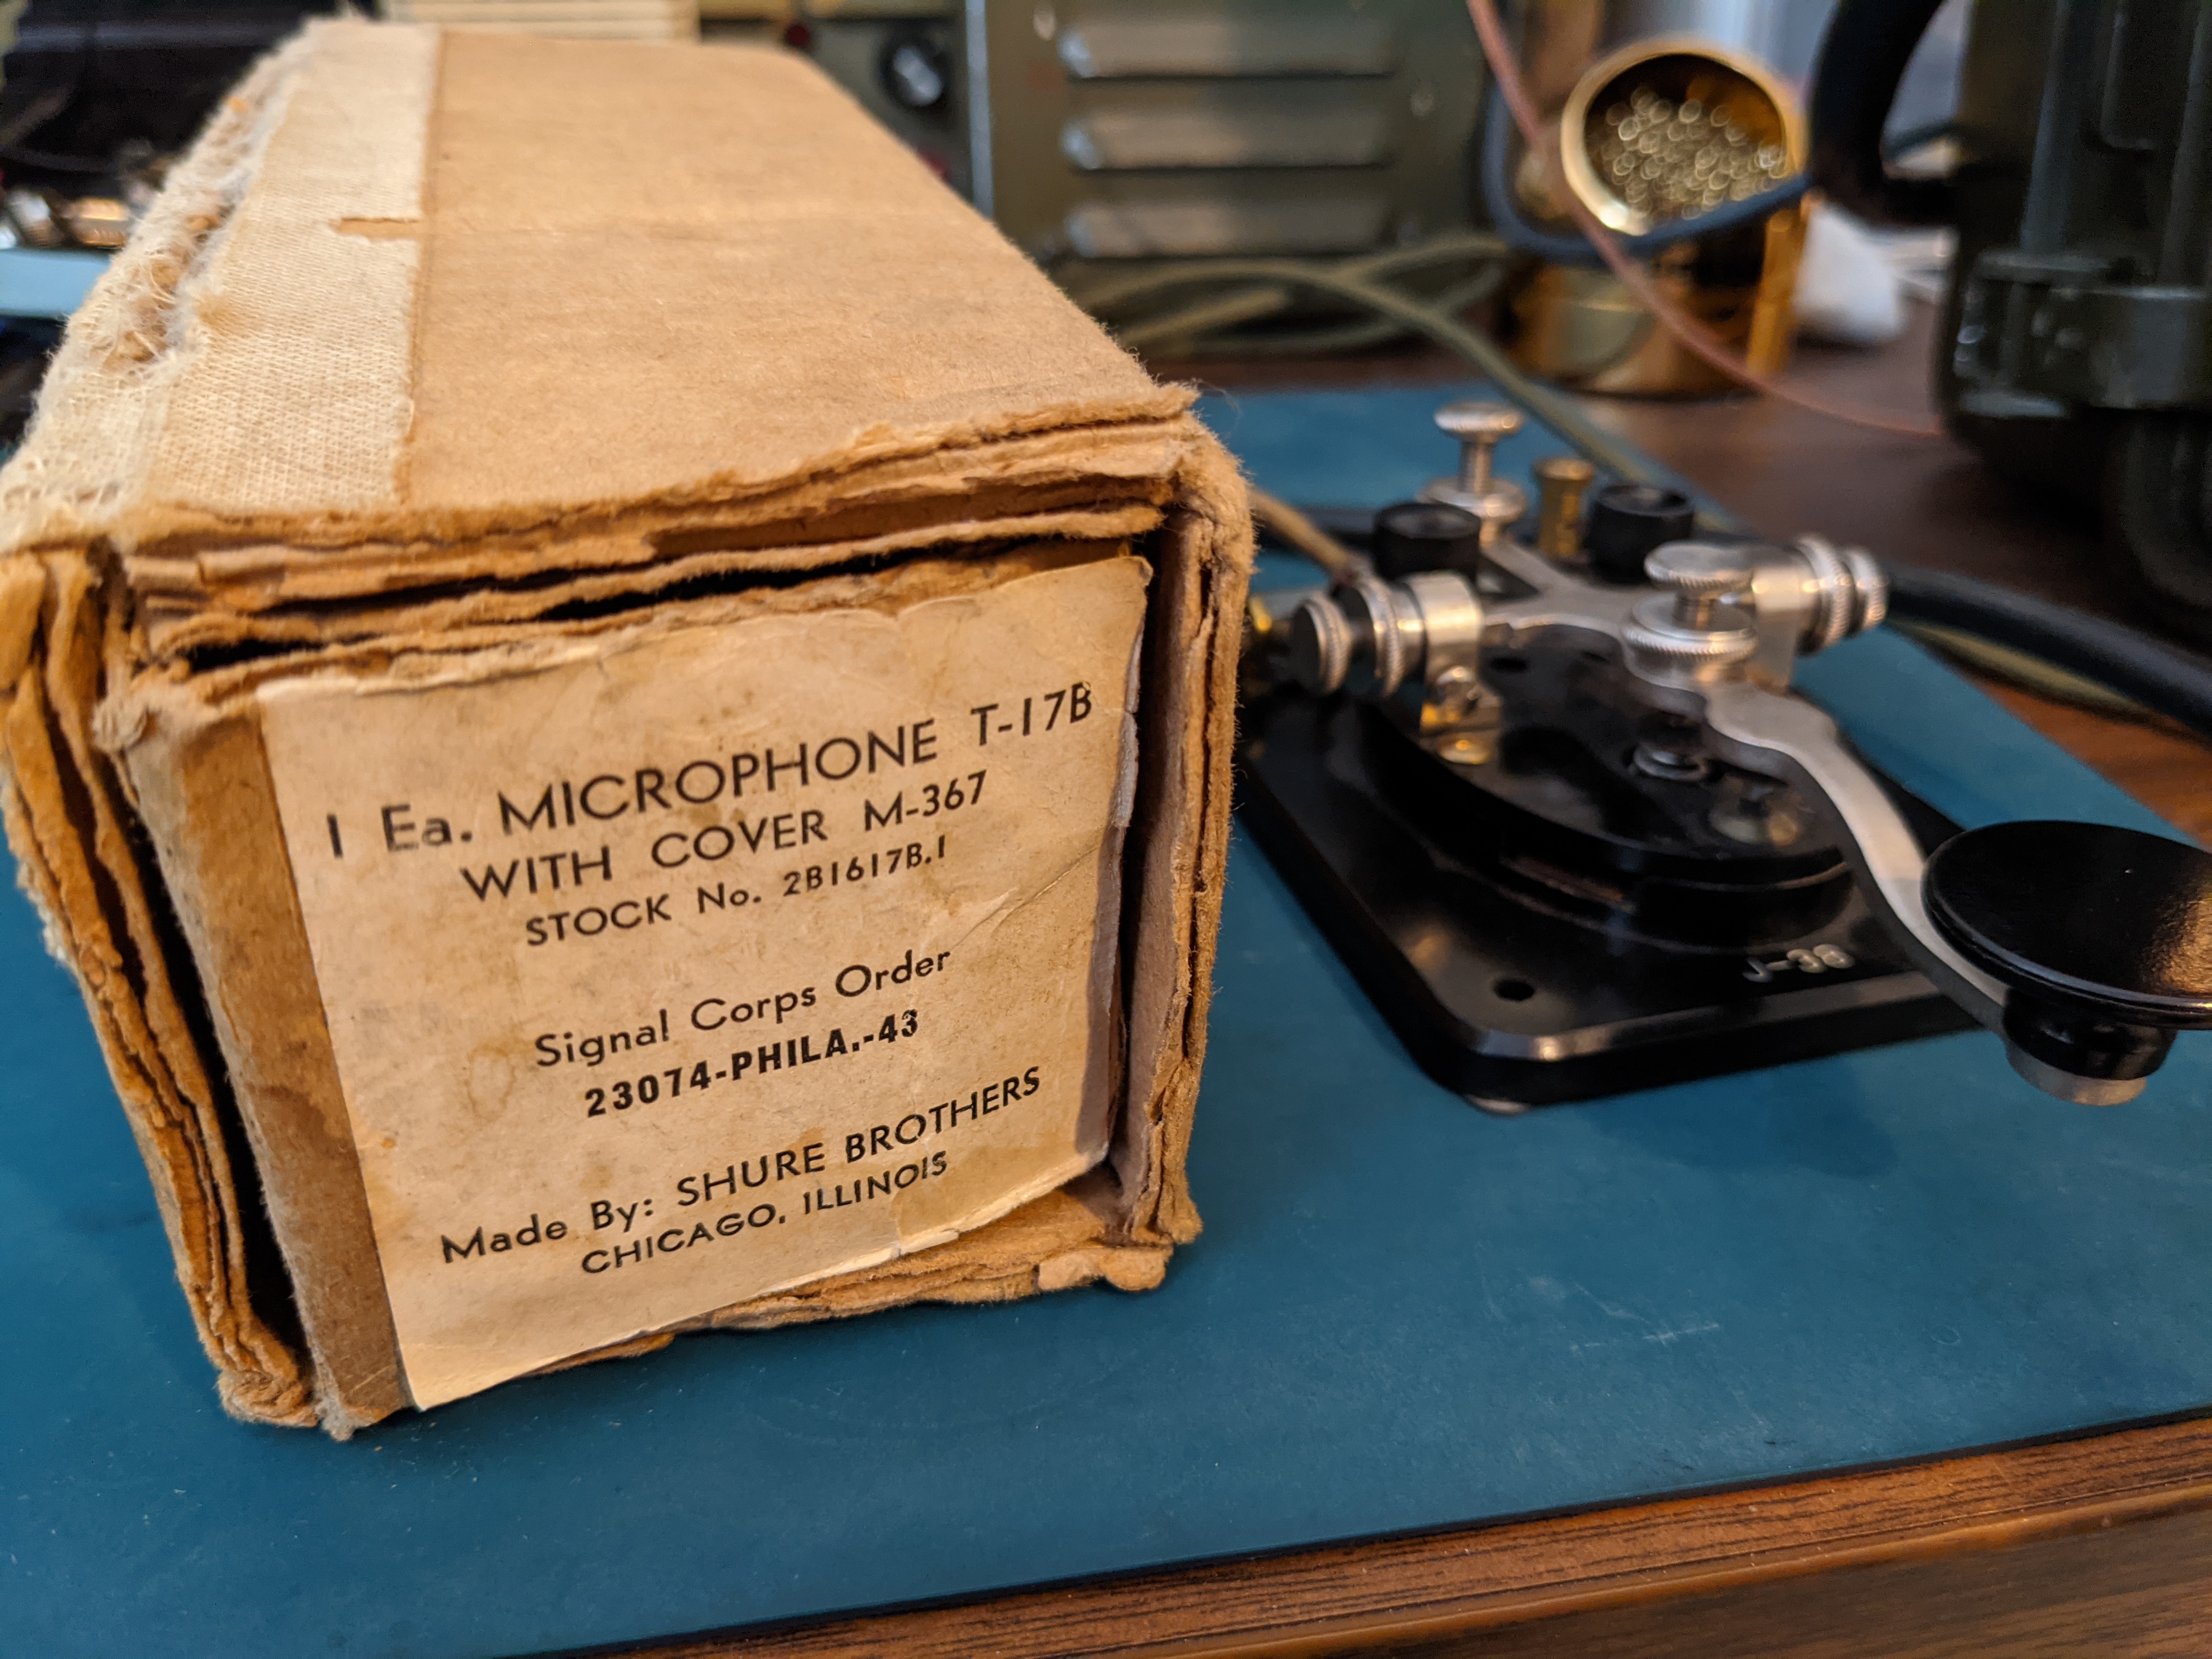
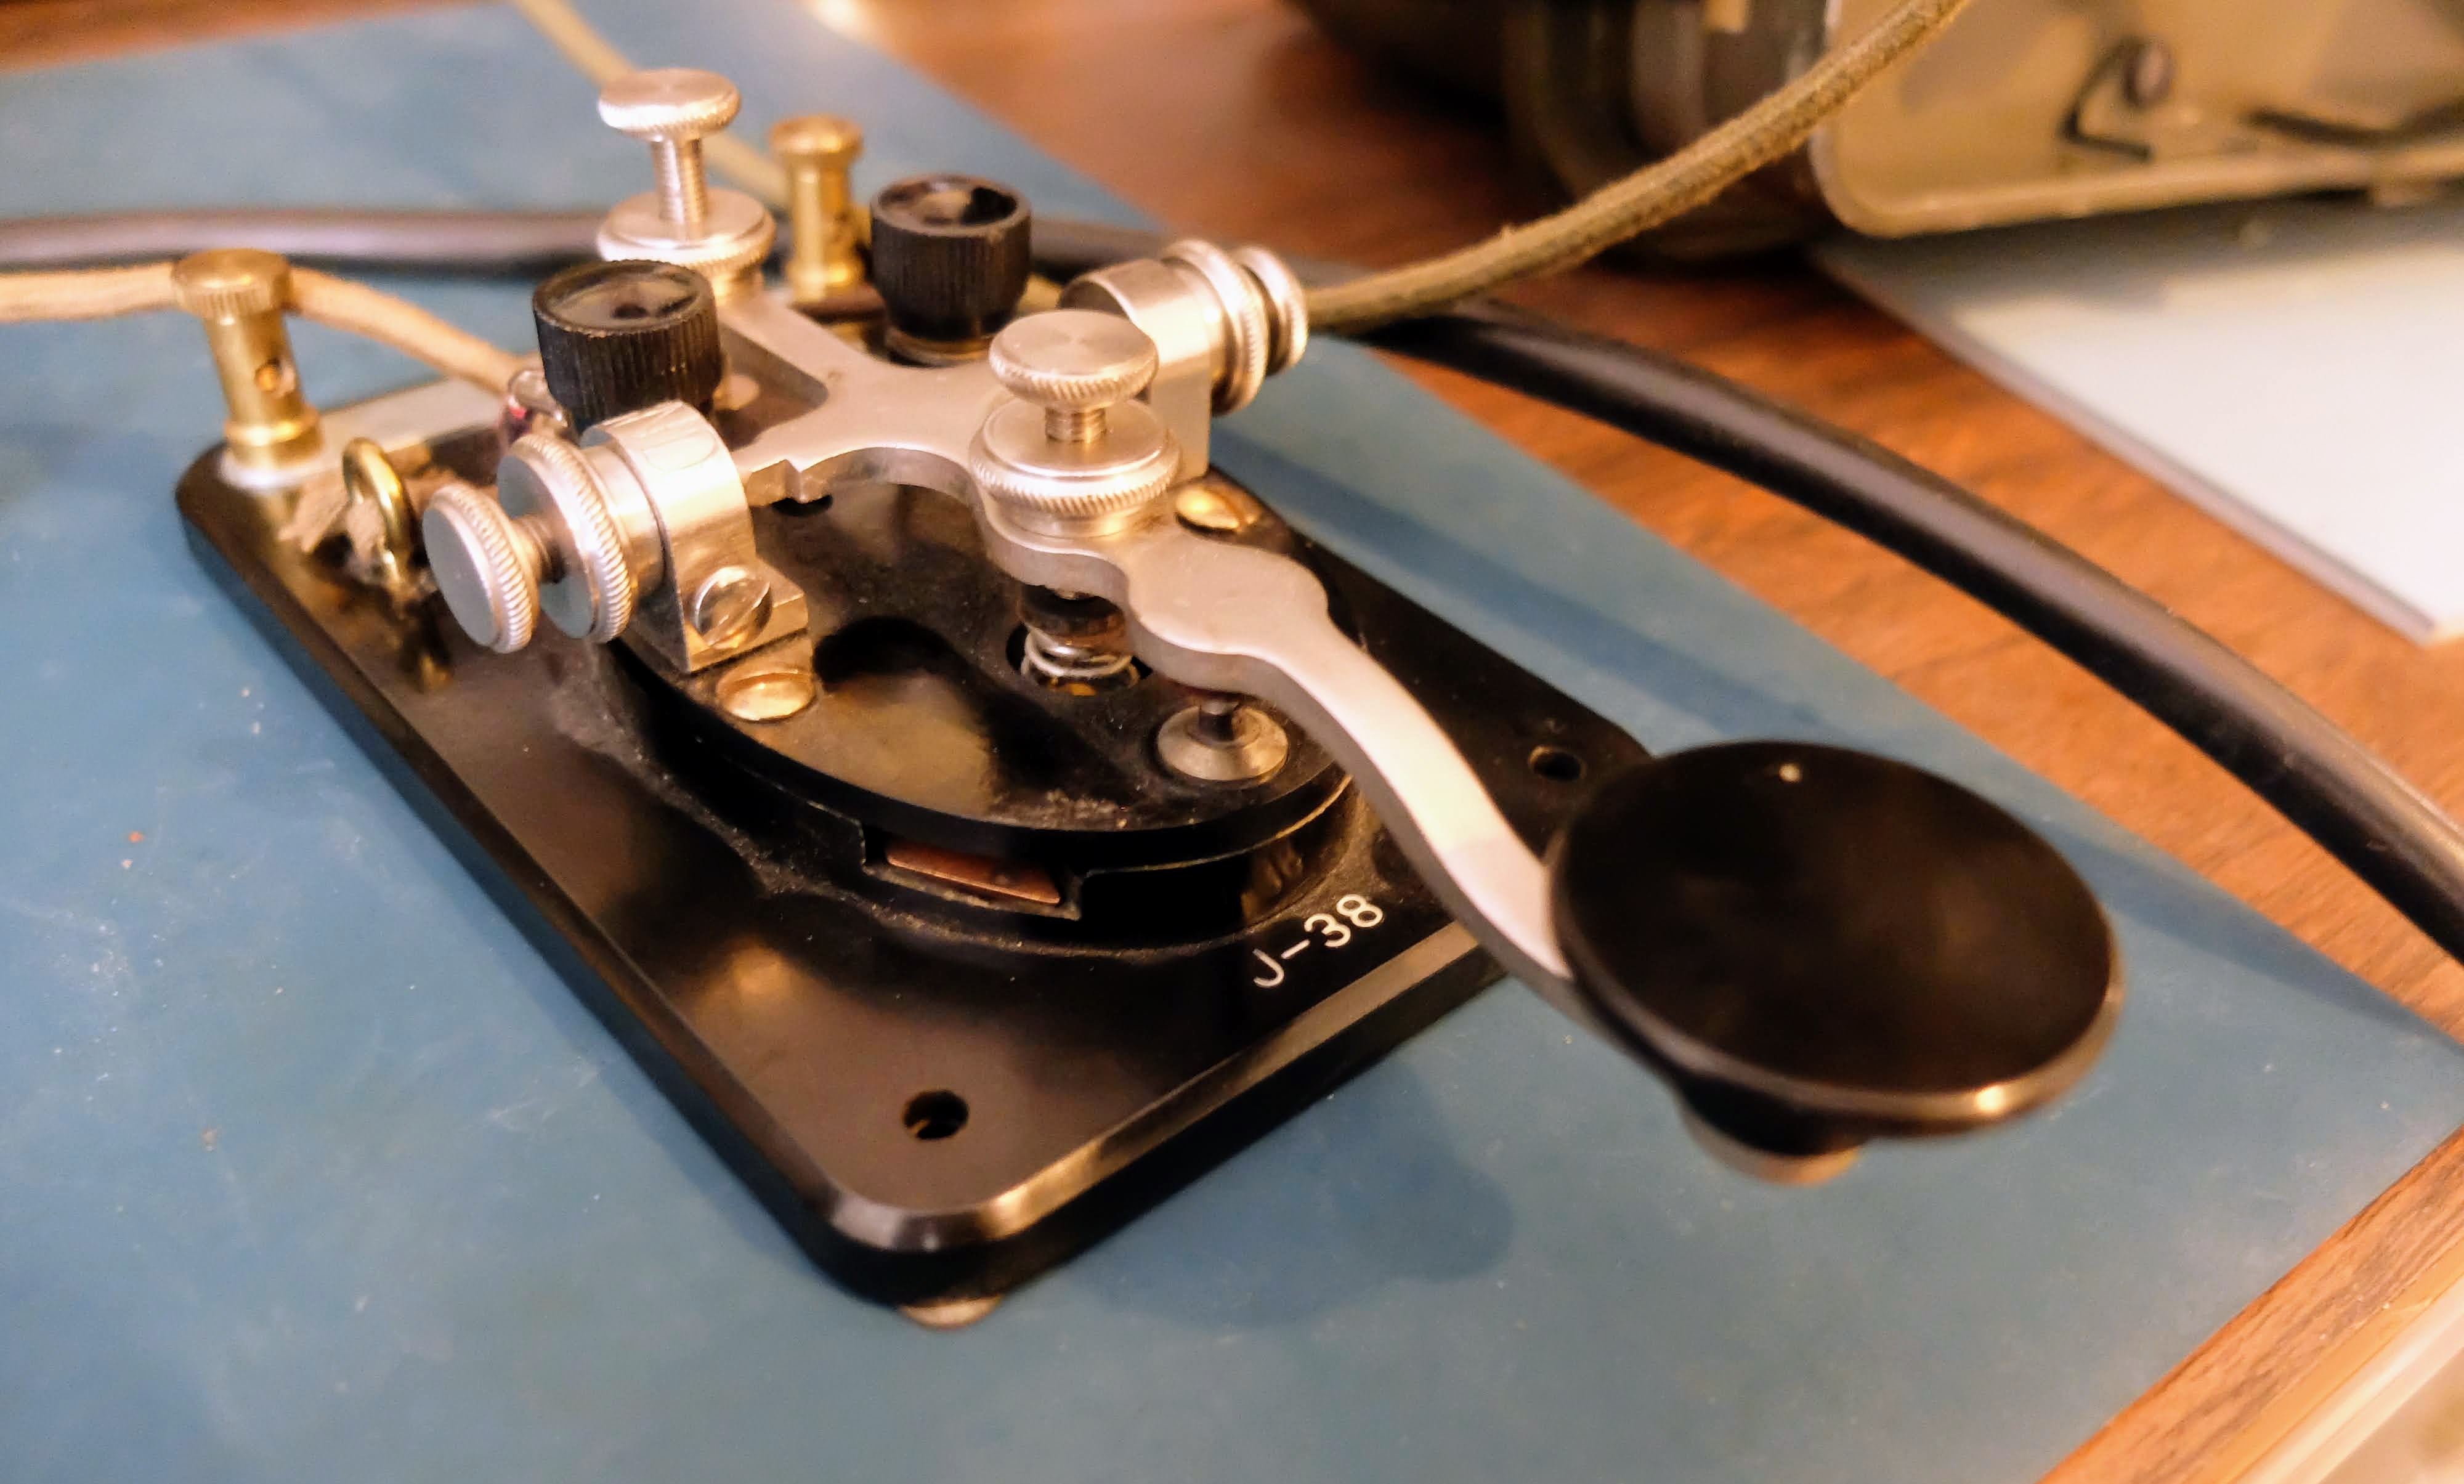
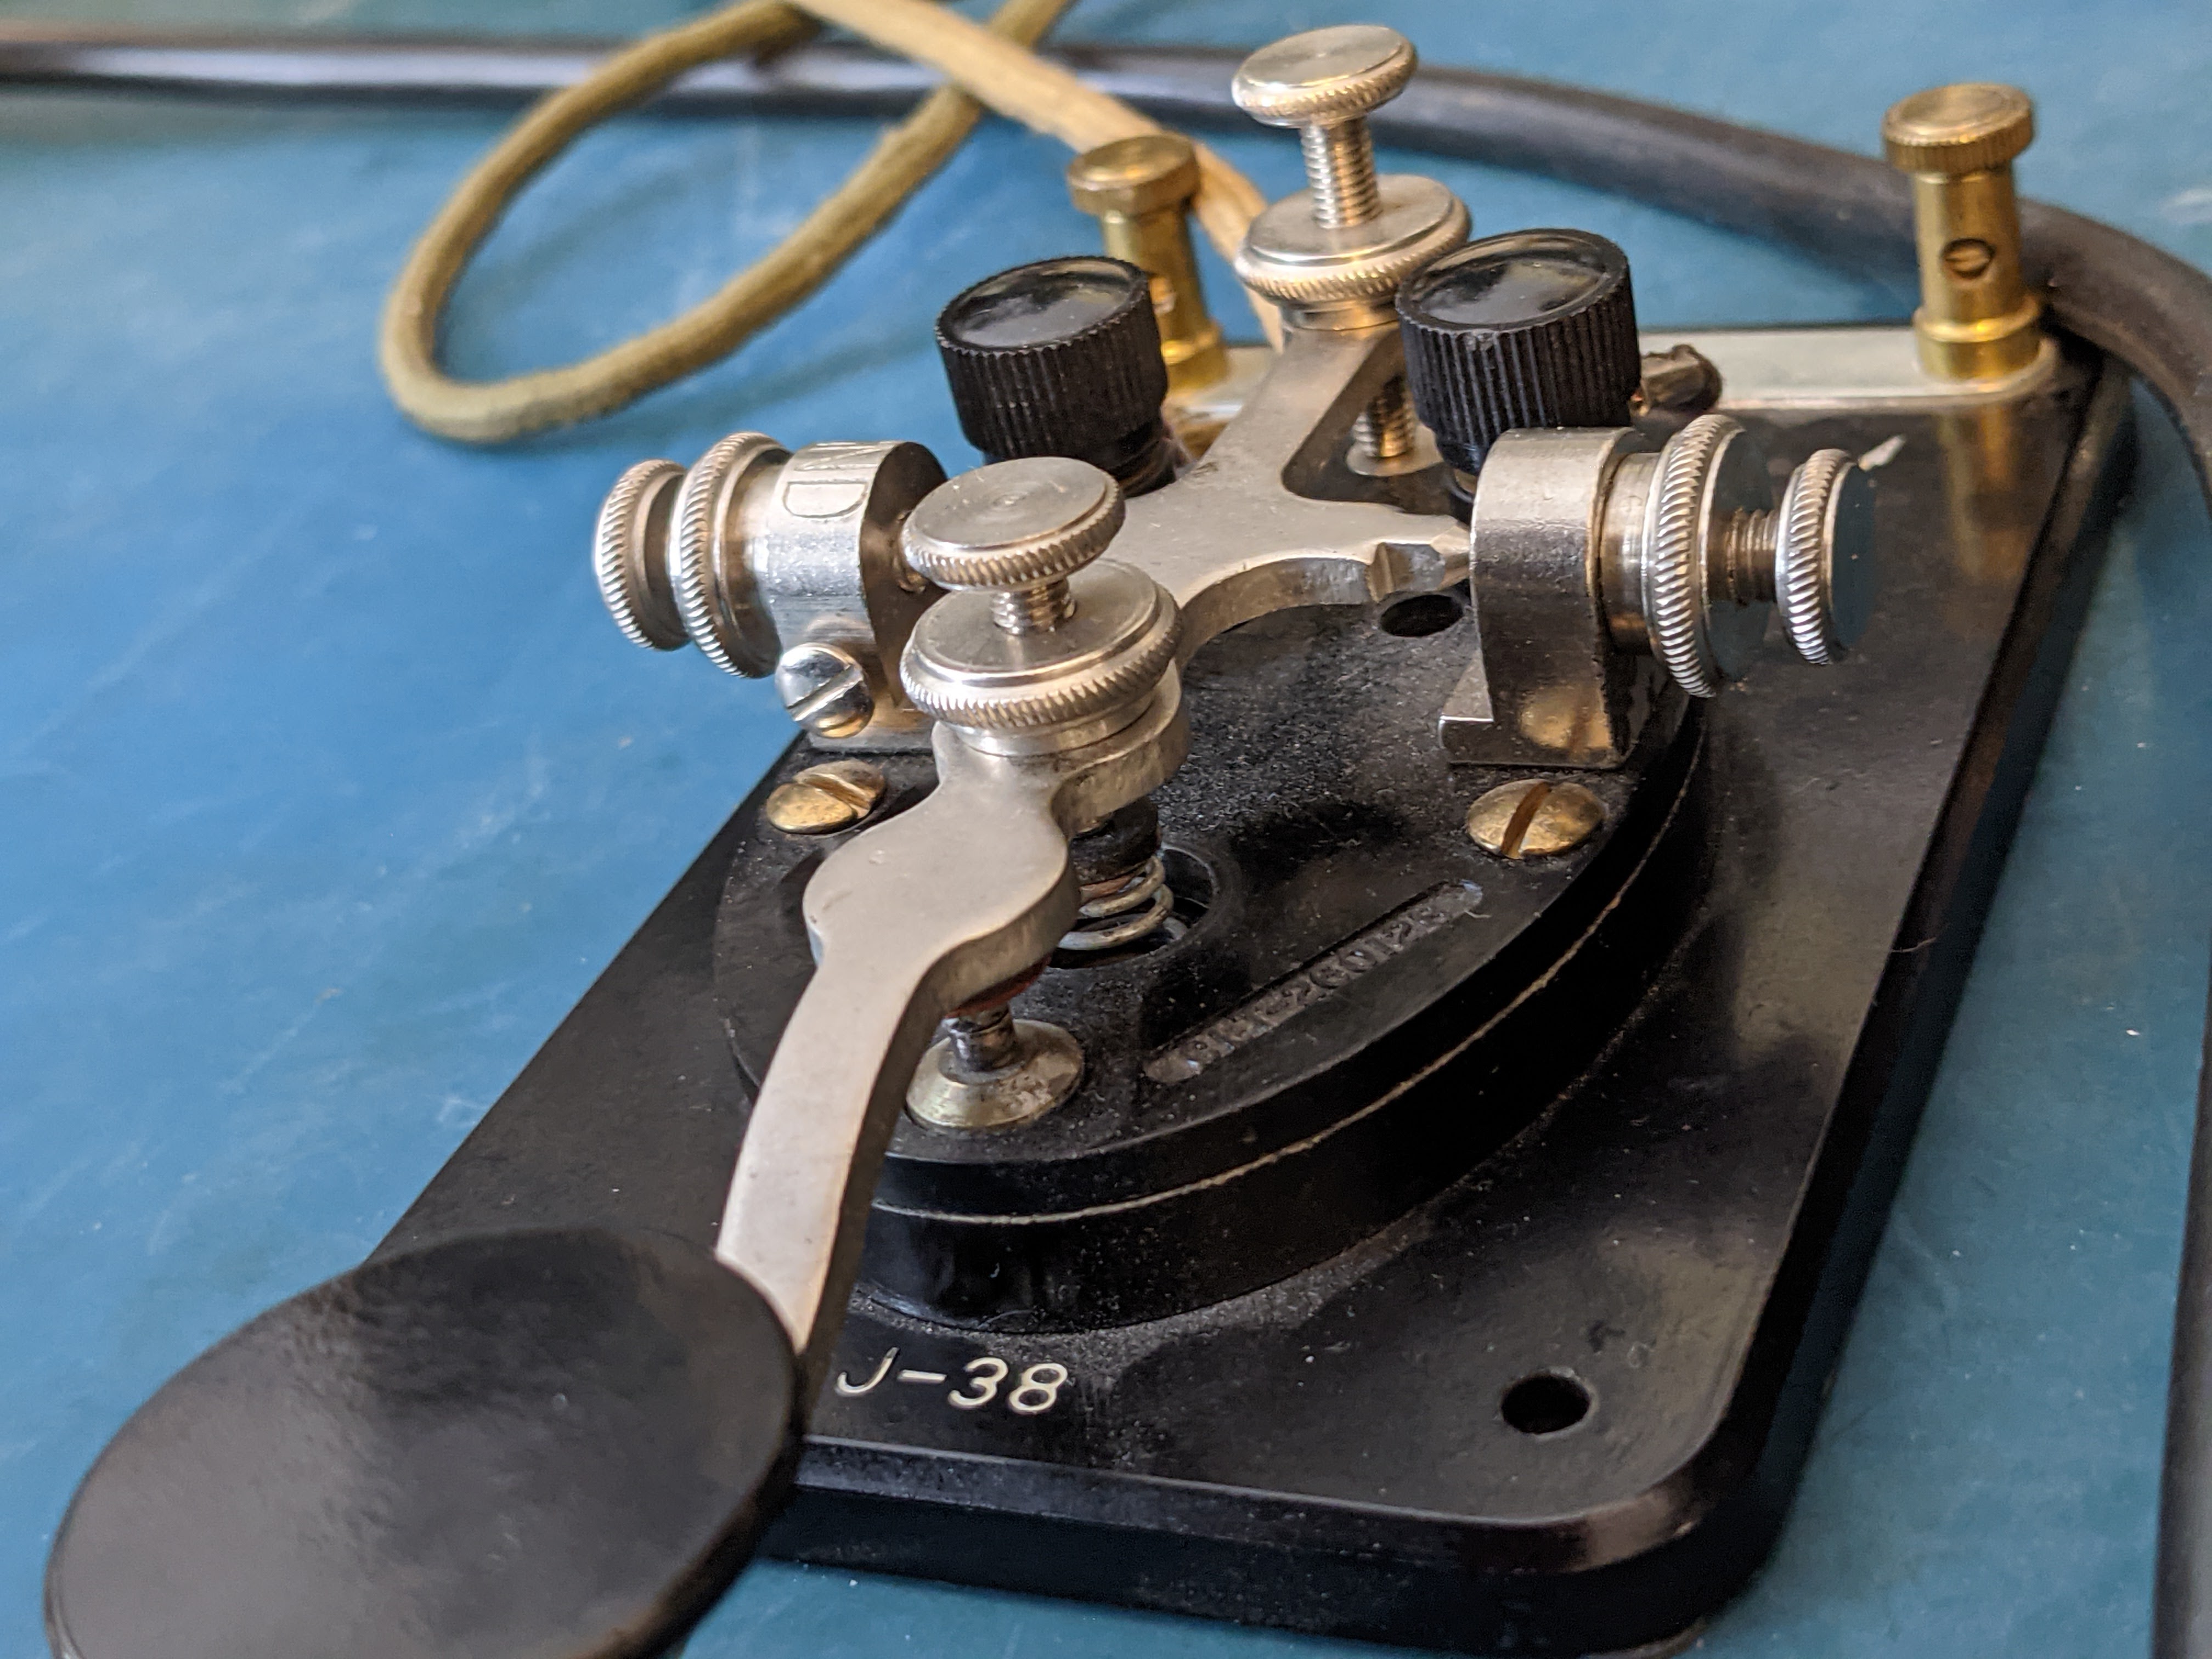
Accessories
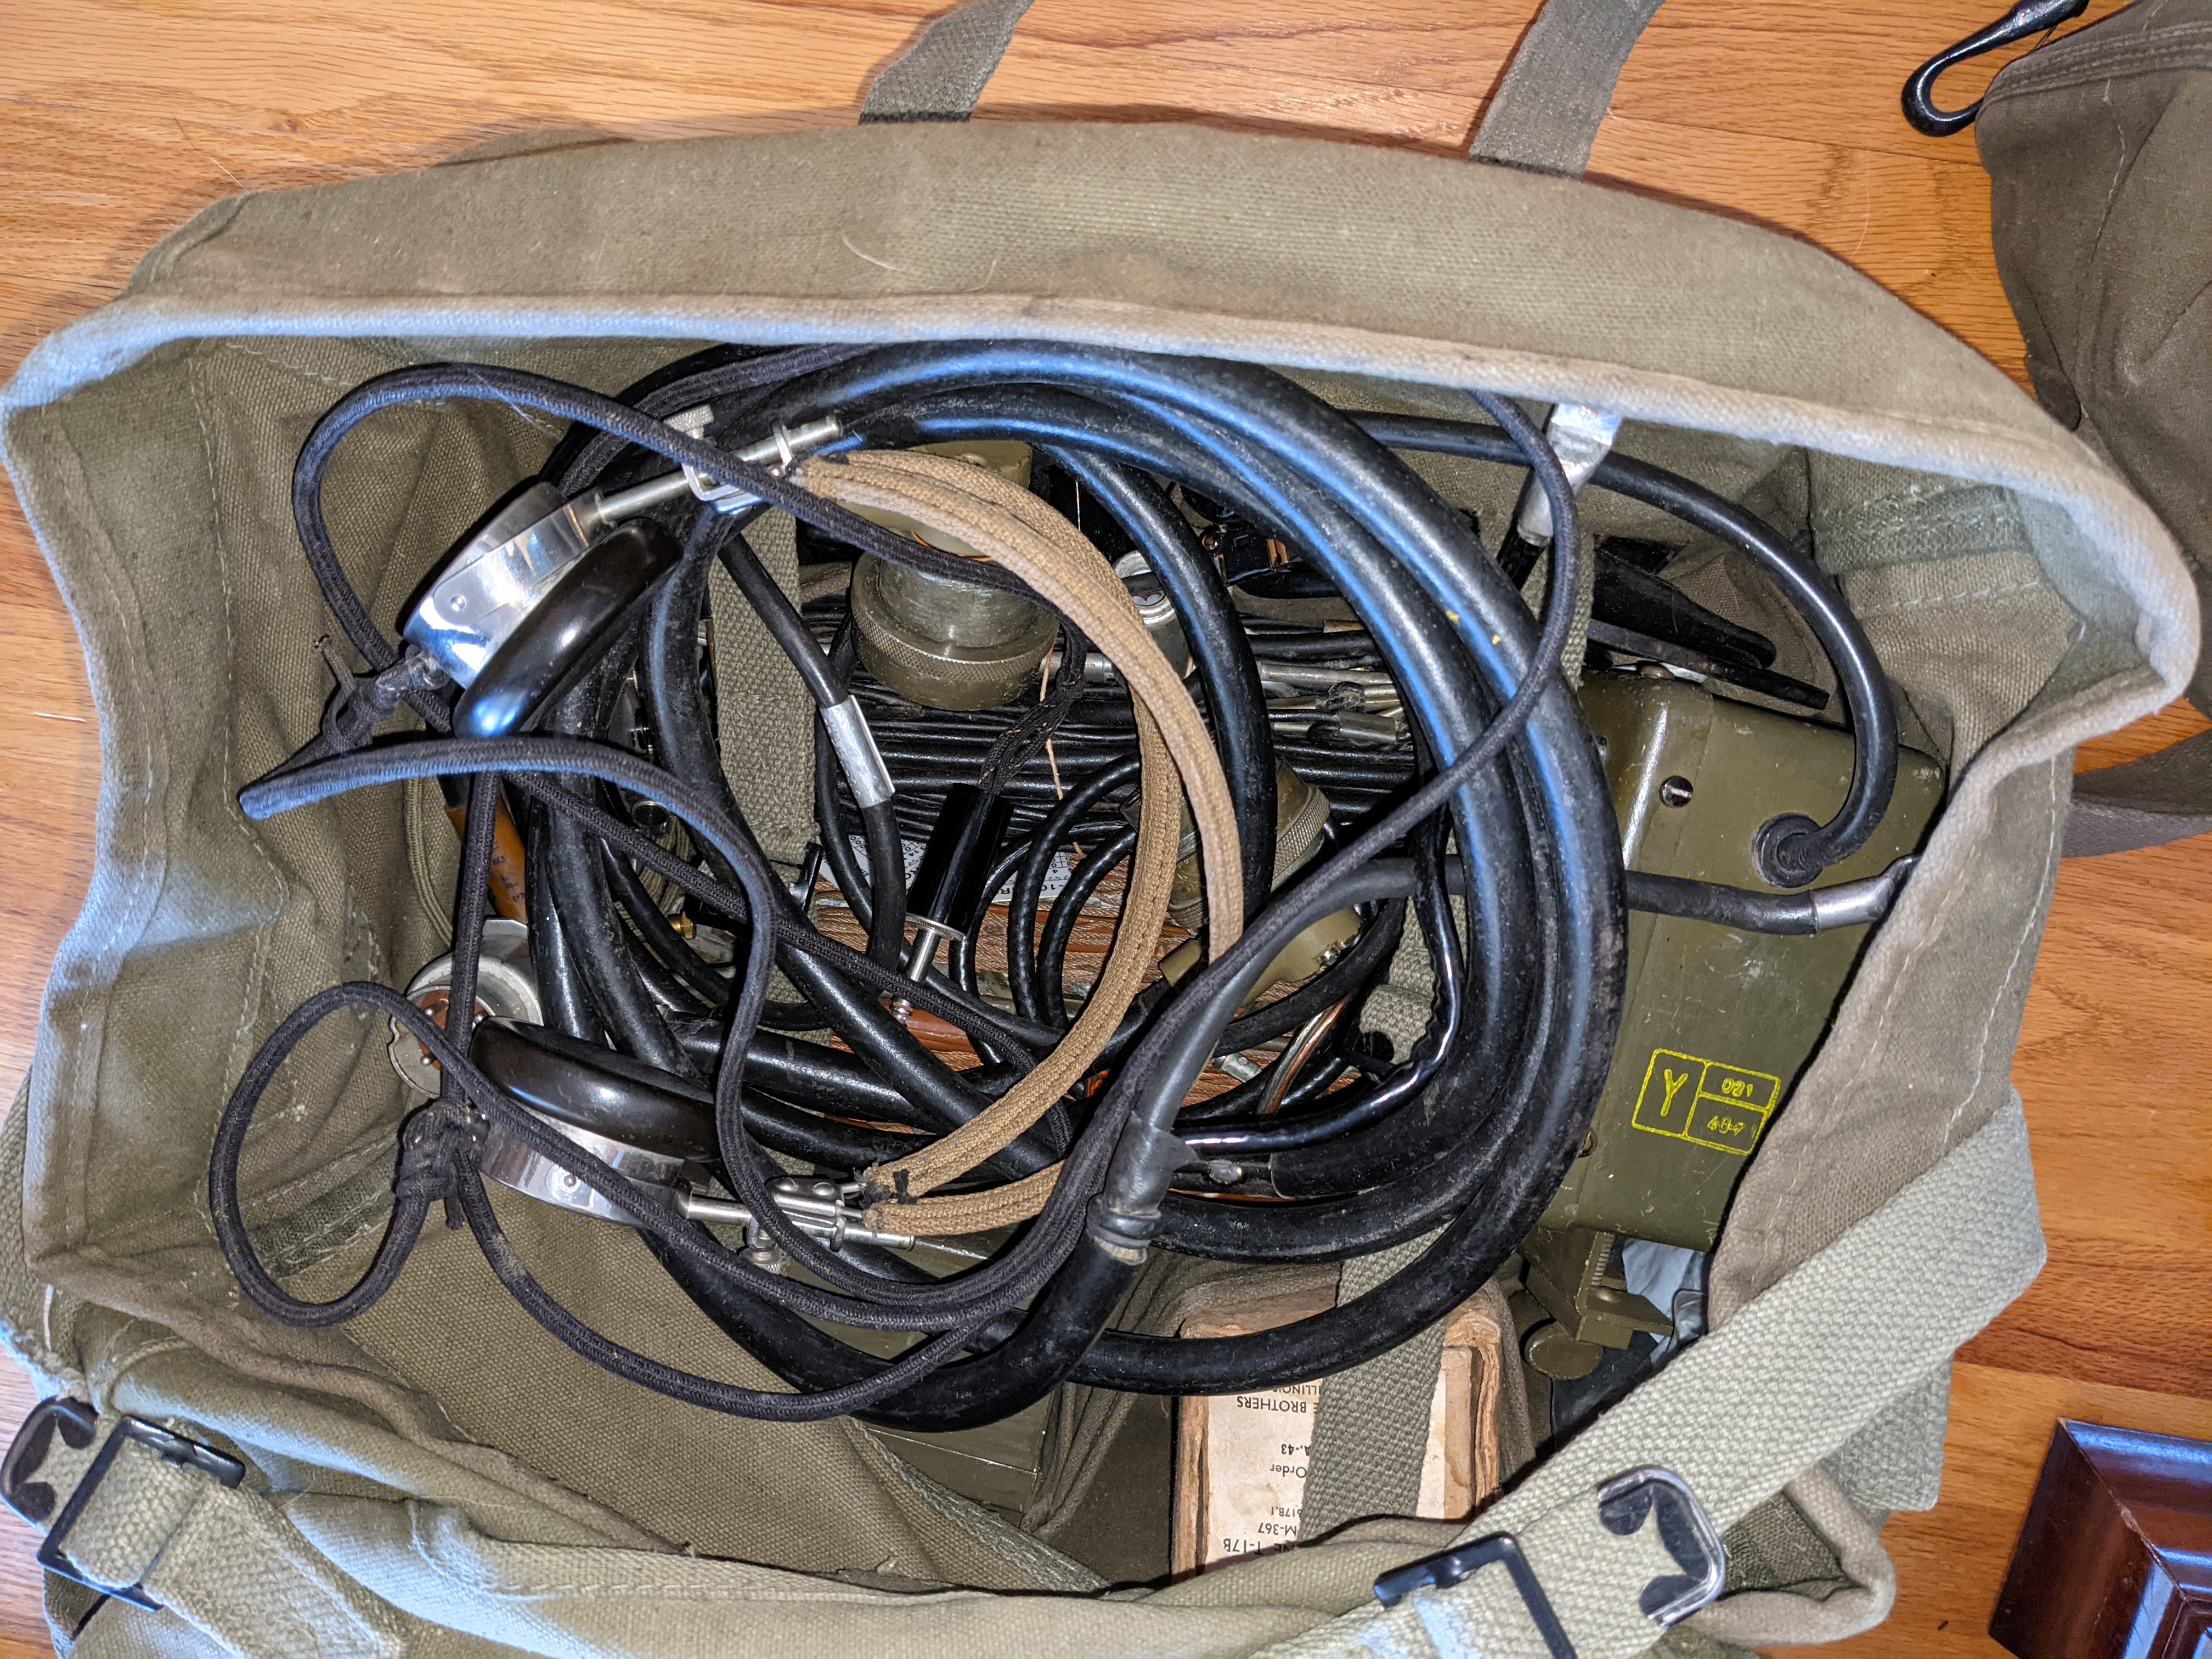 |
| Bag of goodies |
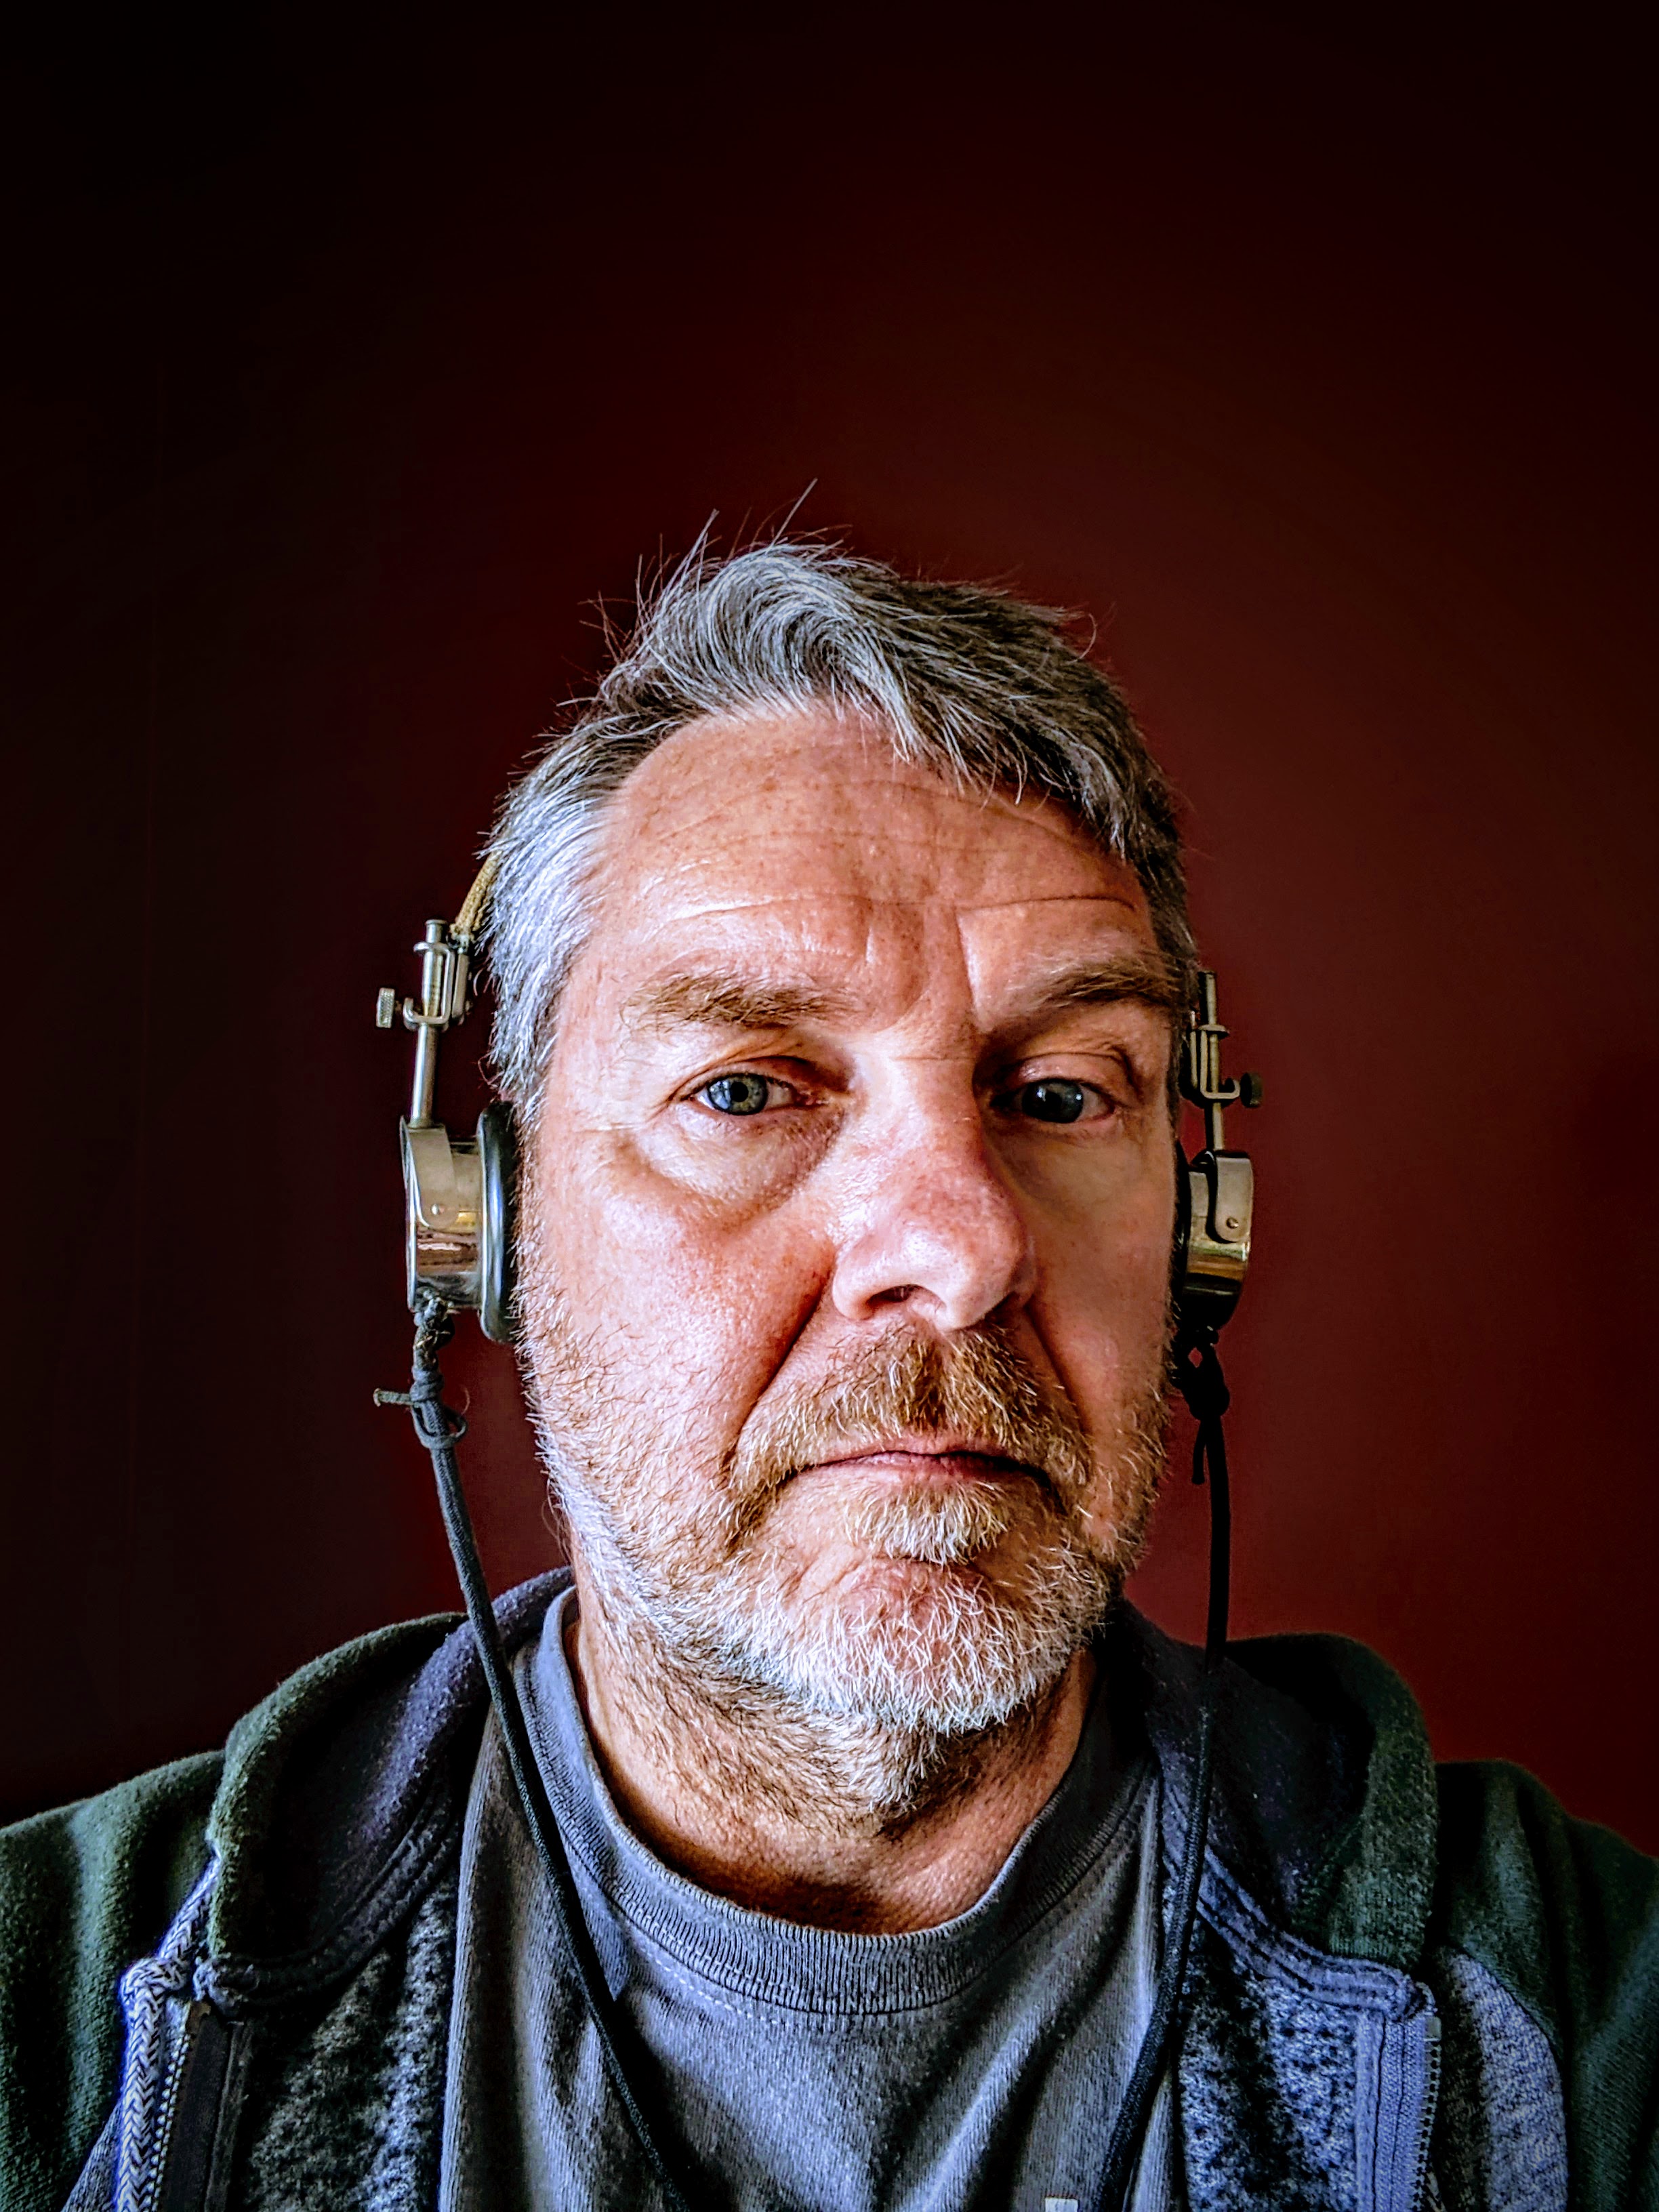
Headphones
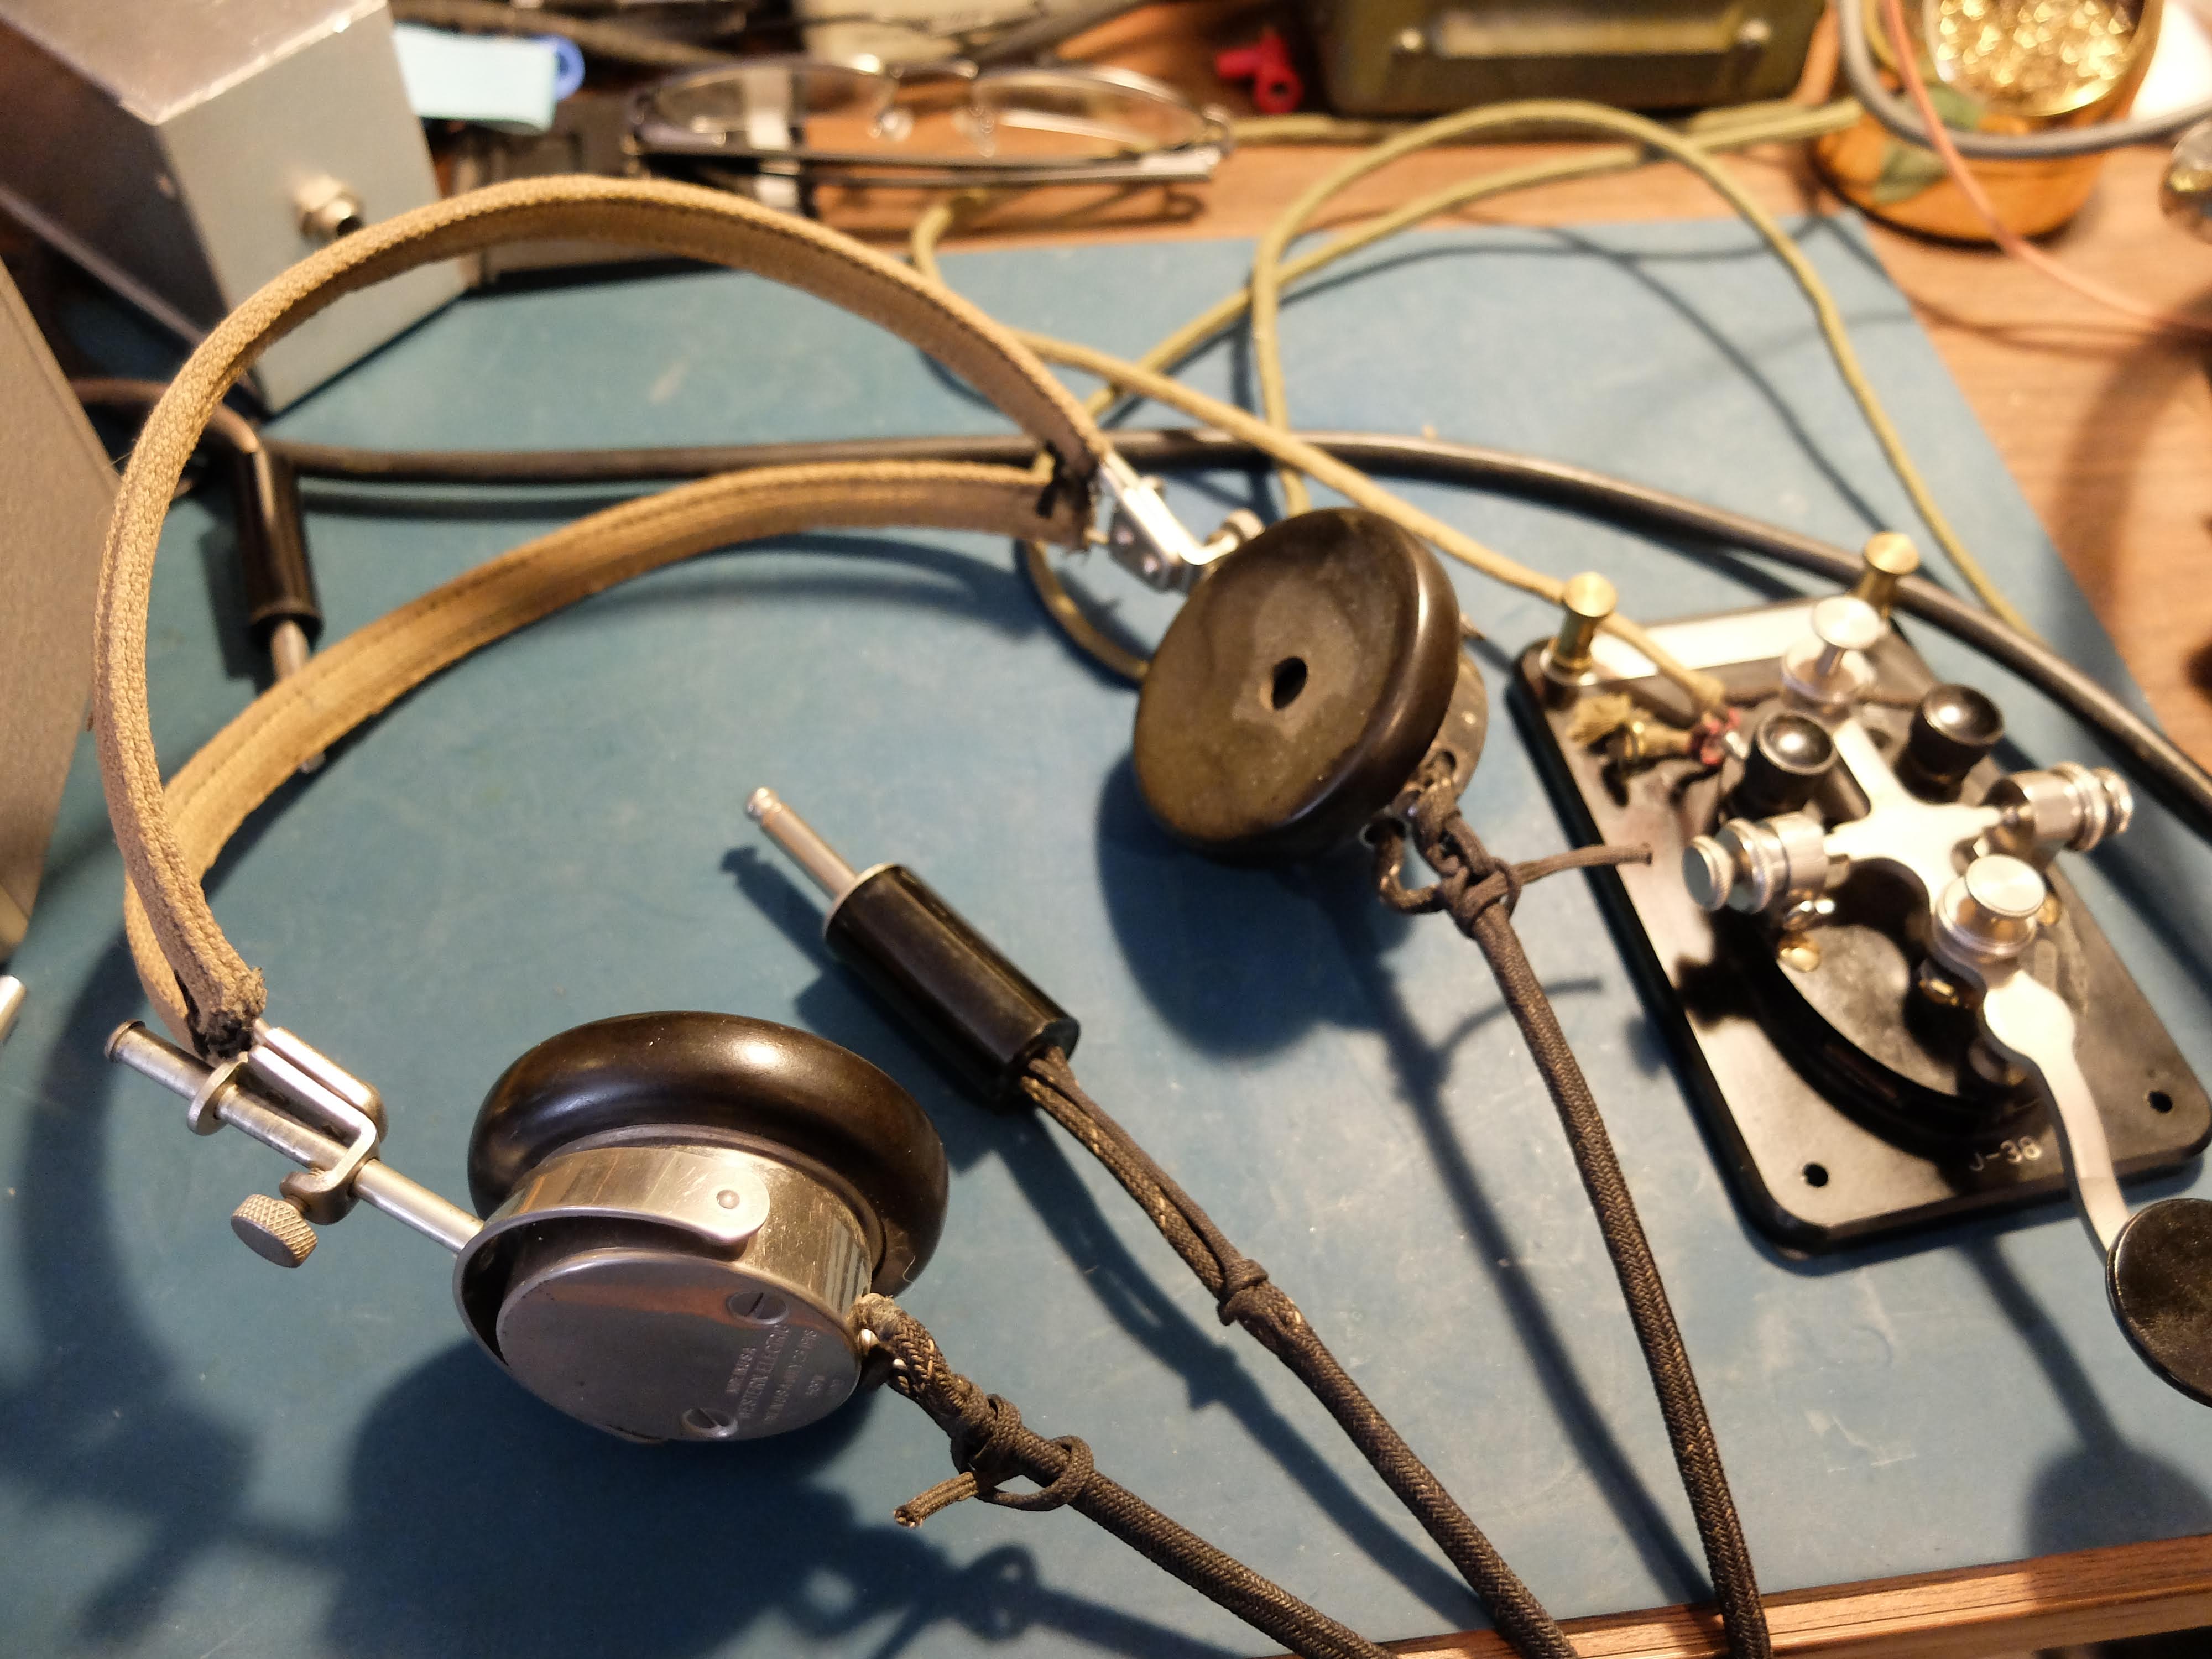

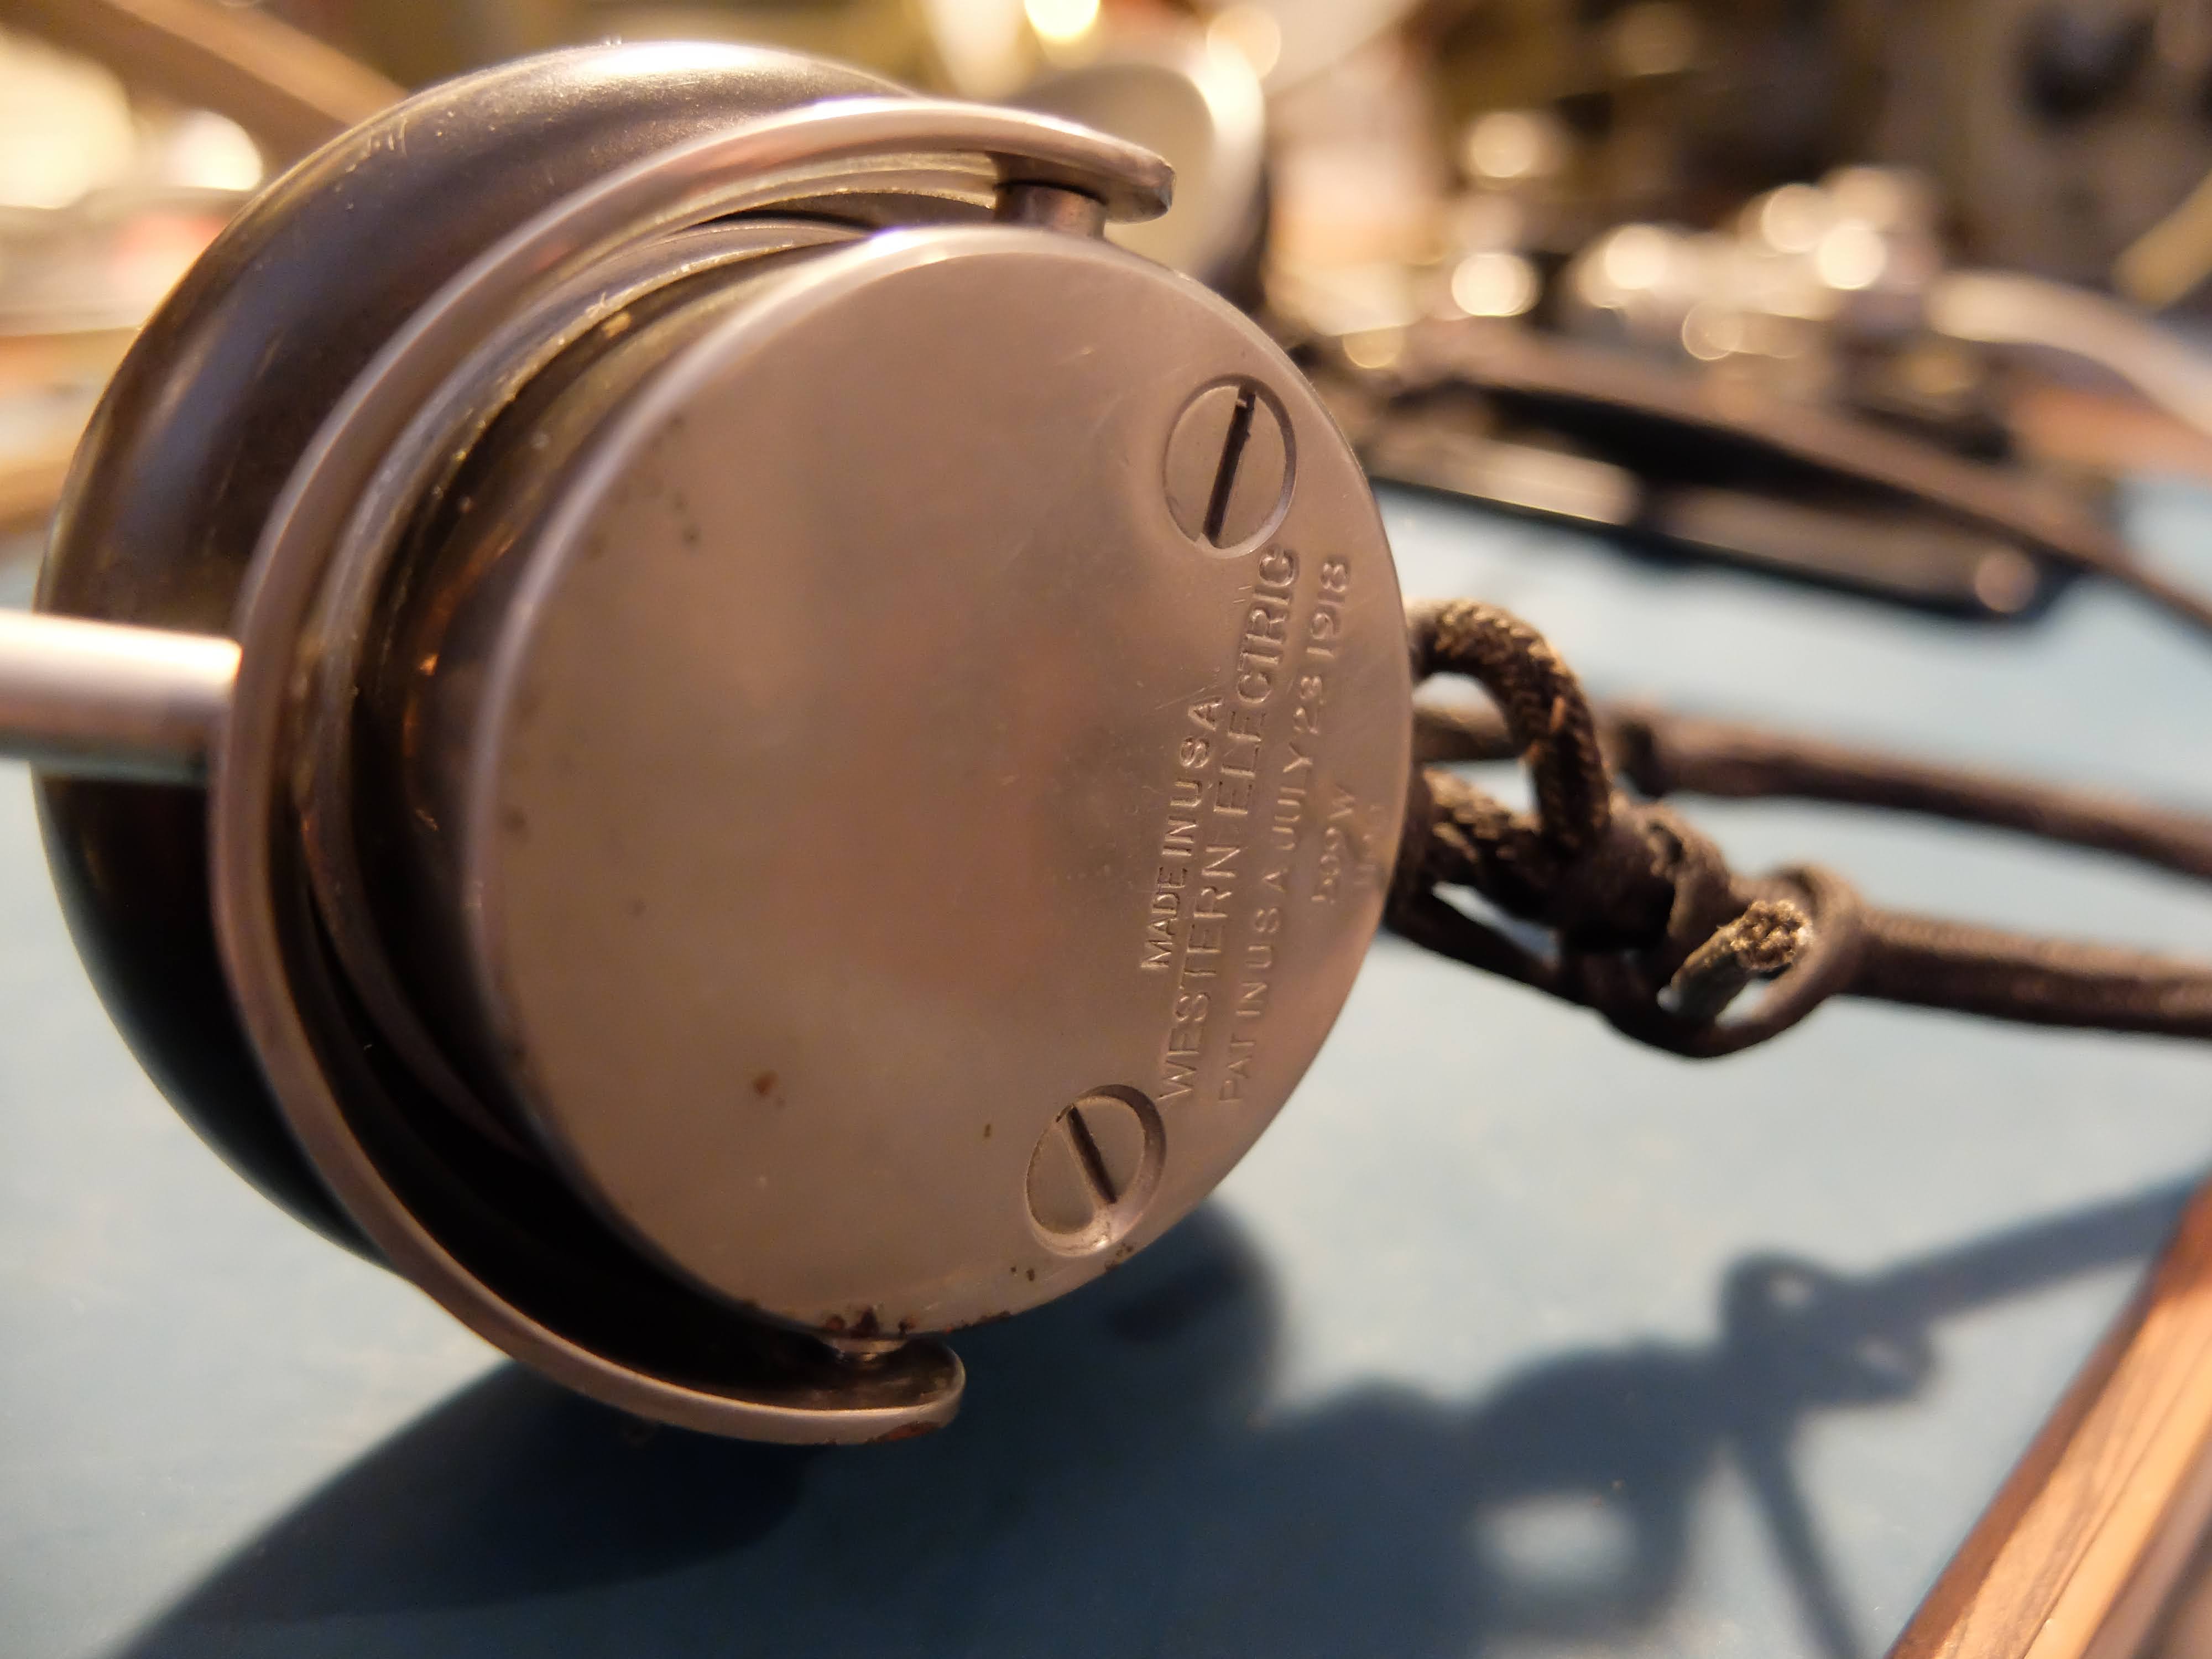
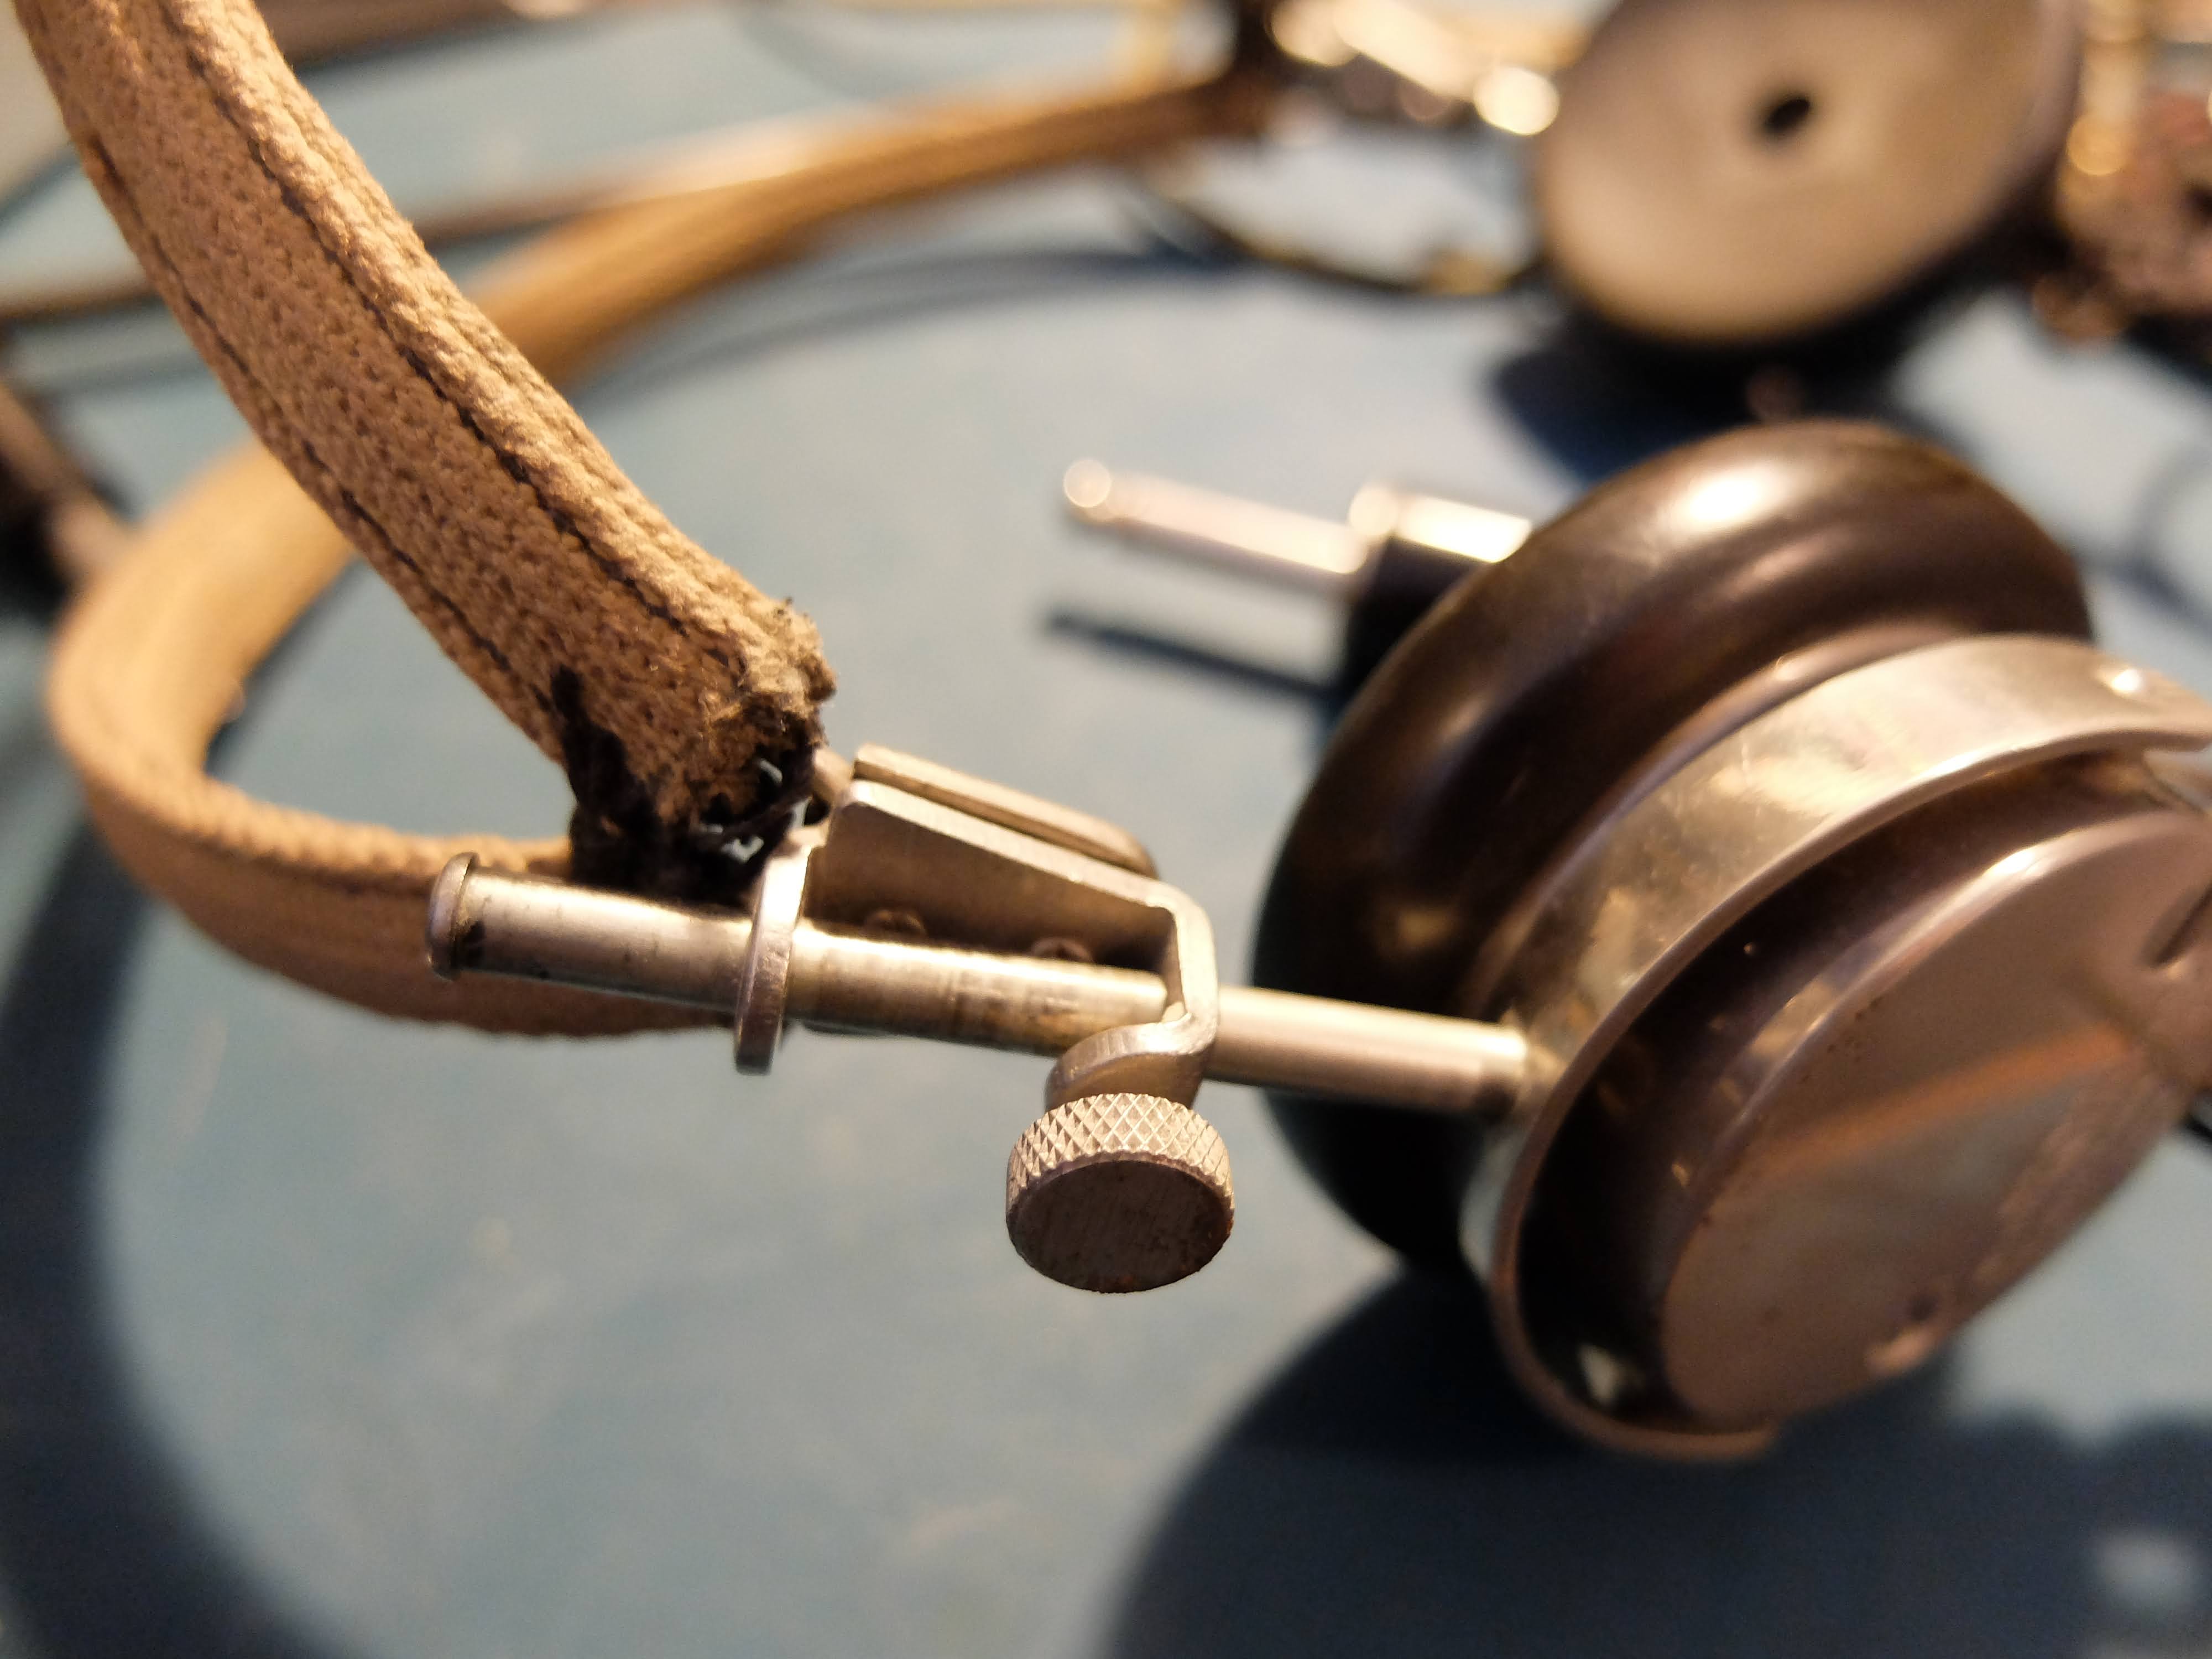
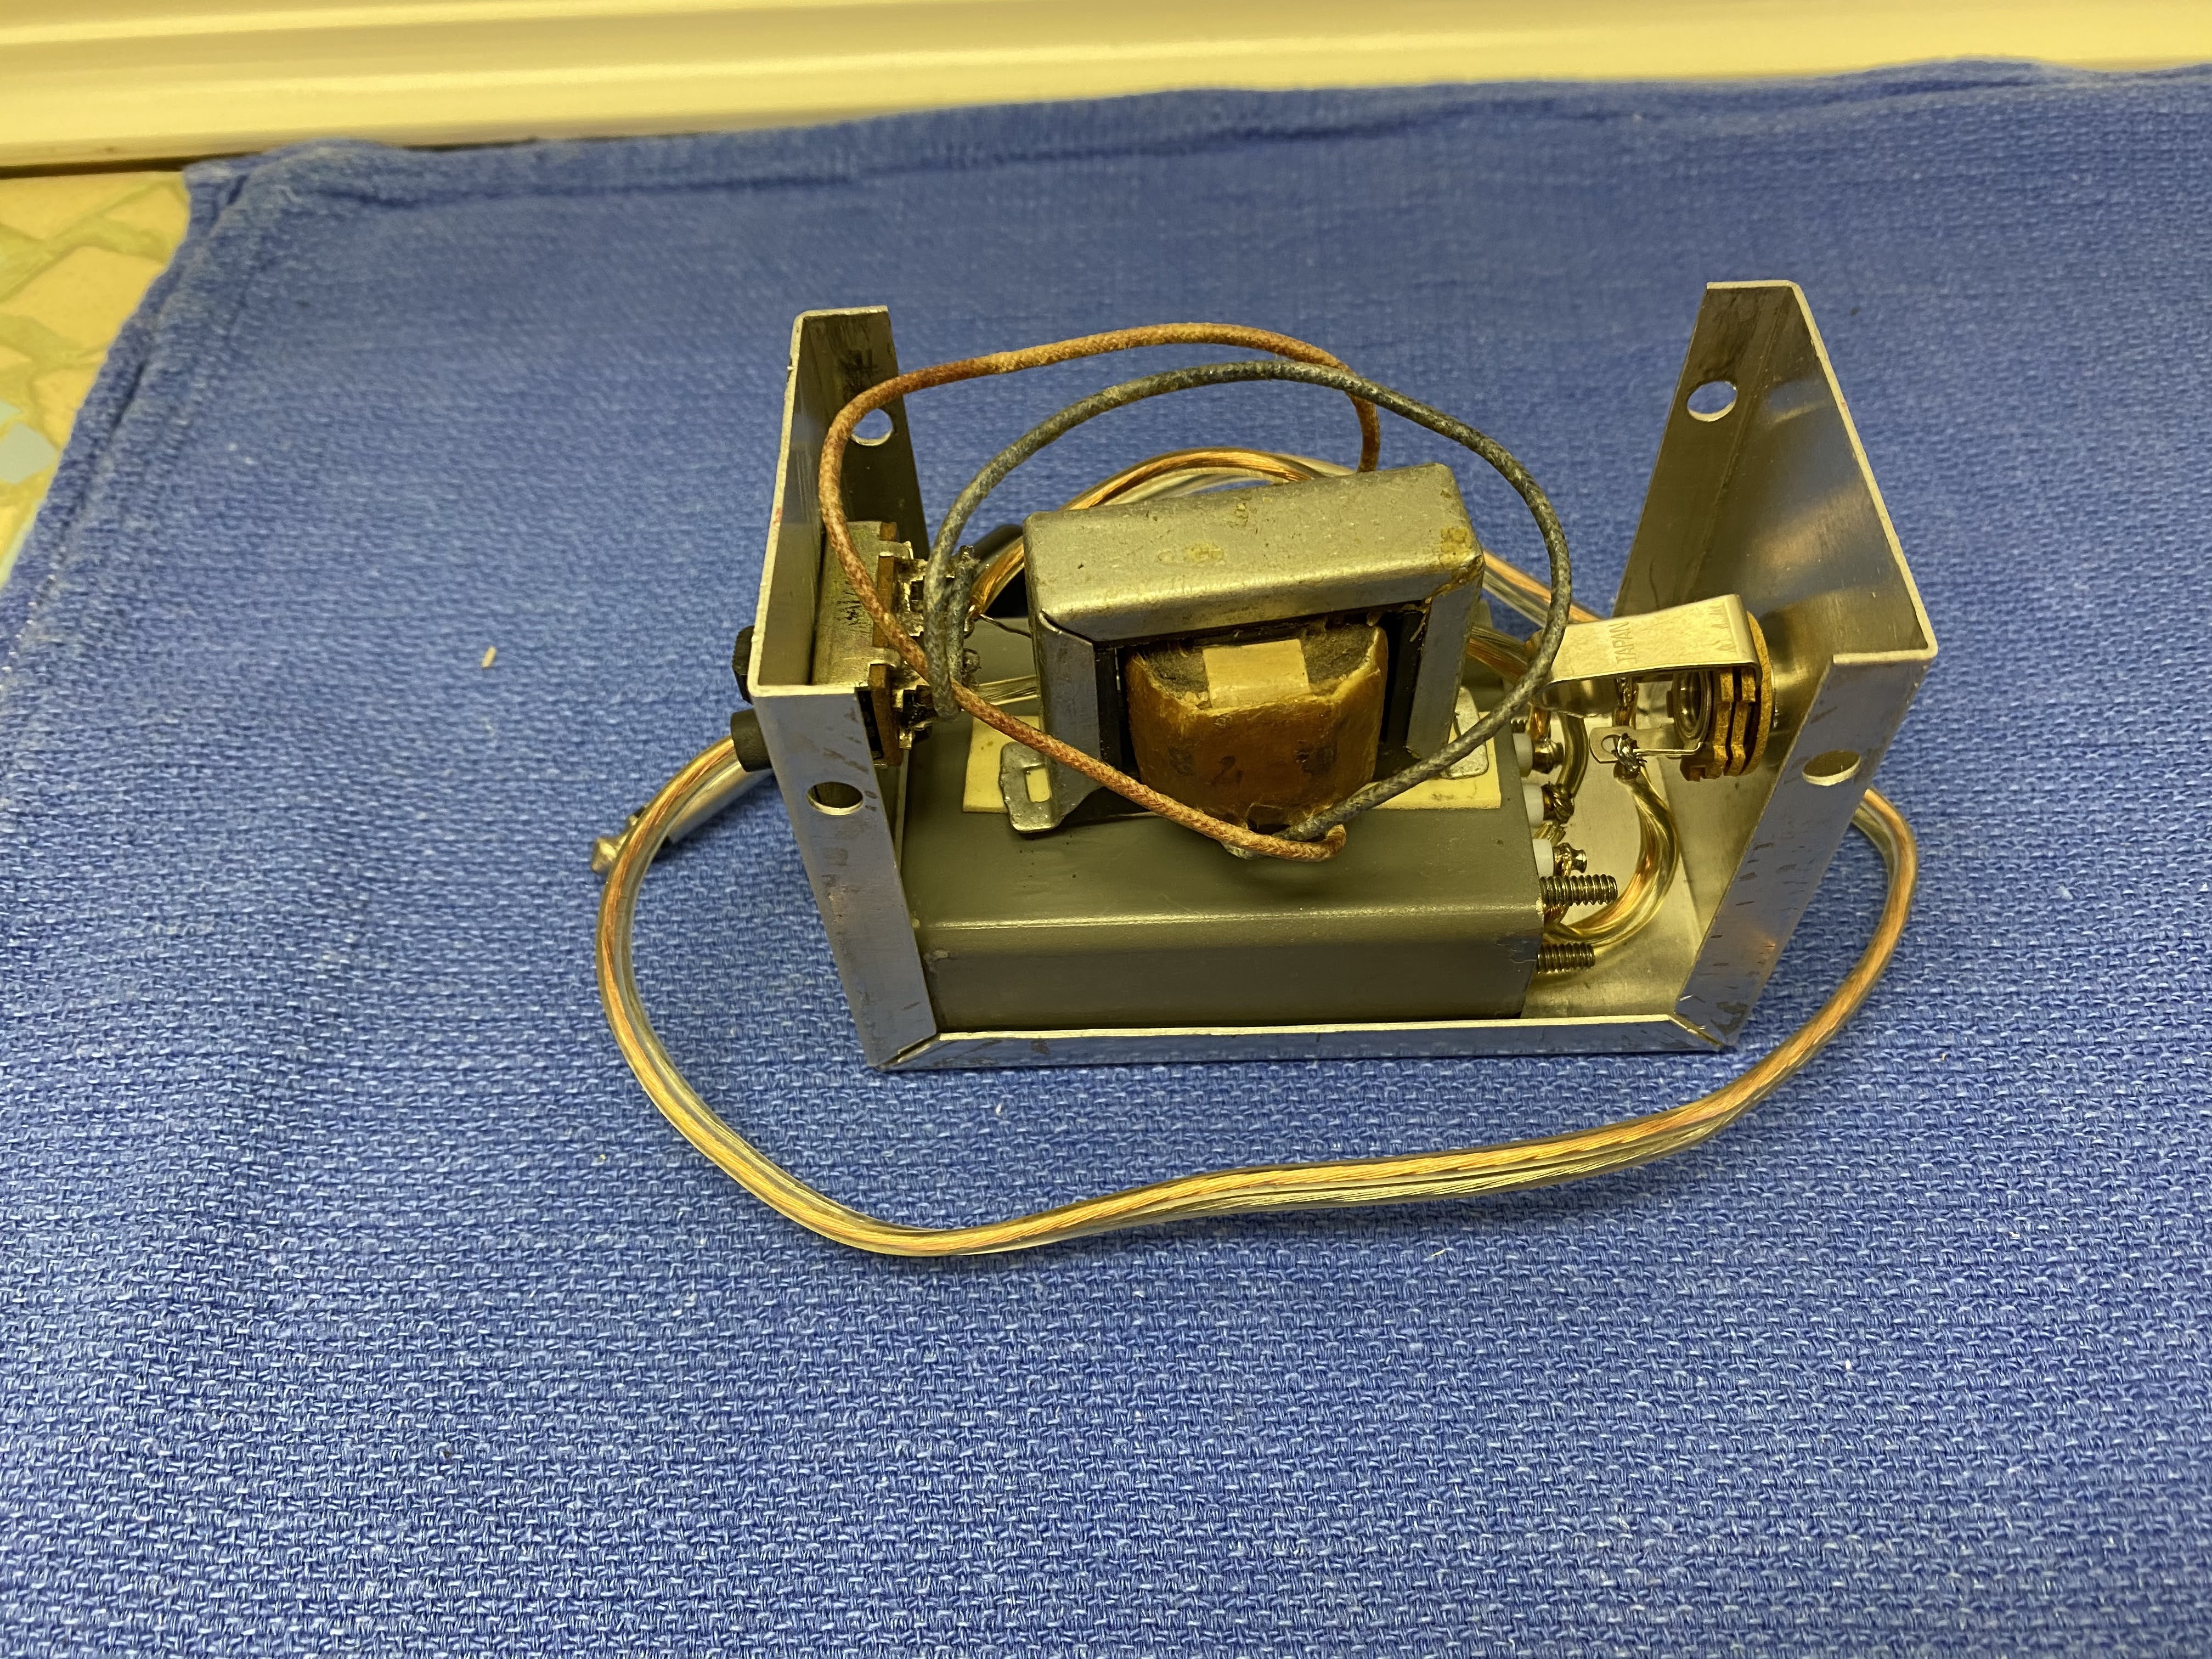 |
| Homebuilt CW filter with impedance switch |
Speaker
Antennas
Spares
More to come
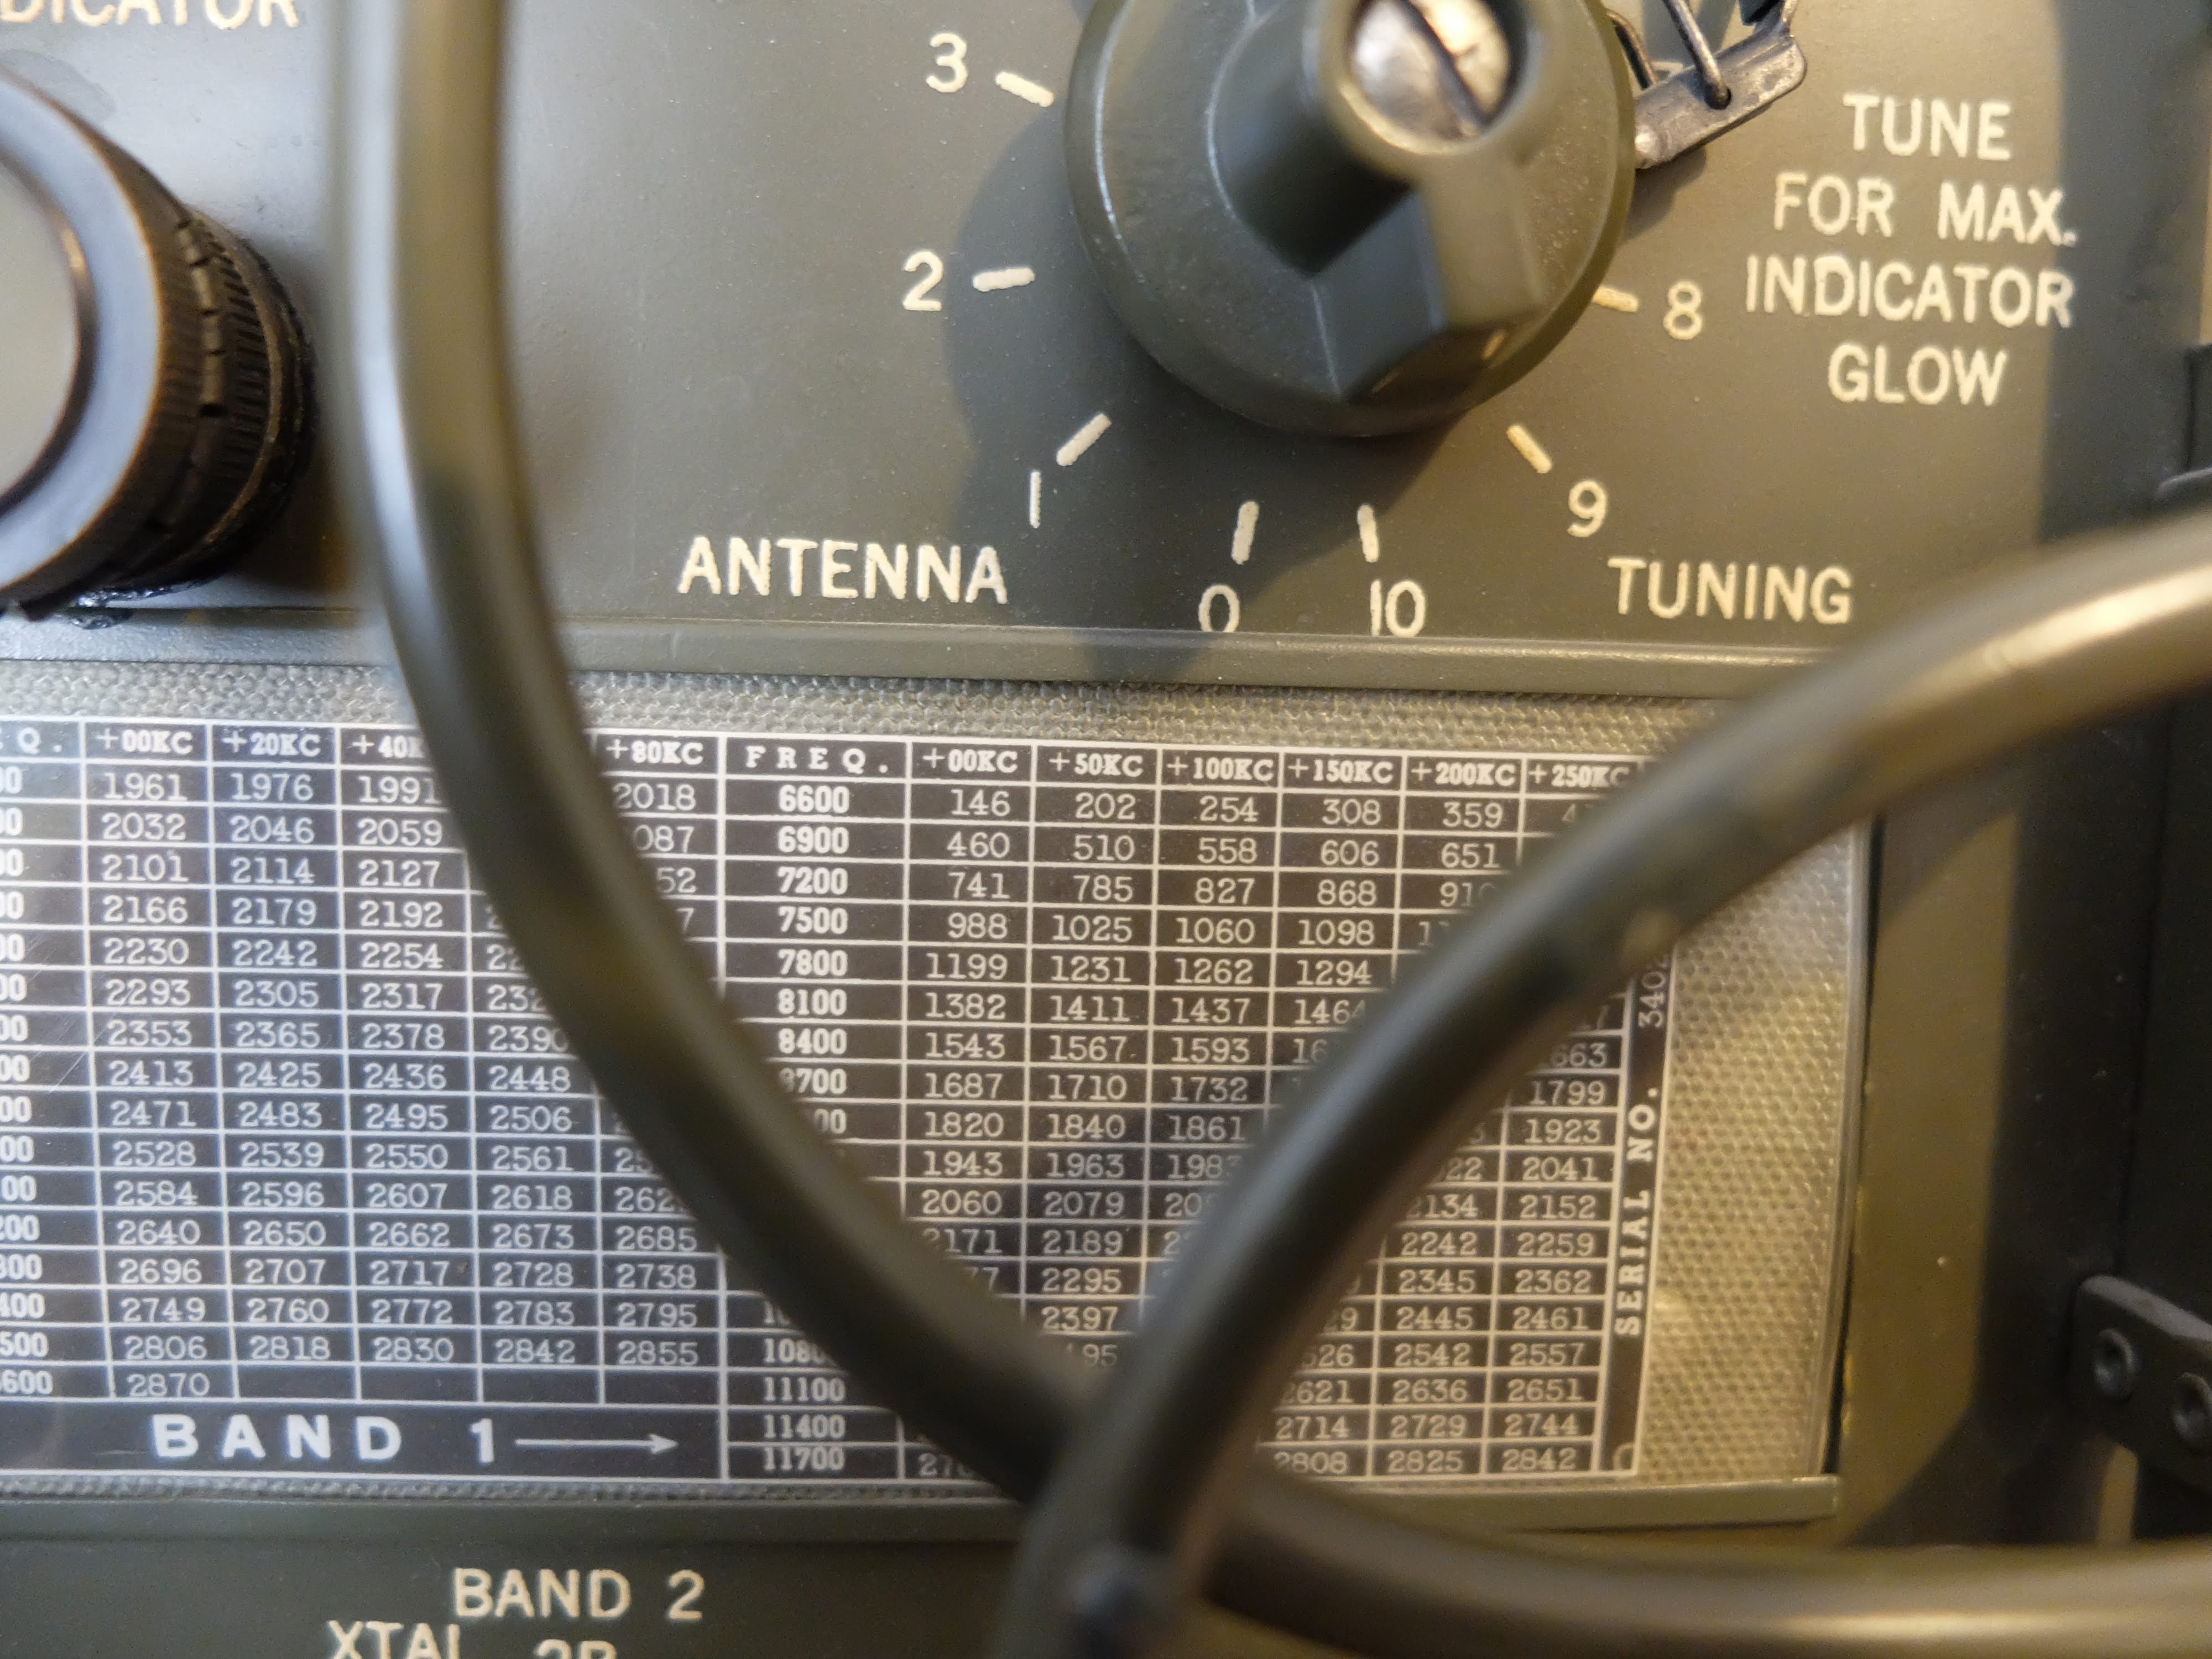
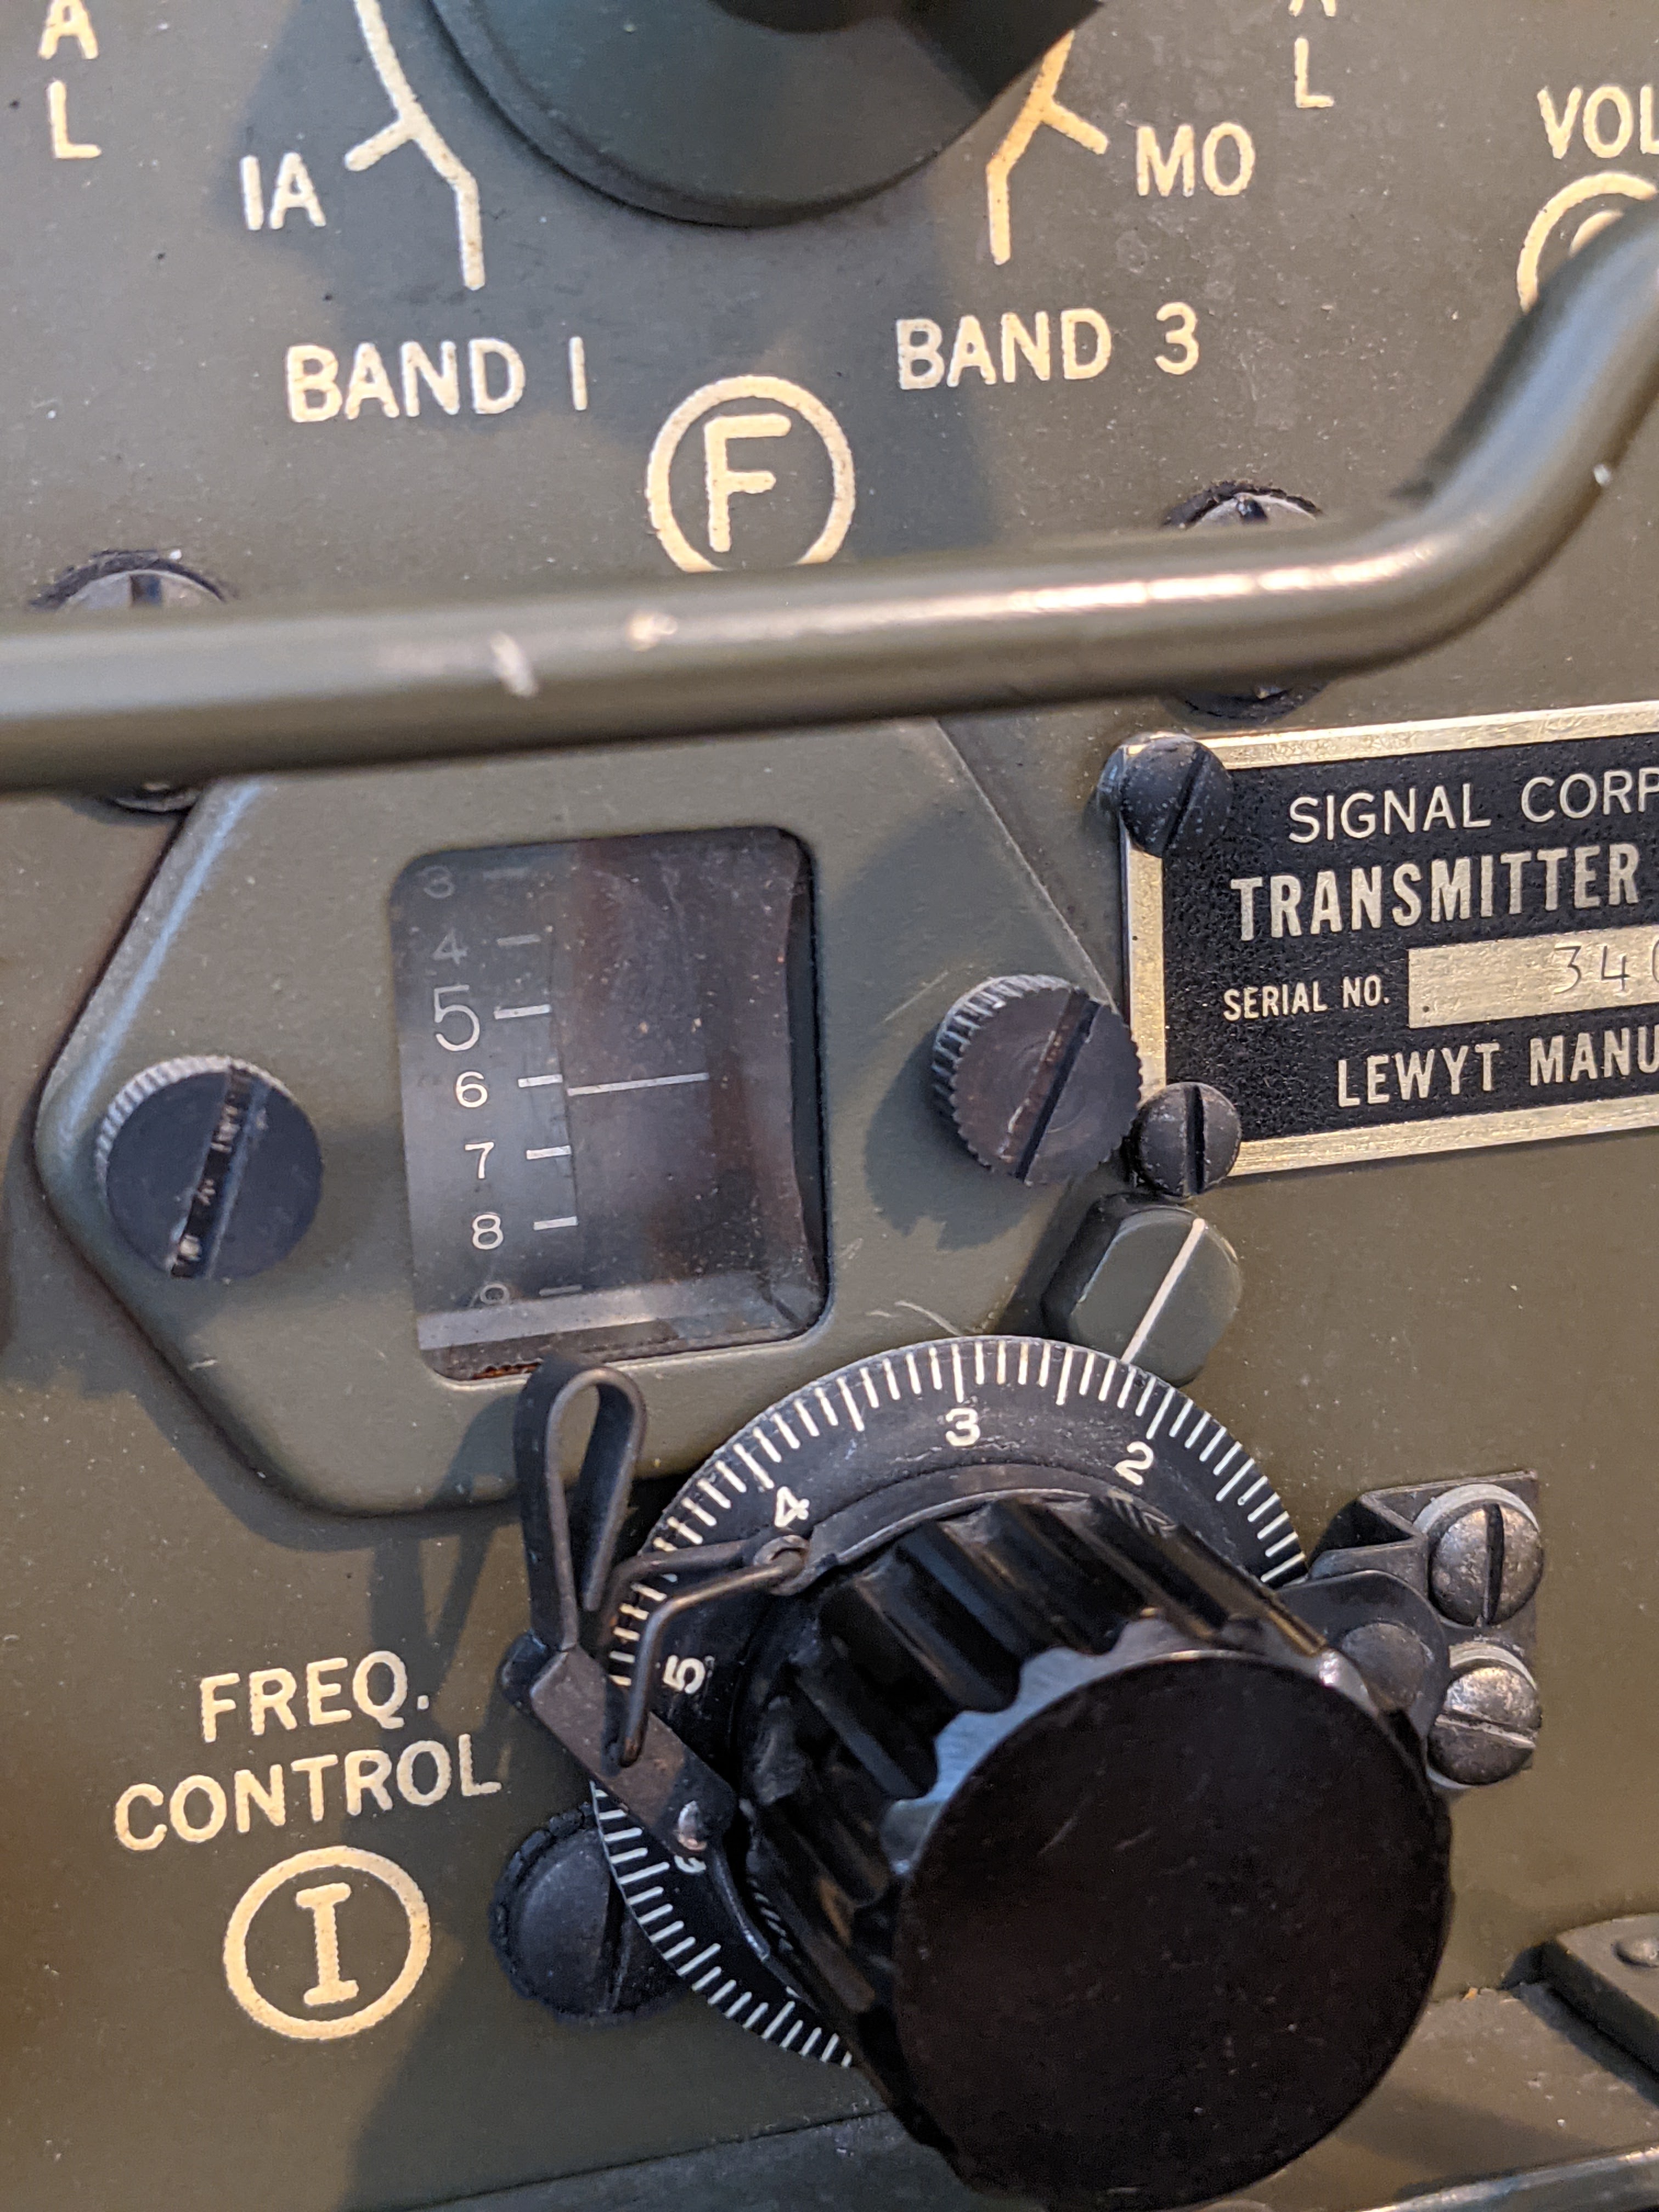
 |
| 50 kHz spacing when reading the frequency on the receiver Note the 7.2 is 7.200 MHz in the 40m band |
Images


Notes
Instructions for restoring a vibrator to operation
Richard Carpenter, AA4OO, is a regular contributor to AmateurRadio.com and writes from North Carolina, USA. Contact him at [email protected].
Snow stopped Transmission.
This Sunday morning we have had a good dumping of snow over the Midlands area..
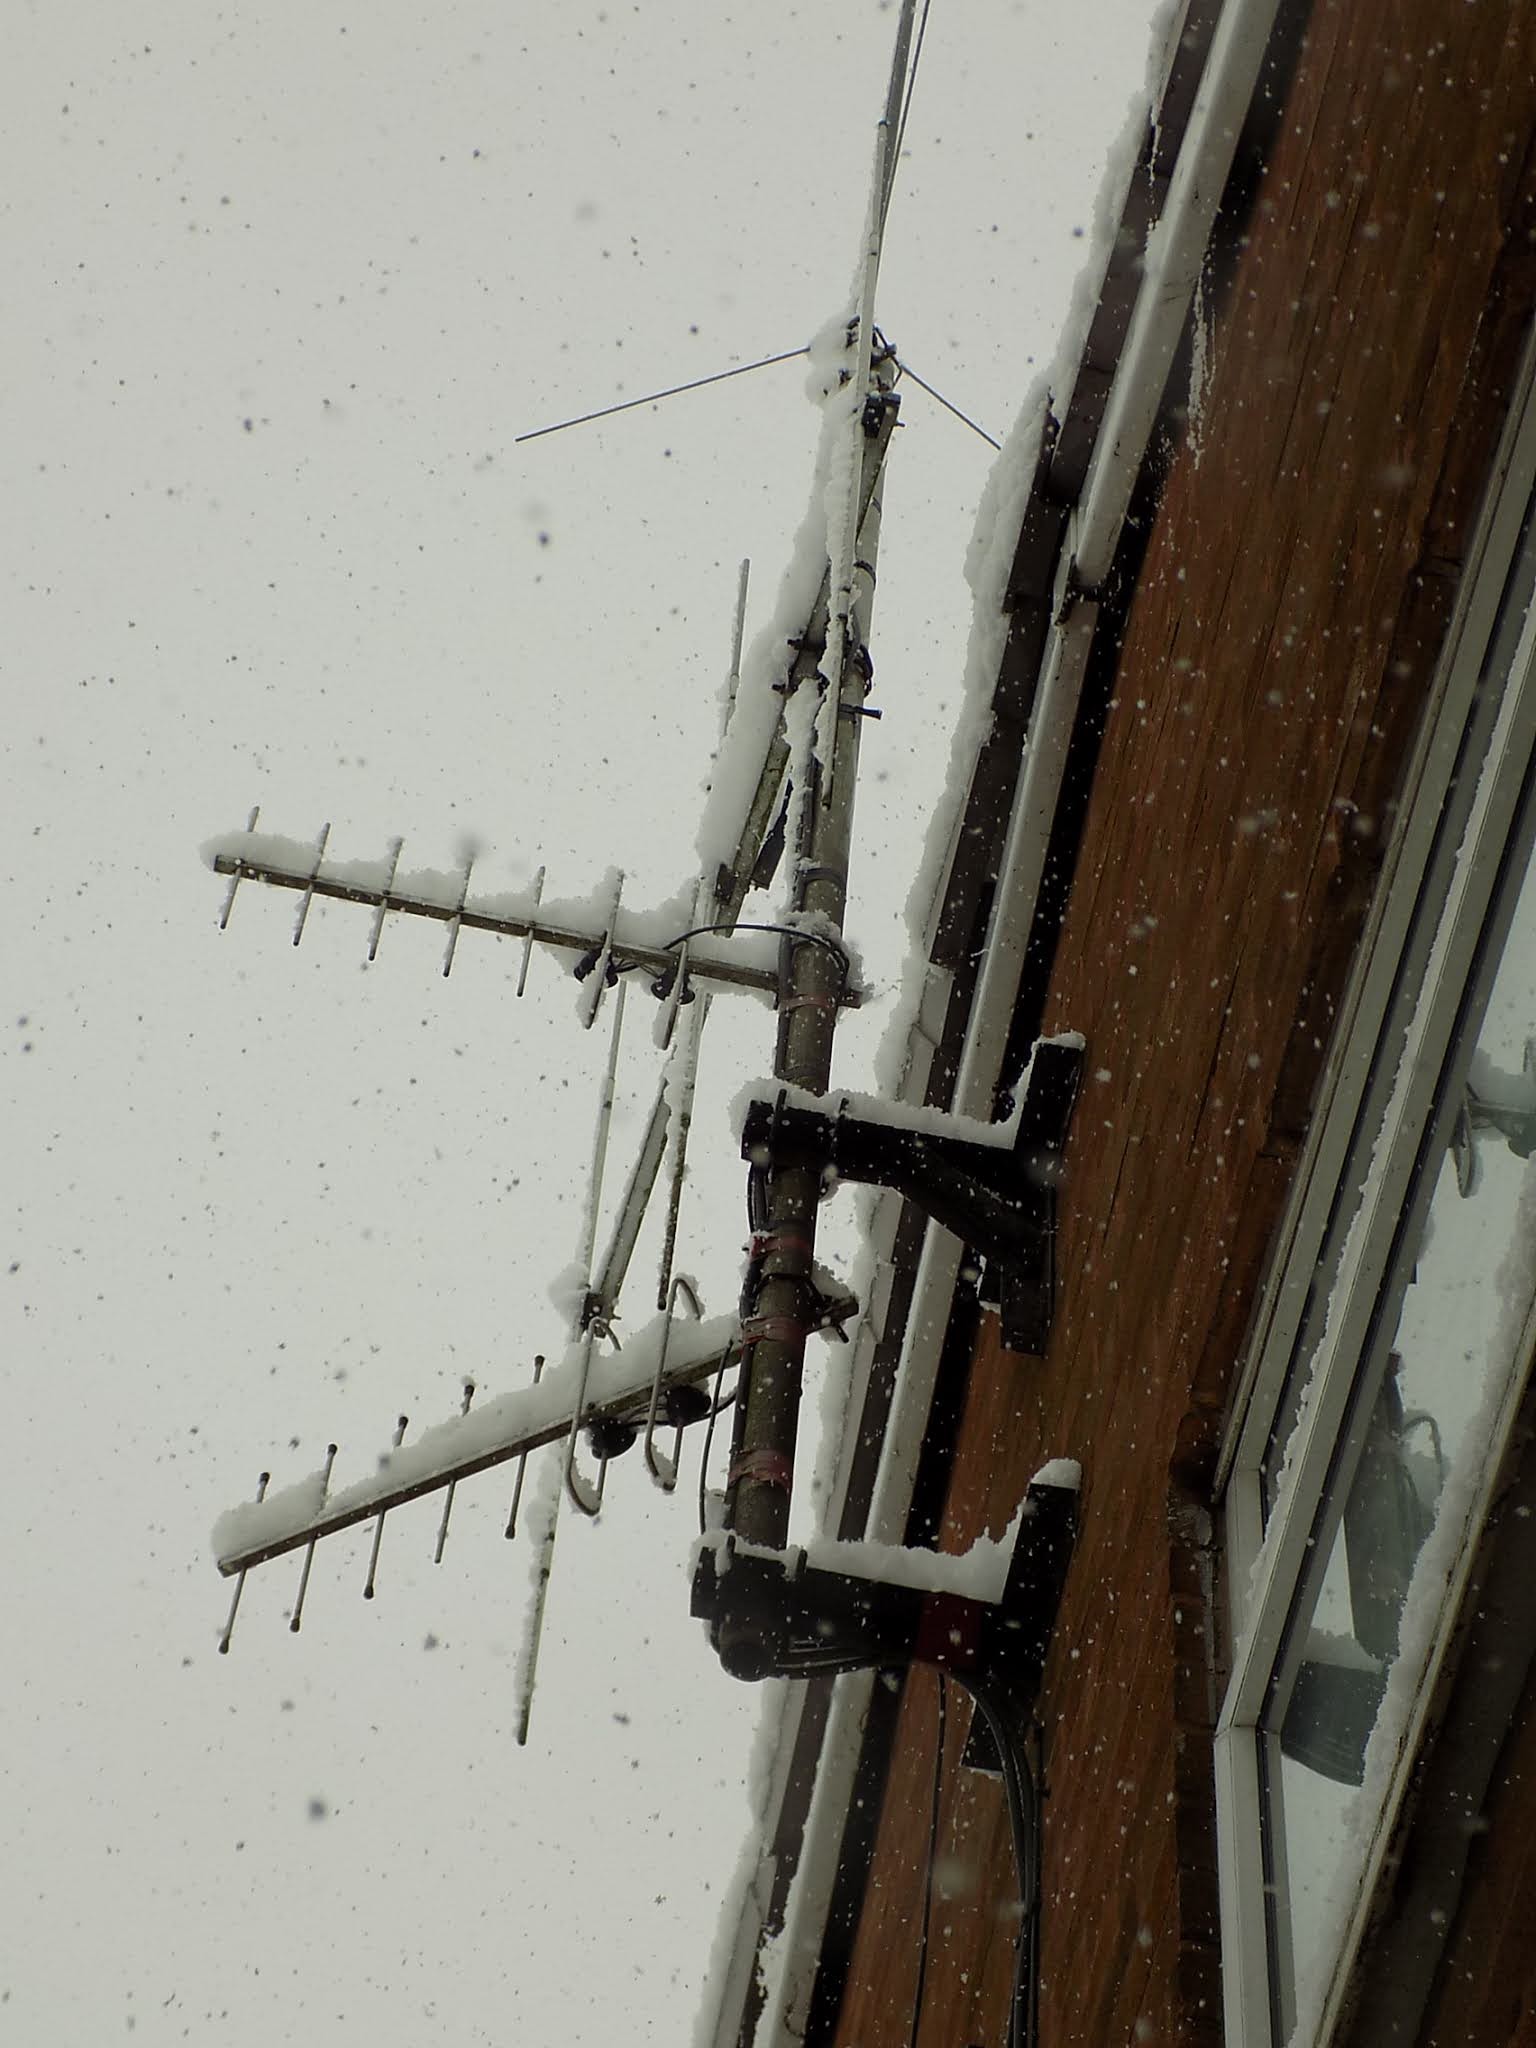
Around 12:00 GMT as I write this, my VHF/UHF array of antennas strapped to the side of the house are well plastered with the white stuff.
Outside Temperature is Zero Centigrade.
Steve, G1KQH, is a regular contributor to AmateurRadio.com and writes from England. Contact him at [email protected].
I’m back
It has been 15 days since my last post but my last post was about our cat Oliver and our best buddy who we said goodbye to. Some may think it strange but we have his ashes back home now in a cat urn. It's only his ashes but to Julie and me, Oliver is back home now.
It's now time to round the corner and get back to ham radio blogging. In my last radio post, I had just finished rebuilding my PC and it's working great. What I mean by great is, it's fast, startup happens almost right away and all the radio programs work great. The other big event computer-wise was I finally upgraded from Win7 to Win10. In the past, I have posted about my going back and forth regarding upgrading to Win10. My first upgrade was a free upgrade that Microsoft offered if you were operating Win7. I did that (installed Win10 over top of Win7) and it was a disaster I was having sound device issues, some of my radio programs intermittently were giving me issues and some of my Windows startups had error messages and failed to start. I was told some or if not all my issues were related to me installing Win10 overtop of Win7 but at that point in time, I was not willing to wipe my drive clean and install Win10 and all my programs.
After my complete PC upgrade, I purchased Win10 and did a clean install on my new solid-state hard drive. I am happy to say that I have had no issues. I did some research regarding Windows 10 and how on its own it installs updates at startup. I had seen many a post on radio sites how one day Win10 OS was without issue and the next startup there was issues. Many times it was due to the fact that an update was the issue that created a problem! I was reading that a very recent Windows update if you had a solid-state hard drive and ran Windows defrag program it would not defrag your drive but erase the drive! As a side note, one should not defrag a solid-state drive in the first place. But there were many upset Windows users who had solid-state hard drives that were wiped clean!
Back to Windows 10 updating issue, I solved that by downloading a program that turns off Windows automatic update. You can also turn Windows update off for 7 days at a time from within the Windows update program itself but you have to remember to reset it after 7 days or you will be updated. There are a few free programs out there that will stop Windows from updating The one I use is called Windows update blocker but there are others.... WUB, Windows update manager or WuMgr and Winupdatestop. The Windows update blocker program I use works great.
I do believe it is important to update Windows as it is very important and keeps Windows running smooth and secure. Now you ask I feel windows updates are important but I have an update blocker installed on my PC? Let me explain the method to my madness, each month on the second Tuesday Microsoft sends out their update to our PC's. These updates at first do have issues and over the course of a few weeks Microsoft learns of them and sends out fixes. I don't want to be a guinea pig for Microsofts updates and the best way for me to deal with this is to update after most if not all issues have been dealt with. I don't have a Microsoft crystal ball to know when to update but I do belong to a group that provides its members with a safe time to allow your OS to update.
I have mentioned this group in a past post, the group is called Ask Woody and for a donation, it provides valuable information, posts and user groups for Windows users. The group informs its users of safe update times to update as well as they will sectionalize the updates informing users of a certain update at this time should be avoided. I do know about Mac and Linux OS's but I have tried both and for the radio programs I want run these OS's just don't cut it for me.
Well, it's time for me to say 73 and thanks for stopping by the blog.....see you soon with a new post.
Mike Weir, VE9KK, is a regular contributor to AmateurRadio.com and writes from New Brunswick, Canada. Contact him at [email protected].
LHS Episode #388: The Weekender LXIV

It's time once again for The Weekender. This is our bi-weekly departure into the world of amateur radio contests, open source conventions, special events, listener challenges, hedonism and just plain fun. Thanks for listening and, if you happen to get a chance, feel free to call us or e-mail and send us some feedback. Tell us how we're doing. We'd love to hear from you.
73 de The LHS Crew
Russ Woodman, K5TUX, co-hosts the Linux in the Ham Shack podcast which is available for download in both MP3 and OGG audio format. Contact him at [email protected].
Hunting For NDBs In CLE 264

Propagation on MF has been excellent this past week and hopefully will continue to be good.
A 'challenge target' for listeners in North America is YEK - 329kHz in Arviat, NU, on the NW shore of Hudson Bay. It's widely heard throughout North America and is a good target for listeners on both coasts. Listen for YEK's upper sideband on 329.424 kHz with your receiver in the CW mode.
When tuning for NDBs, put your receiver in the CW mode and listen for the NDB's CW identifier, repeated every few seconds. Listen for U.S. NDB identifiers approximately 1 kHz higher or lower than the published transmitted frequency since these beacons are modulated with a 1020 Hz tone approximately.
For example, 'AA' near Fargo, ND, transmits on 365 kHz and its upper sideband CW identifier is tuned at 366.025 kHz while its lower sideband CW ident can be tuned at 363.946 kHz. Its USB tone is actually 1025 Hz while its LSB tone is 1054 Hz.
Often, one sideband will be much stronger than the other so if you don't hear the first one, try listening on the other sideband.
Canadian NDBs normally have an USB tone only, usually very close to 400 Hz. They also have a long dash (keydown) following the CW identifier.
All NDBs heard in North America will be listed in the RNA database (updated daily) while those heard in Europe may be found in the REU database. Beacons heard outside of these regions will be found in the RWW database. These databases have recently been re-vamped and are slicker than ever before!
From CLE coordinator Brian Keyte (G3SIA), comes the following CLE info:
Hello all,
Here are all the details for this weekend's co-ordinated listening event.
First time CLE logs too? Yes, please!
Short logs are always as welcome as long ones.
Days: Friday 22 January - Monday 25 January
Times: Start and End at midday, your LOCAL time
Range: 320.0 - 334.9 kHz
Please log the NDBs you can positively identify that are listed in the frequency range (no DGPS please), plus any UNIDs heard there too.
Send your CLE log to the List, if possible not in an attachment, with CLE264 and FINAL at the start of its title.
Please show on EVERY LINE of your log:
# The date and UTC (the day changes at 00:00 UTC).
# kHz - the beacon's nominal published frequency, if you know it.
# The Call Ident.
Show those main items FIRST on each line, before any optional details such as the NDB's Location, Distance, Offsets, Cycle time, etc.
As always, make your log meaningful to everyone by including your listening location and details of the receiver, aerial(s), etc.
It would be OK to use one remote receiver, with the owner's permission if necessary, provided that ALL your loggings for the CLE are made using it.
Joachim or I will send the usual 'Any More Logs?' email at about 20:00 UTC on Tuesday so that you can check that your log has been found OK.
Do make sure that your log has arrived on the List at the very latest by
09:00 UTC on Wed. 27th January.
We hope to complete the combined results within a day or two.
You can find all CLE-related information from our CLE page ( http://www.ndblist.info/cle.htm ), including a link to the seek lists provided for this Event from the Rxx Database.
Good listening
Brian & Joachim
---------------------------------------------------------------------
From: Brian Keyte G3SIA ndbcle'at'gmail.com
Location: Surrey, SE England (CLE co-ordinator)
---------------------------------------------------------------------
If you are interested in some remote listening - maybe due to local difficulties - you could use any one remote receiver for your loggings, stating its location and with the owner's permission if required.( e.g. see kiwisdr.com ) A remote listener may NOT also use another receiver, local or remote, to make more loggings for the same CLE.
These listening events serve several purposes. They
• determine, worldwide, which beacons are out-of-service or have gone silent since the last CLE covering this range
• will indicate the state of propagation conditions at the various participant locations
• will give you an indication of how well your LF/MF receiving system is working
• give participants a fun yet challenging activity to keep their listening skills honed
Final details can be found at the NDB List website, and worldwide results, for every participant, will be posted there a few days after the event.
The NDB List Group is a great place to learn more about the 'Art of NDB DXing' or to meet other DXers in your region. There is a lot of good information available there and new members are always very welcome. As well, you can follow the results of other CLE participants from night to night as propagation is always an active topic of discussion.
You need not be an NDB List member to participate in the CLEs and all reports, no matter how small, are of much value to the organizers.
Remember - 'First-time' logs are always VERY welcome!
Reports may be sent to the NDB List Group or e-mailed to CLE co-ordinator, Brian Keyte (G3SIA), whose address appears above. If you are a member of the group, all final results will also be e-mailed and posted there.
Please ... give the CLE a try ... then let us know what NDB's can be heard from your location! Your report can then be added to the worldwide database to help keep it up-to-date.
Have fun and good hunting!
Steve McDonald, VE7SL, is a regular contributor to AmateurRadio.com and writes from British Columbia, Canada. Contact him at [email protected].
LHS Episode #387: Compiling Software Deep Dive
Hello and welcome to the 387th episode of Linux in the Ham Shack. In this episode, the hosts discuss concepts related to building software from source code. Topics include proper build environments, packages to install for easy building of software, how to get source, commands for building software and much more. We hope you find this talk interesting and informative and we hope you come back for Episode 388.
73 de The LHS Crew
Russ Woodman, K5TUX, co-hosts the Linux in the Ham Shack podcast which is available for download in both MP3 and OGG audio format. Contact him at [email protected].
 Ham Radio Deluxe |
 Ham Radio Prep |
 Ham Radio School |
 KB3IFH QSL Cards  Hip Ham Shirts  HamRadioAuctions HamRadioAuctions Reliance Antennas Reliance Antennas Enigma Shop Enigma Shop |  morseDX  Ni4L Antennas  R&L Electronics R&L Electronics antennas.us antennas.us Ears to Our World Ears to Our World |
- Matt W1MST, Managing Editor
