 |
 Hunting For NDBs In CLE240
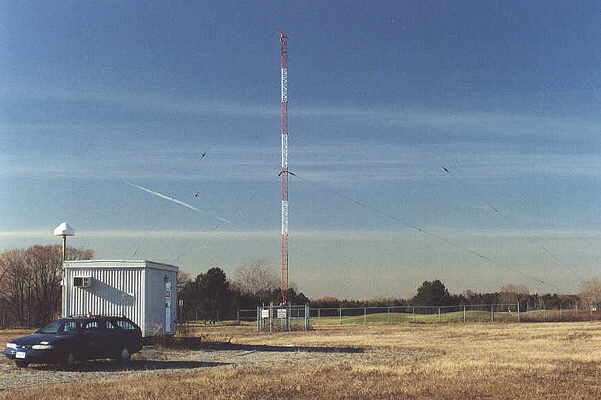 |
| OO-391kHz - Oshawa, Ontario courtesy: VE3GOP |
This coming weekend will see another monthly CLE challenge. This time the hunting grounds will be 385.0 - 399.9 kHz.
For those unfamiliar with this monthly activity, a 'CLE' is a 'Co-ordinated Listening Event', as NDB DXers around the world focus their listening time on one small slice of the NDB spectrum.
A wonderful challenge for listeners in North America is to hear little OO - 391kHz, located in Oshawa, Ontario. It puts out only 7 1/2 watts but has been logged on both coasts as well as in Europe! Listen for its USB CW identifier (with your receiver in the CW mode) on 391.396 and its LSB ID on 390.595 kHz.
MF propagation this past week has been good and signals in this frequency range should be propagating well if things stay undisturbed for the weekend. As usual however, a large coronal hole has returned to its monthly CLE position and its weekend effects are still unknown.
When tuning for NDBs, put your receiver in the CW mode and listen for the NDB's CW identifier, repeated every few seconds. Listen for U.S. NDB identifiers approximately 1 kHz higher or lower than the published transmitted frequency since these beacons are modulated with a 1020Hz tone approximately.
For example, 'AA' near Fargo, ND, transmits on 365 kHz and its upper sideband CW identifier is tuned at 366.025 kHz while its lower sideband CW ident can be tuned at 363.946 kHz. Its USB tone is actually 1025 Hz while its LSB tone is 1054 Hz.
Often, one sideband will be much stronger than the other so if you don't hear the first one, try listening on the other sideband.
Canadian NDBs normally have an USB tone only, usually very close to 400 Hz. They also have a long dash (keydown) following the CW identifier.
All NDBs heard in North America will be listed in the RNA database (updated daily) while those heard in Europe may be found in the REU database. Beacons heard outside of these regions will be found in the RWW database.
From CLE organizer Brian Keyte, G3SIA, come details via the The NDB List Group:
Hello all,
Our 240th Coordinated Listening Event is less than a week away.
We can now forget all about pyramids and relax with a straightforward
event. Whether you are a keen propagation watcher or just a
take-what-comes listener, please join in.
Days: Friday 25 January - Monday 28 January
Times: Start and end at midday, your LOCAL TIME
Range: 385.0 - 399.9 kHz
Please log all the NDBs you can identify that are listed in that range
(it includes 385 kHz but not 400 kHz) plus any UNIDs you find there.
We last used this frequency range for CLE224 in October 2017.
Please send your final log to the List (no attachments and ideally
in a plain text email) with ‘FINAL CLE240’ in its title.
Show on each line:
# The Date (e.g. '2019-01-26' etc. or just '26' )
# The Time in UTC (the day changes at 00:00 UTC).
# kHz - the nominal published frequency, if known.
# The Call Ident.
Please show those main items FIRST. Other optional details such
as Location and Distance go LATER in the same line.
As always, of course, tell us your own location and brief details
of the equipment that you were using during the Event.
We will send the usual 'Any More Logs?' email at about 18:00 UTC
on Tuesday so that you can check that your log has been found OK.
The combined results should then be completed within a day or two.
You can soon find full details about current and past CLEs from the CLE page
http://www.ndblist.info/cle.htm It includes access to CLE240 seeklists
for your part of the World, prepared from the previous loggings in Rxx.
Good listening - enjoy the CLE.
Brian and Joachim
---------------------------------------------------------------
From: Brian Keyte G3SIA ndbcle'at'gmail.com
Location: Surrey, SE England (CLE coordinator)
---------------------------------------------------------------
(If you would like to listen remotely you could use any one remote
receiver for your loggings, stating its location and owner and with their
permission if required. A remote listener may NOT also use another
receiver, local or remote, to make further loggings for the same CLE)
These listening events serve several purposes. They:
- determine, worldwide, which beacons are actually in service and on-the-air so the online database can be kept up-to-date
- determine, worldwide, which beacons are out-of-service or have gone silent since the last CLE covering this range
- will indicate the state of propagation conditions at the various participant locations
- will give you an indication of how well your LF/MF receiving system is working
- give participants a fun yet challenging activity to keep their listening skills honed
The NDB List Group is a great place to learn more about the 'Art of NDB DXing' or to meet other listeners in your region. There is a lot of good information available there and new members are always very welcome. As well, you can follow the results of other CLE participants from night to night as propagation is always an active topic of discussion.
You need not be an NDB List member to participate in the CLEs and all reports, no matter how small, are of much value to the organizers.
Remember - 'First-time' logs are always VERY welcome!
Reports may be sent to the NDB List Group or e-mailed to CLE co-ordinator, Brian Keyte (G3SIA), whose address appears above. If you are a member of the group, all final results will also be e-mailed and posted there.
Please ... give the CLE a try ... then let us know what NDB's can be heard from your location! Your report can then be added to the worldwide database to help keep it up-to-date.
Have fun and good hunting!
Steve McDonald, VE7SL, is a regular contributor to AmateurRadio.com and writes from British Columbia, Canada. Contact him at [email protected].
LHS Episode #267: The Weekender XXII

Welcome to the 22nd edition of the LHS Weekender. In this episode, the hosts discuss upcoming amateur radio contests and special event stations, Open Source events in the next fortnight, Linux distributions of interest, news about science, technology and related endeavors as well is dive into food, drink and other hedonistic topics. Thank you for listening and we hope you're having a wonderful 2019 so far.
73 de The LHS Crew
Russ Woodman, K5TUX, co-hosts the Linux in the Ham Shack podcast which is available for download in both MP3 and OGG audio format. Contact him at [email protected].
LHS Episode #266: #$%&! Net Neutrality

Welcome to the first episode of Linux in the Ham Shack for 2019. In this episode, the hosts discuss topics including the 2018 RTTY Roundup using FT-8, Cubesats and wideband receivers in space, the ORI at Hamcation, Wekcan, Raspberry Pi-based VPN servers, the LHS Linux distributions, CW trainers and much more. Thank you for listening and we hope you're having a wonderful new year so far.
73 de The LHS Crew
Russ Woodman, K5TUX, co-hosts the Linux in the Ham Shack podcast which is available for download in both MP3 and OGG audio format. Contact him at [email protected].
AmateurLogic 126: Blue Thumb DV & 1/4 Wave Stubs
AmateurLogic.TV Episode 126 is now available for download.
Tommy reviews the Blue Thumb DV. George and the crew pull out the test equipment and experiment with 1/4 wave stubs. This live demonstration helps clear up some of the mystery. Mike, VE3MIC sits in for the Cheap Old Man to help keep expenses under control.
1:31:49
George Thomas, W5JDX, is co-host of AmateurLogic.TV, an original amateur radio video program hosted by George Thomas (W5JDX), Tommy Martin (N5ZNO), Peter Berrett (VK3PB), and Emile Diodene (KE5QKR). Contact him at [email protected].
The 2019 Winter “Classic Exchange”
 |
| W7OS - Radio Club of Tacoma working the CX |
The "CX" encourages participants to use older vintage gear including any homebrew equipment, both receivers and transmitters. A unique scoring system provides bonus points for various equipment and combinations as well as encouraging 'repeat contacts' when you switch to different equipment.
 |
| W8KM and his wonderful vintage station |
No vintage gear? ... no problem! All amateurs are invited to participate and get in on the fun no matter what they are using and submit their scores.
 |
| K3MD's Heathkit AT-1 and Hallicrafters HT-37 ready for the CX |
The CX is a low-key relaxing affair and the 'extra' Tuesday operating period should encourage a lot of midweek activity from the vast numbers of retired operators who cherish and run older gear.
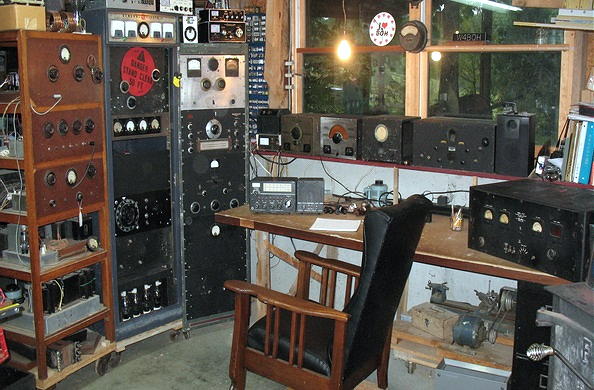 | ||||||||||||||||||||||||
| Lots of combos ready at W4BOH's CX setup |
 |
| K6ZI, Las Vegas - WWII ARC-5s ready to go |
A summary of the Fall 2018 CX and soapbox comments, along with some wonderful vintage-station eye candy, may be found here.
For complete details of the upcoming event, see the web site announcement here.
If you've never entered the Classic Exchange, why not give it a try this year as it truly is a case of 'the more the merrier' ... and eastern operators, make sure to keep the porch light on for those out west!
Steve McDonald, VE7SL, is a regular contributor to AmateurRadio.com and writes from British Columbia, Canada. Contact him at [email protected].
Effective Radiated Power, APRS and HF Transmitter Hunting
 Stories you’ll find in our January, 2019 issue:
Exploring the Mysteries of Effective Radiated Power (ERP)
By Richard Fisher KI6SN
Why is it that some amateur stations you hear on the high frequency bands sound like they are international broadcasting stations? Sure, some may be running the full “legal limit” but many claim to be running just a few hundred watts. The secret is in their antenna—the higher the gain, the greater the Effective Radiated Power (ERP). This month Richard shows us that not only antenna gain but transmission mode has a lot to do with how big your signal sounds on the air and it doesn’t even require a lot of higher math to understand.
APRS and Other Related Digital Communications—Part II
By Cory GB Sickles WA3UVV
As a follow-up to Part 1, which appeared in the August 2018 issue of TSM, this month Cory takes a look at some of the interesting digital modes available that are used for more than simply communicating between stations. While packet radio may seem like a relic of the 1980s and 90s, it’s still widely used in a variety of applications—including communicating through the International Space Station. Cory shows us how this is done and what kind of equipment you need to do it—hint: it’s not all expensive gear with a steep learning curve and you don’t have to have a ham ticket to monitor the action.
HF Transmitter Hunting using KiwiSDRs and TDoA
By Tony Roper
The proliferation of the globally connected and remotely operated KiwiSDRs (software defined radios) has proved a boon to shortwave listeners the world over. It’s also providing an intriguing platform for high-frequency transmitter hunters. Where are those numbers stations originating from? What is the location of those Over-the-Horizon Radar installations causing havoc on the band? Longtime HF sleuth (and professional Air Traffic Controller), Tony Roper, a regular contributor to TSM walks us through the process of using these convenient radios to help answer these age-old shortwave questions.
Winter Shortwave Reading: TSM Reviews the Top Three Shortwave Guides
“Klingenfuss 2019/20 Guide to Utility Radio Stations” and “2019 Shortwave Frequency Guide”
Reviewed by Bob Grove W8JHD
This year Joerg Klingenfuss celebrates his 30th anniversary of publishing his “Guide to Utility Radio Stations” and his “Shortwave Frequency Guide.” Both publications have become indispensable guides to radio hobbyists around the world.
Gayle Van Horn’s “Global Radio Guide”
Reviewed by Ken Reitz KS4ZR
This year marks the debut of Gayle Van Horn’s “Global Radio Guide,” a 456-page compendium of global broadcasting as an e-book available only in Kindle format. The Global Radio Guide replaces her very successful “International Shortwave Broadcasting Guide.”
“World Radio Television Handbook”
Reviewed by Gayle Van Horn W4GVH
The 73rd edition of the World Radio Television Handbook is a wealth of vital information for any radio or television hobbyist and remains the most comprehensive exemplary reference book and a must-have for your listening post.
Scanning America
By Dan Veeneman
Nevada Shared Radio System
Federal Wavelengths
By Chris Parris
Hiding in Plain Sight: Federal Communications Systems
Milcom
By Larry Van Horn N5FPW
Monitor’s Guide to NAS Whiting Field and Training Wing Five
Utility Planet
By Hugh Stegman
Cuban and Russian “Numbers” Continue
Shortwave Utility Logs
By Mike Chace-Ortiz and Hugh Stegman
VHF and Above
By Joe Lynch N6CL
Space and Near Space Communications
Digitally Speaking
By Cory GB Sickles WA3UVV
Double Vision
Amateur Radio Insights
By Kirk Kleinschmidt NT0Z
New Year, New Milestone, New Tidbits
Radio 101
By Ken Reitz KS4ZR
AIR in DRM and Understanding RDS
Radio Propagation
By Tomas Hood NW7US
State of the Union, er…High Frequencies (An Outlook for 2019)
The World of Shortwave Listening
By Jeff White, Secretary-Treasurer NASB
European SW DXers Meet in Slovakia and Austria
The Shortwave Listener
By Fred Waterer
WRNO’s Powerful Return; WRMI’s International Programming: BBC Lineup
Maritime Monitoring
By Ron Walsh VE3GO
Snow, Ice and RF
Adventures in Radio Restoration
By Rich Post KB8TAD
Part 15: Radio as You Like It
Antenna Connections
By Dan Farber AC0LW
Stealth: Fighting Antenna Oppression
The Spectrum Monitor is available in PDF format which can be read on any desktop, laptop, iPad®, Kindle® Fire, or other device capable of opening a PDF file. Annual subscription is $24. Individual monthly issues are available for $3 each.
Ken Reitz, KS4ZR, is publisher and managing editor of The Spectrum Monitor. Contact him at [email protected].
ICQ Podcast Episode 284 – Workshop Projects
Hello fellow Amateur / Ham Radio enthusiasts - and welcome to this, the 284th episode of the ICQ Amateur / Ham Radio Podcast, supported by Luke Aurich (AD0KI), Bob Terry, David Reid (W6KL) along with our monthly and annual subscription donors.
In this episode, Martin M1MRB is joined by Edmund Spicer M0MNG and Bill Barnes N3JIX to discuss the latest Amateur / Ham Radio news. Colin M6BOY rounds up the news in brief and this episode’s feature is Workshop Projects.
Germany on 70 MHz in 2019
ARRL Petitions FCC to Incorporate Parity Act Provisions into its Amateur Radio Rules
Youngsters On The Air Bulgaria 2019 Amateur Radio
US Radio Amateurs Help to Make YOTA Month Happen in Ethiopia
G5 plus 3 Letter Amateur Radio Callsigns available
Swiss 90th Anniversary Special Event Callsign
2019 Marks 50th Anniversary of Worked All Britain Award
EU Directive on Car Radios
$900,000 Settlement in Unauthorized Satellite Launch Case
G3TXQ Silent Key
Colin Butler, M6BOY, is the host of the ICQ Podcast, a weekly radio show about Amateur Radio. Contact him at [email protected].
 Ham Radio Deluxe |
 Ham Radio Prep |
 Ham Radio School |
 KB3IFH QSL Cards  Hip Ham Shirts  HamRadioAuctions HamRadioAuctions Reliance Antennas Reliance Antennas Enigma Shop Enigma Shop |  morseDX  Ni4L Antennas  R&L Electronics R&L Electronics antennas.us antennas.us Ears to Our World Ears to Our World |
- Matt W1MST, Managing Editor
