Posts Tagged ‘homebrew’
 The Enigmatic Heathkit CR-1 Crystal Radio
For the past several months my interest in ‘DX-crystal radio’ construction has been percolating once again. It began when I ran across an interesting description of Heathkit’s legendary CR-1, a double-tuned good performer and very much sought-after by collectors as well as by users. The article described one homebrewer’s attempt to duplicate the receiver and to learn more about the detector and antenna tuning ferrite-loaded coil's secrets.

When it comes to crystal radios, there is nothing revolutionary regarding the CR-1’s basic circuitry but for some odd reason, it has achieved cult-like status as well as high dollar value.
I've been eager to get my mitts on one to see how it performs after reading of one DXer's fifty-eighth catch with his own CR-1!
The article that piqued my interest appears on 'Scott's Crystal Radios' website and makes for an inspirational read, eventually revealing the inside core arrangement of the ferrite-loaded tuned circuits via an actual X-ray of the device! By the way, if you are looking for a nice set of older headphones, Scott's website is the place to visit!
Scott was eventually able to achieve performance equal to that of his borrowed CR-1, with his own slightly modified versions, all in a similar-sized footprint. Perhaps this is one reason why the CR-1 is so much sought-after, as good performance in a very small package is not the norm when it comes to crystal radios. It's usually a case of ‘the bigger, the better’ when it comes to performance.
A recent search of my junque box revealed several NIB ferrite loopsticks that would allow a potntial reproduction of this interesting circuit.
Several years ago I spent an eye-opening winter learning about DX crystal radios as up to that time I had always believed it would be impossible to hear anything other than strong local signals on a crystal radio. I quickly discovered that there was a very large Crystal Radio Yahoo Group where menbers were working at the leading edge of crystal radio design. I also found that the group sponsored an annual Crystal Radio DX Contest which inspired me to dig deeper.
It wasn’t too long before I decided to join the fun and attempt to build a crystal radio DX-machine but I was in for a few surprises and a long learning curve ... it seemed that hearing broadcast band ‘DX’ on a crystal radio (anything other than loud locals) was not going to be an easy task!
Over the course of several months I tried many types of variable capacitors, tank coil configurations and antenna tuning circuits. I even erected a dedicated antenna system for the various experimental circuits I was putting together ... an 'Inverted-L', 50’ straight up and 70’ horizontal, along with a ground rod connected to several buried radials.
I quickly learned about something I normally didn’t have to worry about when working with ‘active’ devices and that was overcoming system and component losses. In critical crystal radio design, it’s all about minimizing the losses in every stage and every component in the system since there are no amplifiers to help overcome these losses. Your system is only as good as the weakest link. In true crystal radio DXing, no active devices are permitted ... it’s just your crystal radio and the energy generated at some, hopefully far away, transmitter site!
After several months, I eventually ended up with a well-performing triple-tuned set that used lots of 'trapping' because of all of the very strong nearby signals here ... eight 50kW locals!
A description of the learning curve, with several do's and dont's to help new builders, can be found on my website here.
Back then, 80 stations were logged (from my location on Mayne Island in SW British Columbia) over the one-week Crystal Radio DX Contest.
CRYSTAL RADIO LOGBOOK
Old notes indicate that there were 14 stations at S9 or higher, requiring heavy trapping to hear anything close to their frequencies.

When it comes to crystal radios, there is nothing revolutionary regarding the CR-1’s basic circuitry but for some odd reason, it has achieved cult-like status as well as high dollar value.
 |
| courtesy: Scotts Crystal Radios |
The article that piqued my interest appears on 'Scott's Crystal Radios' website and makes for an inspirational read, eventually revealing the inside core arrangement of the ferrite-loaded tuned circuits via an actual X-ray of the device! By the way, if you are looking for a nice set of older headphones, Scott's website is the place to visit!
 |
| courtesy: Scott's Crystal Radios |
Scott was eventually able to achieve performance equal to that of his borrowed CR-1, with his own slightly modified versions, all in a similar-sized footprint. Perhaps this is one reason why the CR-1 is so much sought-after, as good performance in a very small package is not the norm when it comes to crystal radios. It's usually a case of ‘the bigger, the better’ when it comes to performance.
A recent search of my junque box revealed several NIB ferrite loopsticks that would allow a potntial reproduction of this interesting circuit.
Several years ago I spent an eye-opening winter learning about DX crystal radios as up to that time I had always believed it would be impossible to hear anything other than strong local signals on a crystal radio. I quickly discovered that there was a very large Crystal Radio Yahoo Group where menbers were working at the leading edge of crystal radio design. I also found that the group sponsored an annual Crystal Radio DX Contest which inspired me to dig deeper.
It wasn’t too long before I decided to join the fun and attempt to build a crystal radio DX-machine but I was in for a few surprises and a long learning curve ... it seemed that hearing broadcast band ‘DX’ on a crystal radio (anything other than loud locals) was not going to be an easy task!
Over the course of several months I tried many types of variable capacitors, tank coil configurations and antenna tuning circuits. I even erected a dedicated antenna system for the various experimental circuits I was putting together ... an 'Inverted-L', 50’ straight up and 70’ horizontal, along with a ground rod connected to several buried radials.
I quickly learned about something I normally didn’t have to worry about when working with ‘active’ devices and that was overcoming system and component losses. In critical crystal radio design, it’s all about minimizing the losses in every stage and every component in the system since there are no amplifiers to help overcome these losses. Your system is only as good as the weakest link. In true crystal radio DXing, no active devices are permitted ... it’s just your crystal radio and the energy generated at some, hopefully far away, transmitter site!
After several months, I eventually ended up with a well-performing triple-tuned set that used lots of 'trapping' because of all of the very strong nearby signals here ... eight 50kW locals!
A description of the learning curve, with several do's and dont's to help new builders, can be found on my website here.
Back then, 80 stations were logged (from my location on Mayne Island in SW British Columbia) over the one-week Crystal Radio DX Contest.
FRQ | STATION | LOCATION | POWER |
540 | CBK | WATROUS, SK | 50KW |
550 | KARI | BLAINE, WA | 2.5KW |
560 | KPQ | WENATCHEE, WA | 5KW |
570 | KVI | SEATTLE, WA | 5KW |
580 | KFXD | NAMPA, ID | 5KW |
580 | KTMT | ASHLAND, OR | 1KW |
600 | CKBD | VANCOUVER, BC | 10KW |
650 | CISL | VANCOUVER, BC | 10KW |
670 | KBOI | BOISE, ID | 50KW |
690 | CBU | VANCOUVER, BC | 50KW |
730 | CJNW | VANCOUVER, BC | 50KW |
750 | KXL | PORTLAND, OR | 20KW |
770 | CHQR | CALGARY, AB | 50KW |
780 | KKOH | RENO, NV | 50KW |
790 | KGMI | BELLINGHAM, WA | 1KW |
800 | CKOR | PENTICTON, BC | 500W |
800 | CHAB | MOOSEJAW, SK | 10KW |
810 | KGO | SAN FRANCISCO, CA | 50KW |
820 | KGNW | SEATTLE, WA | 5KW |
830 | CKKY | WAINRIGHT, AB | 3.5KW |
840 | KSWB | SEASIDE, OR | 500W |
840 | CKBX | 100 MILE HOUSE, BC | 500W |
850 | KOA | DENVER, CO | 50KW |
860 | KPAM | TROUTDALE, OR | 10KW |
870 | KFLD | PASCO, WA | 250W |
880 | KIXI | MERCER ISLAND, WA | 10KW |
880 | COOL | EDMONTON, AB | 50KW |
890 | CJDC | DAWSON CREEK, BC | 10KW |
900 | CKMO | VICTORIA, BC | 10KW |
910 | CKDQ | DRUMHELLER, AB | 50KW |
920 | KXLY | SPOKANE, WA | 5KW |
930 | KBAI | BELLINGHAM, WA | 500W |
940 | CJGX | YORKTON, SK | 50KW |
950 | KJR | SEATTLE, WA | 50KW |
960 | CFAC | CALGARY, AB | 50KW |
980 | CKNW | NEW WESTMINSTER, BC | 50KW |
1010 | CBR | CALGARY, AB | 50KW |
1040 | CKST | VANCOUVER, BC | 50KW |
1060 | CKMX | CALGARY, AB | 50KW |
1070 | CFAX | VICTORIA, BC | 10KW |
1090 | KYCW | SEATTLE, WA | 50KW |
1130 | CKWX | VANCOUVER, BC | 50KW |
1160 | KSL | SALT LAKE CITY, UT | 50KW |
1170 | KPUG | BELLINGHAM, WA | 5KW |
1180 | KOFI | KALISPELL, MT | 10KW |
1190 | KEX | PORTLAND, OR | 50KW |
1200 | WOAI | SAN ANTONIO, TX | 50KW |
1210 | KBSG | AUBURN, WA, | 10KW |
1210 | KZTS | SUNNYSIDE, WA | 1KW |
1240 | KGY | OLYMPIA, WA | 1KW |
1240 | KOFE | ST. MARIES, ID | 500W |
1250 | KKDZ | SEATTLE, WA | 5KW |
1250 | KWSU | PULLMAN, WA | 5KW |
1260 | CFRN | EDMONTON, AB | 50KW |
1260 | KLYC | McMINVILLE, OR | 850W |
1270 | CHAT | MEDICINE HAT, AB | 10KW |
1270 | KTFI | TWIN FALLS, ID | 1KW |
1280 | KIT | YAKIMA, WA | 1KW |
1290 | KGVO | MISSOULA, MT | 5KW |
1290 | KUMA | PENDLETON, OR | 5KW |
1290 | KKSL | LAKE OSWEGO, OR | 5KW |
1300 | KOL | SEATTLE, WA | 5KW |
1300 | CJME | REGINA, SK | 10KW |
1310 | CHLW | ST. PAUL, AB | 10KW |
1320 | CHMB | VANCOUVER, BC | 50KW |
1340 | KLKI | ANACORTES, WA | 1KW |
1360 | KKMO | TACOMA, WA | 5KW |
1370 | KAST | ASTORIA, OR | 1KW |
1410 | CFUN | VANCOUVER, BC | 50KW |
1470 | CJVB | VANCOUVER, BC | 50KW |
1510 | KGA | SPOKANE, WA | 50KW |
1520 | KKSN | OREGON CITY, OR | 15KW |
1530 | KFBK | SACRAMENTO, CA | 50KW |
1550 | KCCF | FERNDALE, WA | 10KW |
1590 | KLIV | SAN JOSE, CA | 5KW |
1600 | KVRI | BLAINE, WA | 10KW |
1620 | KYIZ | RENTON, WA | 1KW |
1640 | KPBC | LAKE OSWEGO, OR | 1KW |
1660 | KXOL | BRIGHAM CITY, UT | 1KW |
Old notes indicate that there were 14 stations at S9 or higher, requiring heavy trapping to hear anything close to their frequencies.
| My recent interest made me wonder what the situation is today when it comes to the number of strong local ‘blowtorch’ signals, surely the bane of all crystal radio DXers? Although there have been a few changes over the years, a quick scan of the band during the prime DX evening hours found that although one of the blowtorch signals (at 600kHz) was now gone, another had appeared at 1200kHz ... sadly no net difference. The top end of the band, always a prime area for good skywave DX, is unfortunately still dominated by a huge signal from KVRI just across the water near the Canadian / U.S. border. If KVRI were silent, the top end would be a wonderfully quiet hunting-ground for new catches. The new local blowtorch (CJRJ) on 1200 kHz will now cause problems for the middle of the band, which was always a good region for DX. So it seems overall, there hasn’t been a huge change here other than in the middle of the band. It looks as though there are still some good watering-holes to be had but several traps will still be needed in any new system. Once my present radio-bench project is finished (a '36 RK-39 crystal power oscillator) I’m looking forward to more research and design of a couple of new systems, starting with something similar to the CR-1 as well as some experimentation with toroidal coils. I always find the research and planning phase of any new project more interesting and fulfilling than the actual construction and implementation! Hopefully I’ll have something ready for the fall DX season! Thanks to VA7MM, I will also have the loan of an original CR-1 next winter to make comparisons to any clone that I might build! If building a DX-crystal radio is something that might interest you, there are several great websites offering inspiration and helpful info. The links for these may be found at the bottom of my own crystal radio page. As well, there are two active crystal radio groups on Facebook, where daily two-way discussion can be had. Perhaps, with enough new interest, we can even revive the annual Crystal Radio DX Contest! |
 Building A Jones Push-Pull Oscillator
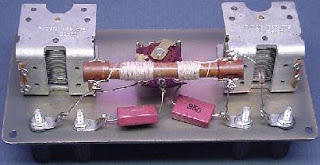
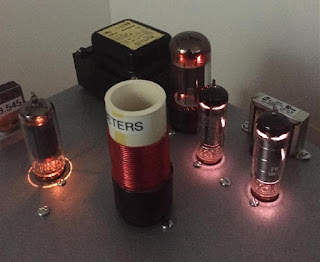
Just as my shelf space for new projects keeps expanding (and quickly running out!), so does my main web site, "The VE7SL Radio Notebook". I have just added a new page to the site describing the construction of my newly-completed Jones Power-Oscillator using a pair of 6L6s.
If you might be thinking of building a 'Jones', you may find something helpful or perhaps find inspiration for a new project. The new page may be found here.
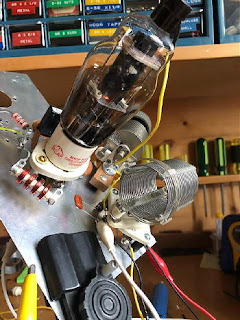
I'm presently building the final version of my RK-39 crystal power-oscillator ... but I have no idea where I 'll put it when finished!
 My 2019 Novice Rig Roundup Summary

Once again the Novice Rig Roundup (NRR) has come and gone ... and once again, it was the most enjoyable 'contest' of the year for me.
What I have come to enjoy most about the NRR is that most participants do not really treat it as a contest but more as an opportunity to spend some relaxing CW time enjoying some of their favorite vintage rigs ... spread out over nine days of activity. Since there was never a Novice-class program in Canada, I was never a Novice, but the NRR brings back all of the good memories experienced as a newly-licenced radio-crazed 15 year old operator!
Back in those times, there was a gratifying sense of achievement with every contact. My clap-trap collection of parts and tin gutter-pipe verticals, mounted atop our old four-story city house, magically sent my tiny signal from coast to coast and over the pole.

Those were the dying days of big-daddy Cycle 19, and my station was proof that just a tiny bit of RF was all that was needed under such amazing solar conditions.
This year's NRR began by making a couple of contacts with my Drake 2NT and VF-1 VFO but my newly-finished 1936-style Jones Push Pull Oscillator was begging to be put to the test. This meant that the remainder of the week would be spent using crystal-control and in all likelihood, sending a hundred or more 'CQ NRR's, hopefully attracting some of the crowd.
Due to previous commitments, I missed a few nights of operating but ended up with 53 NRR contacts in 23 different states or provinces. Operating on 40m in the late afternoon and then for a short period on 80m after dinner, proved to be the best use of my time, as usually, much of the eastern activity had closed shop for the night, just as the band was getting good. There were two nights of superb 80m propagation but with very little NRR activity ... unfortunately for many participants, late-night operating (even with wonderful propagation) is not in the cards for those that must rise early for work the next morning!
There were several highlights for me once again and being able to create them while using my new homebrew rig was very gratifying.
Roger, VA1RST, back in Halifax, Nova Scotia, was one east-coaster that seemingly cherished the midnight-oil! His great Drake 2B ears were able to copy the little 'Jones' on 80m with no problem and his participation added an exotic DX-flavor to the NRR.
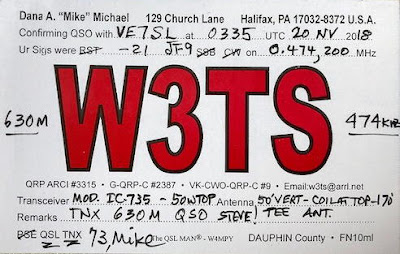
Michael, W3TS, managed to squeeze enough RF from his one-tube 6AG7 crystal oscillator to be heard and worked here on both 40 and 80m, with a respectable 559 on 40 and 569 on 80!
It wasn't until after the NRR was over that I realized why Mike's call was familiar as we had worked a couple of times already this winter on the 630m band (475kHz) ...doh!
More transcon magic was made when Tom, K3AJ, finessed a few watts from his single 6CL6 crystal-controlled DX-machine to the west coast on both 80 and 40m. The propagation gods must have been paying close attention as his 40m signal was a solid 579 while his late-night 80m signal was a whopping 589 here ... 80m propagation just like the good old days!
Not to be outdone by Tom, ex-Nebraskan Andy, KØSM in New York, kept his vintage '42' clipped together long enough to be worked back here as well. With just a couple of watts from the early '30s tube, his signal was no problem on both bands.
Gary, W8PU, with his newly-built mid-30s 6L6 tri-tet oscillator, was another treat from the east when his 559 80m signal arrived here from Ohio in good form.
A little closer to home, WB2AWQ, Howie down in Reno, had a whopping signal all week whenever I heard him on 40m. Howie can always be counted upon for 'NV' in most vintage rig operating events, including the 1929 BK Party. This time 'round, he was using his BC-458A, crystal-controlled at 35 watts out. It's a good bet that hundreds of Novices got their start with a surplus Command set such as this, which often sold for just a few dollars in the 50s ... still new in the box!
Even closer was new Oregonian, Dave, WB7WHG, who was still getting set up at his new location on the east side of the Cascades in Bend. Dave keyed his Knight T-60 for our NRR contacts on both 80 and 40 and was very much louder than when I used to work him at his midwest WB9WHG QTH!
The T-60 is a popular choice among NRR ops and it's diminutive size is somewhat misleading as the current-hungry sweep tube used in the PA stage packs a big wallop. If you happen upon one of these under a fleamarket table, don't pass it up ... it"s a lethal NRR weapon!
Heathkit stations were as popular in the NRR as they were in countless Novice shacks decades ago ... and they sound just as good now as they did back then.
KN8RHM (N8XI), Rick, made Michigan proud with his HW-16 transceiver, while Mark, VA7MM, handed out 126 contacts from western Canada with his all Heath vintage station. His newly added homebrew TR switching system provided hands-free break-in, saving wear and tear on the DX-60's precious function switch.
Not many Viking Rangers were heard this year but the one keyed by Markus, VE7CA, sounded very 50s-like with its oscillator being crystal-controlled for the event.
K9SB, Tim, used his Johnson Adventurer and Hallicrafters SX-101A vintage setup as well as a vintage Drake station to hand out 'IL' to many NRR ops.
There seems to be no shortage of era-appropriate Novice gear out there but as the years progress, it will get harder and harder to find and probably more expensive to own. It's wonderful to see so many amateurs that understand and appreciate this older gear and are doing their best to keep it all working ... and the NRR is just one of many opportunities to let these old beauties demonstrate their capabilities.
From what I can tell, NRR activity continues to increase every year and will hopefully be even bigger next year. If you were a participant, don't forget to get your log completed along with your photos and soapbox comments, all of which can be done through the NRR website here. If you enjoyed the NRR, all run by volunteers, consider making a small monetary donation to keep the event going. You can do this via the NRR site as well.
If you're one of the many NRR participants that didn't want the event to end, don't forget that every Monday is the NRN (Novice Rig Night). A short 'CQ NRN' in the usual CW watering-holes, will often provide some nice rag chew time with like-minded operators.
Thanks to all organizers and participants for the CW fun and for another great ride in the NRR time-machine ... see you again next year!
 Mr. Carlson’s Lab – A YouTube Treasure
I recently watched two superb YouTube videos. The first described exactly how to determine the 'shielded' side of a fixed capacitor and the importance of knowing this information.
As you have probably noticed, most modern fixed capacitors no longer indicate the 'grounded' end or the lead going to the internal shielding. At one time, the capacitor's polarity was commonly marked with a band on one end but this is no longer the case ... even though one side is indeed still the shielded side. Depending on exactly what part of the circuit your fixed capacitor is being used in, connecting it in the reverse direction (shield going to signal side), can introduce hum, RF pickup, instability and generally result in poorer capacitor / circuit performance ... and all it takes to determine which lead is which is an oscilloscope!
The second video I viewed shows the process used to resurrect a Yaesu FT-1000MP in truly terrible condition. In a very professional step-by-step process the video shows the logical and systematic approach at making the radio better than new.
Both videos are done by a truly gifted engineer, Paul Carlson, VE7ZWZ, and are exceptionally well done ... the quality one would expect to have to pay for rather than freely view on YouTube.
If you visit Paul's YouTube channel, you'll find a host of other radio and audio-related videos and I guarantee that you will learn something of value ... and probably hang around to watch several more. They are really well done.
 The 2019 Winter “Classic Exchange”
 |
| W7OS - Radio Club of Tacoma working the CX |
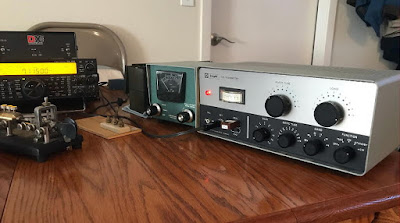
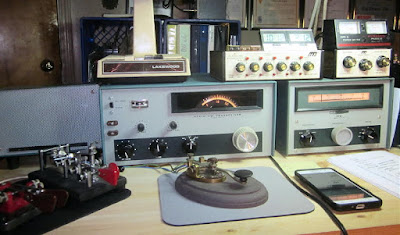
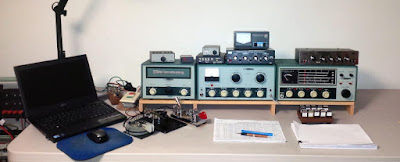
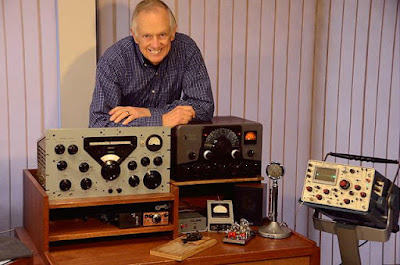
The "CX" encourages participants to use older vintage gear including any homebrew equipment, both receivers and transmitters. A unique scoring system provides bonus points for various equipment and combinations as well as encouraging 'repeat contacts' when you switch to different equipment.
 |
| W8KM and his wonderful vintage station |
No vintage gear? ... no problem! All amateurs are invited to participate and get in on the fun no matter what they are using and submit their scores.
 |
| K3MD's Heathkit AT-1 and Hallicrafters HT-37 ready for the CX |
The CX is a low-key relaxing affair and the 'extra' Tuesday operating period should encourage a lot of midweek activity from the vast numbers of retired operators who cherish and run older gear.
 | ||||||||||||||||||||||||
| Lots of combos ready at W4BOH's CX setup |
 |
| K6ZI, Las Vegas - WWII ARC-5s ready to go |
A summary of the Fall 2018 CX and soapbox comments, along with some wonderful vintage-station eye candy, may be found here.
For complete details of the upcoming event, see the web site announcement here.
If you've never entered the Classic Exchange, why not give it a try this year as it truly is a case of 'the more the merrier' ... and eastern operators, make sure to keep the porch light on for those out west!
 Radio Bench Fun!

Every once in awhile I’m reminded of the magic of radio and why this hobby is so much fun!
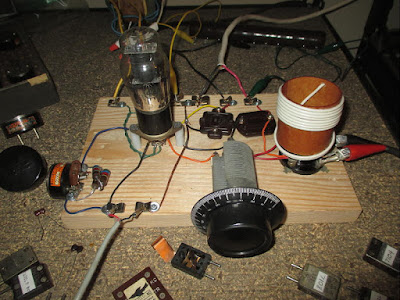
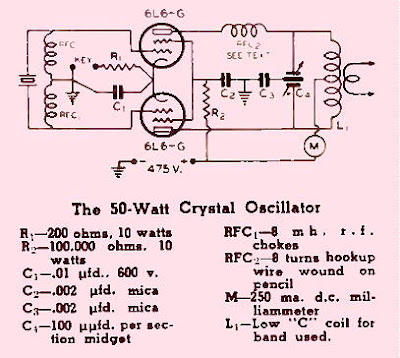
For the past week and a bit, in between power outages of up to four days, I’ve been optimizing a circuit from the December ‘36 ‘Radio’ magazine.
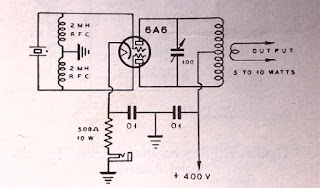
It looked like it might be something that would be fun to use during the weeknight NRN (Novice Rig Nights) activities ... a Jone’s-style push-pull crystal power oscillator using a pair of 6V6s. The original article called for 6L6s but my power supply can probably not provide much more power than is already coming from the 6V6s and these will likely be easier on my few precious novice-band crystals.
The circuit is lashed-up on my very well-worn 'aluminum breadboard', which is peppered with numerous convenient holes punched or drilled for mounting various crystal sockets, tube / coil sockets, variable caps etc ... it really looks awful but allows easy parts swapping to test out different configurations.
This afternoon I had the thing perking to my satisfaction, along with a very sweet-sounding CW note, using my WWII - era 7121kc crystal. Everything looked good into the dummy load so I connected the 40m antenna through the tuner, clipped the bug to the cathode resistor and at about 40 minutes before sunset, sent a short ‘CQ’, hoping for a nearby local but not really expecting a reply ... now this is the magic part.
My CQ was immediately pounced-upon by John, N2BE, on the other side of the continent, in New Jersey! I shook my head at the dangling pile of clip leads and just-barely soldered components clamped in the bench vice and had to smile when he gave me a 589 report! John was working the AWA's Linc Cundall CW Contest, where rigs must be pre-1950 designs or builds. I was happily able to give him a legitimate point, using my 1936 Jones oscillator!
At 400V on the plates, the little lash-up puts out 18 watts and seems to be about 45% efficient ... not too bad for a power oscillator. As well, the crystal current must be low as it keys nicely and doesn't sound stressed.
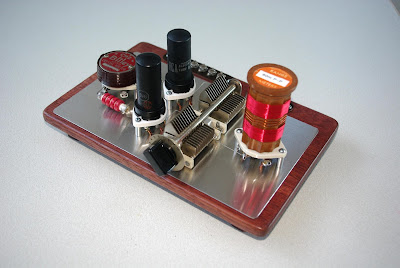
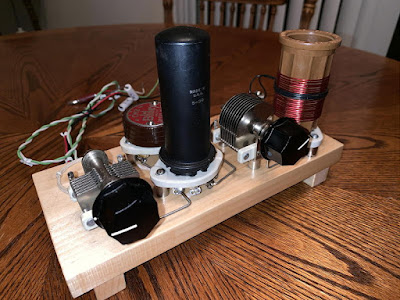
I’ll soon be rebuilding the little transmitter into something more presentable, probably similar to my Tri-Tet-Ten, using the short-lived but visually attractive mid-30’s building style that mated a shiny aluminum plate to a nice wooden base.
Stay tuned ... I’ll hopefully have it completed over the next few weeks and will be looking for some 80 / 40m NRN Monday night fun!
 Manhattan Style
After blogging for over four years now, I've covered a lot of topics that have piqued my interest in the ham radio world. I'm going to (once in awhile) select some previous blogs for reposting since they are every bit as valid as they were a few years ago and many new readers will have never found them without going way back! This one is from June, 2014.
****************************
I haven't yet decided to rebuild the little 630m CW transmitter using Manhattan style or the newer Muppet style being promoted by Chuck, K7QO.
The Muppet style seems to be PCB without holes, with parts being mounted on the copper pads directly. Like Manhattan or Ugly construction, changing components is very convenient. I pretty much split final construction methods between Manhattan style or dedicated PCB.
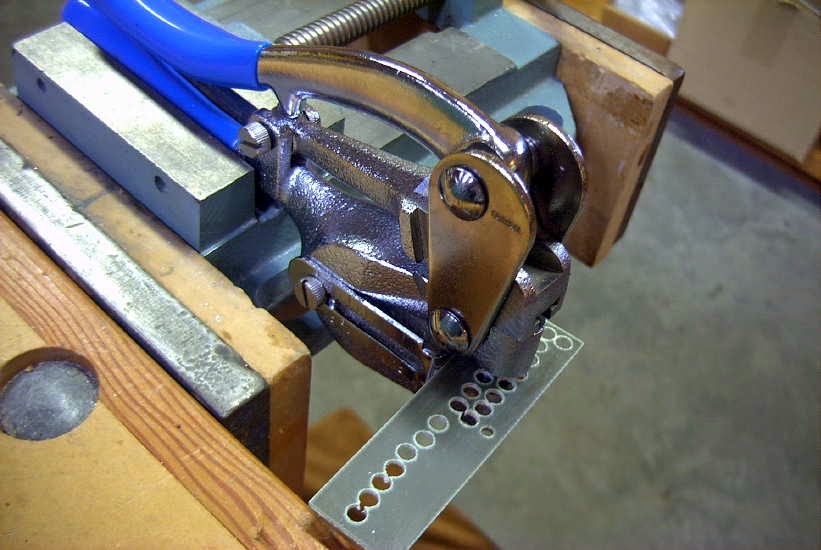
I recently ran low on the pads used for Manhattan and made another pile of various sizes. For those interested in using this style, it's pretty quick and easy to manufacture a good stock of your own pads using a simple hand punch.
These punches are widely available on e-Bay or possibly at your local hardware outlet or craft store. They come with various sized dies but I have only found myself using two sizes, 5/32 and 3/16. The punches have a small point at the center which I filed off so not to create a dimple in the punched pad.
It's also advisable to scuff sand the bottom of the PCB strip as well as to shine up the copper side with some light steel wool before punching any pads. They will eventually be glued to the circuit's PCB copper surface using a small dab of CA ("super glue") glue and the slight scuffing beforehand will ensure that the pads stay put. My usual technique is to place a tiny dab of glue with a toothpick at the spot where the pad will go. I then pick up the pad using an X-acto knife, spearing the pad's copper side and then pressing it down on the glue spot. CA cures quickly once it is oxygen-starved so pressing down on the pad for a few seconds is usually all that is needed. Any time I have run into trouble it was because I used too much glue....just a small dab is needed.
There are many good tutorials on Manhattan-style construction to be found on the internet as well as some super examples of what can be accomplished using this method as a "final" version technique.
For me, one of Manhattan's strongest selling points is that even though final part values may have been fleshed out during a rough build, parts can still easily be changed, added or even removed without a lot of fuss....unlike a PCB....but Muppet does look interesting!
I haven't yet decided to rebuild the little 630m CW transmitter using Manhattan style or the newer Muppet style being promoted by Chuck, K7QO.
 |
| K7QO Muppet Style |
I recently ran low on the pads used for Manhattan and made another pile of various sizes. For those interested in using this style, it's pretty quick and easy to manufacture a good stock of your own pads using a simple hand punch.
These punches are widely available on e-Bay or possibly at your local hardware outlet or craft store. They come with various sized dies but I have only found myself using two sizes, 5/32 and 3/16. The punches have a small point at the center which I filed off so not to create a dimple in the punched pad.
It's also advisable to scuff sand the bottom of the PCB strip as well as to shine up the copper side with some light steel wool before punching any pads. They will eventually be glued to the circuit's PCB copper surface using a small dab of CA ("super glue") glue and the slight scuffing beforehand will ensure that the pads stay put. My usual technique is to place a tiny dab of glue with a toothpick at the spot where the pad will go. I then pick up the pad using an X-acto knife, spearing the pad's copper side and then pressing it down on the glue spot. CA cures quickly once it is oxygen-starved so pressing down on the pad for a few seconds is usually all that is needed. Any time I have run into trouble it was because I used too much glue....just a small dab is needed.
 |
| VE7SL Lowfer Tx |
For me, one of Manhattan's strongest selling points is that even though final part values may have been fleshed out during a rough build, parts can still easily be changed, added or even removed without a lot of fuss....unlike a PCB....but Muppet does look interesting!




.jpg)


