Posts Tagged ‘Mobile’
 Get crackalackin’
As Fall is here, it is time to put together a To Do list of everything I have been putting off all Summer and the beginning of the school year.
TM-D710A

I have four of these rigs and they need some TLC. I need to make sure they have the updated firmware on the main unit, TNC, and operating panel.
The latest versions:
TNC: 1.02 – May 2011
Operating Panel: 2.12 – Janurary 2015
Main unit: 2.10 – May 2011
For the benifit of emergency operations, I have been performing the modificiation to the TM-D710As to open the frequency range.
Standard frequency plan. I developed a spreadsheet of the repeaters in the greater Kansas City area, frequecies for FRS/GMRS, the Kansas City Airport (MCI), Sherman Army Airfield, and various national park frequency plans. This is the first step in standardizing the configuration across all four of the TM-D710As. I can additionally take the spreadsheet and use it for programming my HTs. This should allow for a memory channel standardization that will make my life easier.
Weather Station

The current Davis Vantage Pro2 I have installed on the roof needs maintenance. Wouldn’t it be nice to get the top of the line version?
For some time I have been talking about finding a weather station setup that will work with a linux-based computer. That quest continues. I have read about a piece of software called Meteo that is suppose to work with Xastir.
And if I can’t get Xastir to work with the Vantage Pro2… is there another comparable weather station that WILL work with Xastir? Life would be a lot easier without Windows.
HF Antenna for home
I need to string up the Carolina Windom I have had sitting on the shelf for the last few years. The G5RV that is up now is showing its age (not to mention one of the legs is drooping badly). Now that the leaves have fallen, I should be able to get the Windom up there without too many problems (… famous last words).
HF setup in the mobile
Time to get going. I have all the materials I need. What I don’t have is an installation plan… mainly for the Tarheel antenna. I can’t do a hitch mount because I need the hitch for pulling my travel trailer. Two possible options: (a) get a swinging gate for the back bumper where you could mount a spare tire and a water can or (b) find some way to afix a mount coming out behind the left rear tire.
 User Hostile! Radios that you love to hate!
“I hate this radio”
Have you ever said this?
I certainly have. Some radios are a joy to use. They are intuitive, easy to use and you don’t ‘NEED THE MANUAL’ every time you want to change something!
HT’s seem to be the most ‘user hostile’ radios available to hams. I know! All HT radios should have certain things, VFO, on off knob/button, volume control and keypad, and in my opinion, they should not be so difficult to use that you need to read the manual every time you want to do, what should be a simple task; change CTCSS tone of a repeater, for example!
When HT’s were reduced in size, they became more complicated to use. Menu systems were instituted. They were further reduced in size and menus were multi-layered! How many times have I yelled at my HT after holding button a for 1 second, then within 4 seconds, tried to press button 2, for 1 second but no more than 2.5 seconds, while doing 3 pirouette turns on my left foot, only then, can I use my radio. That same button has 3 functions now a days. Press it once for one thing, press it again within a specified number of seconds and you get another function. Press and hold it and you get yet another option.
Enter the English Translation, manual! Poorly translated from Japanese, but at least its in English! (With many pertinent things omitted!)
Why do manuals go to great lengths to tell you in great detail everything that you ‘don’t want to know’ and will most likely never use or use very seldom?
But tell you want you NEED TO KNOW, naw! Tell you how to ‘undo’ something? That would make it too easy!
Actually, I really like this VX5-R HT from Yaesu. It’s a love/hate relationship, however! So very handy, it fits in the palm of my hand, has lots of memories, and many many nice features. Accessing those features is not always easy, especially without the manual right in front of you. If you ever push the wrong button, and send it into ‘never-never-land’, its hard to un-do what you just did! One thing that was left out of the VX 5 is a memory clear feature! That omission makes life with this radio difficult at best!
You cannot return a designated memory channel to its ‘no data’ state. The only thing you can do from the radio itself is to overwrite that particular memory with another frequency!
I’m not picking only on Yaesu!
This Icom V 8000 is the most ‘User Hostile’ radio that I have ever owned.
Not only is it difficult to use, but it has problems as well. The mic is notorious for a mechanical problem with the PTT button, and the external speaker jack does not work well. Unfortunately, the external speaker jack is where you have to plug the programming cable in to program the radio. The Icom program for doing this is also ‘user hostile’ BTW!
Editing and Cloning Software RT Systems I bought software and cable from RT systems to program and manage the Icom T 70-A. The HT and its programming software arrived yesterday.
The Icom T-70-A, is the replacement radio for the Yaesu VX 5
It will replace the VX5 as my ‘go to’ HT. Just last night, I picked up the Yaesu VX5 the wrong way, mashed some buttons on its face and sent it into never-never-land! Try as I may, I could not undo it with normal button press. Since the radio has an RT Systems program and cable on its way, I went nuclear, and reset the processor. Finally, the radio was operational once more. It needs programming of course but the display is no longer stuck!
It programmed the Icom T 70-A radio to my specifications with only a cursory reading of the manual. The radio is intuitive, easy to use and has some great features. RT Systems Programming Software and Cable
Funny, I just installed an Icom 7100 mobile HF/VHF/UHF/MF radio in my truck. That radio was ‘done right’ by the manufacturer! Its easy to program and use, so there is no need to keep the manual handy for simple tasks. I run mobile CW/SSB and VHF repeaters with it. If there were any UHF in the area, I’d have that programmed in there too. Its a joy to use!
This photo shows the IC 7100 on a modified clip board held in place with bungee cords. So far, I have not seen the need for programming software. That said, there is an SD card on board this radio. It can save the settings to the SD card. I have not explored this avenue yet. It would be nice to keep a copy of the settings on an SD card and on my laptop for future use. Something unexpected can happen. Spare radio data would come in very handy then. Replacing all the settings would be very easy with the programming/clone software. RT systems sells that one too.
Do you have a radio that you love to hate?
 World’s Best Microphone Hanger
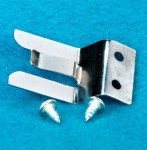
I am often disappointed by the crummy microphone hanger clips supplied with mobile ham transceivers. Typically, they are cheap metal clips with sharp edges waiting to impale your hand, that look like this:
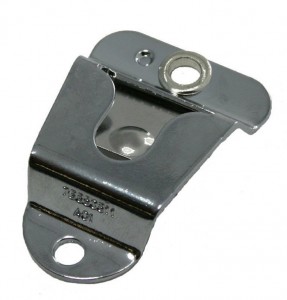
 I recently came across these microphone clips that are awesome! Available from Amazon for $7.49.
73, Bob K0NR
The post World’s Best Microphone Hanger appeared first on The KØNR Radio Site.
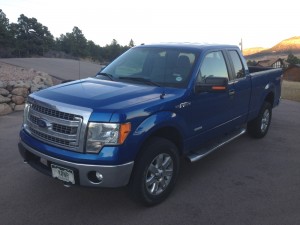
 2013 Ford F-150 Ham Radio Installation
After acquiring a Ford F-150 truck last year, I’ve been working on getting a ham radio installed in it. At times, I have loaded up my vehicle with multiple radios covering HF through 70 cm but lately I am content with just having a reasonable dualband 2m/70 cm FM rig in the mobile. Actually, I used a Yaesu FT-8900 that does FM on 10m, 6m, 2m and 70 cm but just set it up for the two bands.
One of the most critical questions for a mobile installation is what kind of antenna to install and where to put it. In the end, the antenna is going to be the main determinant of mobile performance. Ideally, I’d like to have the antenna on the roof of the cab but the truck will not fit in my garage in that configuration. Another option I considered was mounting a longer dualband antenna using one of the stake pocket mounts from Breedlove. I prefer NMO mounts for VHF/UHF antennas and the stake pocket looked like a good way to go. However, a little measuring revealed that a 1/2-wave or 5/8-wave 2m antenna on the stack pocket was not going to clear my garage door. So it seemed that I was limited to a shorter antenna. I may still use the stake pocket mount for an additional antenna for road trips or to add 6m and 10m antennas.
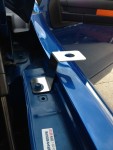
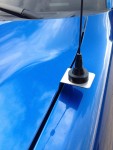
At this point, the F-150 bracket offered by The Antenna Farm looked like a good option. They have a number of these brackets made specifically for various vehicles, so check them out. This made the antenna installation quite simple. <click on any of the photos for a larger view>
The antenna is an NMO-mount dualband that I had laying around the hamshack. I don’t recall the exact model number but these are very common, about 19-inch long for 1/4-wave operation on 2m and a small loading coil to make it work on the 70cm band.
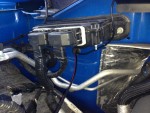
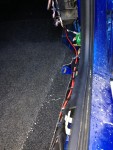
The F-150 has several precut holes for passing wires through the firewall. I used one that is on the passenger side just below a large module, as shown in the photo. It took a stiff wire and some force to punch my way through the rubber plug and into the cab compartment.
I don’t have a photo of the battery connection but I connected the positive lead right onto the battery terminal while the negative lead was attached to the truck chassis near the battery. You may have been told to always connect directly to the battery terminals but that advice no longer applies to some newer cars because there is a current monitoring device in the negative battery lead. To avoid confusing the vehicle battery monitoring system, the negative connection to your transceiver needs to be on the chassis side of the current monitor. Alan K0BG explains this issue on his web site. Actually, Alan has a wealth of information on mobile installations on his web site: www.k0bg.com. Oh, of course, I used inline fuses on both the positive and negative power cables.
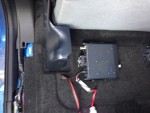
I mounted the FT-8900 transceiver on the floor under the back seat. To route the power cables and antenna coax, I pulled up the flat plastic trim piece that runs along the floor at the passenger door. I started from the front and did some careful prying (and praying) to remove the trim without breaking it. This exposes a trough with a factory wiring harness in it but there’s room for more. A few other plastic trim pieces were removed to get access to the wires coming through the firewall. All in all, this was not that difficult. (Yea, Ford!)
The photo to the left shows the FT-8900 radio installed under the passenger side rear seat. I drilled holes through the floor and mounted the radio with hefty sheet metal screws. The screws go right through the metal floor and and can be seen from under the truck. (Check that out before drilling!) Because the radio body is under the rear seat, I am using a small external speaker mounted near the drivers seat.
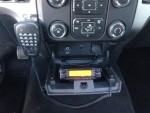
The radio control head is mounted inside a little door/shelf that normally pops open to reveal the USB port for plugging in a smartphone. (Note that Ford has multiple seat / dashboard configurations.)
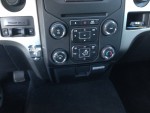 The FT-8900 control head just fits inside this little shelf, even when the door is closed (see photo). The microphone does have to be removed to close the door. I mounted a microphone hanger with a couple of sheet metal screws, as shown in the photo. I don’t like the crappy little hanger that usually comes with a ham transceiver so I bought some higher quality hangers on Amazon.
Overall, I am pleased with the radio install. The antenna location is clearly a compromise and I notice the performance is not as good as my previous vehicle (which was a small SUV with an NMO mount antenna in the middle of the roof.) But the antenna is “low profile” and sufficient for “around town” mobile operating. I am getting a little noise on the 2m band which needs some investigation. The 70cm band is very clean and is the band I use the most.
73, Bob K0NR
The post 2013 Ford F-150 Ham Radio Installation appeared first on The KØNR Radio Site.
 How About a New 12 Volt Automotive Connector?
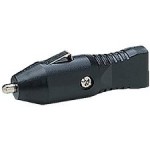 Don’t get me wrong — I do like standard connectors. A while back, I wrote about how the micro-USB connector became the standard power/data connector for mobile phones. Well, that is unless you own an iPhone.
The good news is that we do have a standard power connector for 12 VDC in automobiles. The bad news is that it is an ugly behemoth derived from — can you believe it? — a cigarette lighter. For some background and history, see the Wikipedia article. The Society of Automotive Engineers (SAE) has a standard that describes this power connector (SAE J563). Alan K0BG correctly warns us to “never, ever use existing vehicle wiring to power any amateur radio gear” including the 12 volt accessory plug. (I always follow this advice, except in the cases when I don’t.) I also found this piece by Bill W8LV on eham.net that describes the crappiness of these connectors.
Well, there is a new standard power connector showing up in cars: the USB port. These ports provide the data and power interface for mobile phones, integrating them into the auto’s audio system. Standard USB ports (USB 1.x or 2.0) have a 5V output that can deliver up to 0.5A, resulting in 2.5W of power. A USB Charging Port can source up to 1.5A at 5V, for 7.5 W of power. This is not that great for powering even low power (QRP) ham radio equipment.
Now a new standard, USB Power Delivery, is being developed that will source up to 100W of power. The plan is for the interface to negotiate a higher voltage output (up to 20V) with 5A of current. Wow, now that is some serious power. We will have to see if this standard is broadly adopted.
Two things are obvious to me: 1) the old cigarette lighter connector needs to go away and 2) it is not clear what the replacement will be.
What do you think? Any ideas for the next generation of 12V automotive connector?
73, Bob K0NR
The post How About a New 12 Volt Automotive Connector? appeared first on The KØNR Radio Site.
 Get Your Mobile Frequency Sticker On
One of the things I try to do is monitor the National Simplex Calling Frequency for 2 meter FM: 146.52 MHz, especially when mobile. It is fun to see who might show up on 2m simplex: SOTA operators, hikers, mobile stations, campers, etc. See these two posts on operating ideas: A Simple Wilderness Protocol: 146.52 MHz and The Use of 146.52 MHz.
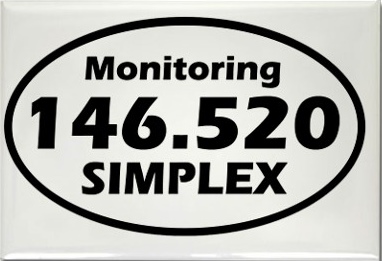
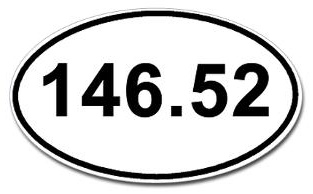 It is also fun to say hello to another ham when you pass them on the highway. While you may see their call letter license plates or notice their mobile antenna, you may not know what frequency they are monitoring. The Noise Blankers Radio Club has solved this problem — just put this sticker on your vehicle.
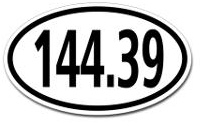
After poking around cafepress.com, I found some additional options for indicating your radio frequency:
The 2meter SSB calling frequency:
The APRS frequency:
And there’s this magnet for your refrigerator:
If you don’t like any of these, cafepress.com makes it easy to create your own. Go for it!
73, Bob K0NR
 Show Notes #116
Episode #116 Audio (Listen now!):
- Week-end Brushes with fame
- HamQTH Author Wants Your Feedback
- Search for Vanity Call Signs
- What’s New in Ubuntu 14.04 (Trusty Tahr)
- Ubuntu 13.10 for Smart Phones (Ubuntu Touch)
- Pete Looks for a phone
More Topics
- The Savannah Project
- List of small/medium/large ham radio projects
- Fascinating tour of the space station
- Small Wonder Labs to go QRT
- Social Media Roundup
- Google+
- Felix R.
- Peter N.
- Twitter
- @TheZerocool (Denis S.)
- Mailing List
- Adrian (2E0SDR)
- Rusty (NM1K)
- Robert (AD0BM)
- Subscriptions
- Bill A. (Monthly)
- Bill H. (Monthly)
- David L. (Yearly)
- Gary U. (Monthly)
- Jeremy H. (Monthly)
- Scott P. (Monthly)
- Robert H. (Yearly)
- Thank you to our monthly and yearly subscribers.
- Thank you to all of our listeners, live and quasi-live.
- Please check out our website: http://lhspodcast.info.
- You can reach us at [email protected]. You can leave us voice mail at 1-909-LHS-SHOW (547-7469).
- All hatemail can go to [email protected]
- Please subscribe to the mailing list. A link is on the Web site.
- Go to CafePress and Printfection and buy some of our show merchandise. Each purchase helps out the show.
- Listen live every every other Tuesday at 8:00pm Central that would be Wednesday at 02:00z. Our recording schedule is on the Web site.
Music
- ”The Soundtrack of Our Summer” by The League from the album The Soundtrack of Your Summer, courtesy of Jamendo.
- ”Whore of Babylon” by Sons of Sin from the album Rebelations, courtesy of Jamendo.


