Posts Tagged ‘Products’
 New records set at VE3WDM!!
 |
| Julie was out and about snapping shots!! |
| At 40mW and below this is the reading |
up purchasing was MRP40 cw decoding program. Now my code is not to bad at all but during contests I have found that for some reason some stations send at the speed of sound. (not sure why as they may loose more contacts that gain as folks just move on being not able to understand the fast code) For those stations this is were MRP40 shines.
| Programs running during the contest |
That was the software success for the contest other great events were being able to keep my power down to 1 watt....except for 2 contacts were the power creeped up to 3 watts. Did I say the power was kept to 1 watt? That was for a total number of 6 contacts the rest of the DX contacts went into the log with power numbers varying from 10mW's to 900mW's!!
Here is how the power numbers broke down
Contacts Power
2 10mW
13 20mW
2 40mW
4 50mW
14 100mW
22 500mW
12 From above 500 to 900mW
6 1 watt
2 3 watts
77 TOTAL
I did say there was some records broken here at VE3WDM and they are
1. 69 DX contacts with under 1 watt in a contest!
2. Miles per watt bar is set higher.....CR3A with 10mW is 344,468 miles per watt
DL6FBL with 10mW is 400,126 miles per watt
| 10mW on the QRPometer |
 Bring on the contest………..
| New monitor in place and ready for ARRL CW contest |
| Very dusty |
one DVI and one VGA output port. It was the VGA port that was not allowing my new monitor to shine with all it's resolution. I ended up purchasing the Zotac Geforce GT 620 video card. This has two DVI outputs and as with the other care supports dual monitors. A small part of the day today was spend
| Rear view of PC |
| New on left old on right |
 A new antenna coming soon………
I was going through my QST this week an had notice an add for a new antenna by SteppIR. In the past I would had just passed by the add but this antenna in the
picture had an eye catching look to it. It's called the CrankIR vertical
and can be used from 2m to 40m or another unit that goes from 2m to 20m
(an 80m unit is in the works) The antenna is great for portable ops,
field day, emergency and neighborhood restricted antenna areas...and the
list goes on!! For me this antenna can easily fit into a nap-sack and
carried out into
the great outdoors, placed in the truck of my Scion IQ and hauled to a park and setup at a picnic bench were I have done many a mini contest from.
So lets look at the nitty gritty of the antenna first off it's made by SteppIR who has a GREAT reputation and has been the choice of many DXpeditions. The 20m version extends to 9 feet and when folded up is only 26 inches. The 40m version is 18 feet and reduces to 30 inches. As far as I am concerned both sizes are very manageable for transporting. I am not gong to high light evey detail as there is a link on this post to the SteppIR CrankIR page with limited info but more to come!! This antenna is due to make its purchase date in the spring of this year. I did send an email to SteppIR with some questions about the antenna and Bart was very prompt to get back to me.
My Questions were........
1. I did not notice any radials are there any? (I asked this because for portable ops sometime radials can become a pain especially if you are in a park where the public is.)
Bart's answer was.....
The antenna will be designed to work with a single, elevated, tuned radial (included)
THERE HAS BEEN SOME COMMUNICATION
BETWEEN MYSELF AND STEPPIR SINCE THE POST.....IT WOULD SEEM I
MISUNDERSTOOD AN EMAIL. THE CABLE YOU SEE IN THE PICTURE DOES RAISE AND
LOWER THE ANTENNA ELEMENT TO THE DESIRED BAND TO WHICH YOU WANT TO
OPERATE IT'S NOT A COUNTER POISE. (MY MISTAKE) BART TOLD ME THERE IS A
COUNTERPOISE THAT WILL (THIS IS THE PLAN) EXTEND AND RETRACT FROM THE
BASE WITH ANTENNA AS YOU GO FROM BAND TO BAND.
 |
| Mounted on bench |
So lets look at the nitty gritty of the antenna first off it's made by SteppIR who has a GREAT reputation and has been the choice of many DXpeditions. The 20m version extends to 9 feet and when folded up is only 26 inches. The 40m version is 18 feet and reduces to 30 inches. As far as I am concerned both sizes are very manageable for transporting. I am not gong to high light evey detail as there is a link on this post to the SteppIR CrankIR page with limited info but more to come!! This antenna is due to make its purchase date in the spring of this year. I did send an email to SteppIR with some questions about the antenna and Bart was very prompt to get back to me.
My Questions were........
1. I did not notice any radials are there any? (I asked this because for portable ops sometime radials can become a pain especially if you are in a park where the public is.)
Bart's answer was.....
The antenna will be designed to work with a single, elevated, tuned radial (included)
Now what I get from this answer is the
radial is the crank up wire that is surrounding the antenna I had
thought this was for the cranking of the antenna up and down.
Note...see green section below for correct after the fact info.....
My next question was....
2. Was the cable and crank up device
part of the antenna or a separate piece?
Bart's answer was......
The crank is for extending or retracting the element around the frame of
the antenna. It does not raise/lower the antenna or support tube.  |
| The 40 to 2m retracted |
This is were I got the impression the
cable was not to raise and lower the antenna element and was the
elevated tuning radial he spoke of. As for the whether or not it was
attached to the antenna was not sure what his answer was...BUT
the picture to the left seems to look like it is attached to the base
of the antenna. There looks to be a bolt just below Mike's hand.
Bart's answer was........
Prices have not been set, but we do expect them to start at about $250.
So there yo go just some tidbits of
info about what seems to be a very nice antenna from a very reputable
company!!
 Elecraft KX3…stand, CW key and battery charger.
| KX3 on the new Nifty stand viewed at same angle as below pic |
Last week I ordered a stand for my KX3 radio I had seen it on the Nifty ham radio site. I was there looking at their new KX3 radio guide. I have one of their guides for each of my radios and they are great. If you want to find a "how to" with your radio instead of searching through your manual these Nifty manuals have it all set out at your finger tips. So back to the KX3 stand.....I was surprised to see they were
| KX3 on it's own legs |
Also a week or so ago my KXPD3 keyer and KXBC3 NiMH battery charger came in. I have not yet had the time to install the KXBC3 charger. I have mounted the Key and it worked great right great out of the box. The key does come with other springs to change
the tension of the key. Up to this point I have not changed the key spring tension it works fine as it is.
My Begali key that I have was (I thought) giving me problems with extra dit's and dah's at times. It became very frustrating and even after adjusting the key as well as cleaning the contacts I would still have the same
| New KX3 key |
 Where does the money come from???
For some time now there has been a rumour of a new radio coming out from Kenwood.
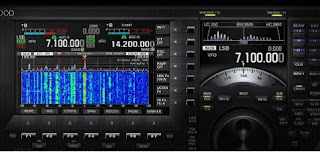
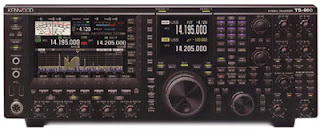
In Japan Kenwood is anouning a new addition to the family of radios. They are saying the TS990S will be released Feb 2013. It's a great radio with many features and great specs...but it comes with a very steep price tag.....9,138.78. I am just not sure how folks come up with the cash for rigs like this.
 |
| View of the TTF on the TS 990S |
Independent DSP filtering for each receiver
7 inch TTF display
3.5 inch TTF sub display
independent receivers
Updates via the internet
Below are some rigs with similar spec's and price tag to boot.
IC 7800
200 watts
independent receivers
7 inch TTF screen
12,500
FTDX 9000D
Has a TTF 6.5 inches
200 watts
Sub receiver
10,900
Of these and other companies who offers rigs under 2,000
Yasue has 5 HF radio's under 2,000 and 9 rigs above, Icom has 4 rigs under 2,000 and 4 rigs over. (not including IC 7100 as it's not out yet) Kenwood has 5 under 2,000 and one above. Ten Tec 4 rigs under 2,000 and 2 rigs over. As for Elecraft 2 rigs under 2,000 and no rigs over 2,000 ( I did not include the kit rigs as with Ten Tec as well) Lets not forget Flex radio they have 2 rigs under 2,000 and 3 over 2,000 this includes the just released 6500 and 6700 series rigs. The market for Amateur radios under 2,000 is fairly decent but that still is a steep price for a rig. Lets not forget with a lot of these radios there are extras that may have to be purchased to have the rig you want. So just as there are Roll Royce and Bentley's so there are also the high end radio gear and they must sell or they would not produce them.  How do you sell an Elecraft K2
 |
| My first K2 serial 6613 |
developed a kit that allows the K2 to be setup and ready for any add on you want to put in the K2. Let me clear the waters a bit......if you build a bare bones K2 with no options but later you want to add some options, it my require you to remove some components from the K2 in order to add the option.
| NB rework board top view |
From the post I received great suggestions on options that should be added while building the kit. The one idea I am leaning toward is to just leave the radio "option free" and
| NB rework bottom view showing header |
 Fourth and final KX3 video………
| Up and running |


