Posts Tagged ‘Uncategorized’
 Portable Station Build – Part 1
I have been working on putting my radios and gear into a portable box. My goal is a single station that is portable which I can use at home or outside the home. I wanted this setup to be able to be used at things like: Field Day, Communications volunteering for local events, or simply operating at a local park. I don’t want portable gear and fixed station gear at home. I think for me, having a single station that I know inside and out, that could be used in multiple locations suits me just fine. A few guys in our club have talked about doing an informal get together at a fellow member’s farm and spend the afternoon operating. An informal “Field Day” just for fun. I finally have enough done to put up the first post describing my efforts.
For the box that will old the radio gear, I chose a MTM Sportsmen Dry Box called the Spud 7.

Inside the box, I am building an aluminum frame to hold the gear. I am using 3/4″ aluminum angle from my local bog box home store. Also used is some flat aluminum pieces where I did not feel the angle would work well.
Here is the outer portion of the frame.

There will be two shelves. The bottom one will hold both radios, a Yaesu FT-857D and a Paesu FT-8800R. Here is the frame with the radio shelf installed.

The frame is assembled with 1/8″ aluminum pop rivets. I find these easy to work with and they can be easily drilled out if I have to remove and replace something. Some joints have two rivets and other places have one.
The upper of the two shelves, will hold a LDG tuner, a SignaLink USB device and a PowerWerx power supply. Here is the upper shelf. I had it installed but had to take it out to drill the holes for mounting the power supply. The radios will be installed with the mobile mounting brackets that same with them. I ordered the optional mounting brackets for the power supply. So all these things will be held in bolts, nuts, and lock washers. The tuner will be held in with double-sided tape and plastic tie wraps. The tuner is lightweight enough to not move when I tested that solution.
Here is the upper shelf not installed . . . .

The tuner will be on the left, and the power supply on the right.
Once I get the upper shelf in, I plan on painting the frame with a black hammered spray paint. But that’s subject to change . .
The lower part of the frame will be covered with a plate. Mounted on the lower opening, will be a face plate which will have antenna connectors for each radio, power connectors, a power meter and a few other things. I am finalizing the plans for that now. I have it drawn out and designed, I just have to review it again and start ordering the electrical and antenna components.
I will write a Part 2 as I make more progress. I am also going to work on a solar solution for power in the field. That will come later as well.

Time for some radio now
I’ve spent far too much time putting this blog back in line thanks to some dodgy code that got into my site. The site as a whole has shrunk a bit and I’m adding content back in as I go along. Its all very time consuming even though I have loads of back ups.
Having said that I’ve found a bit of time to do some planning for the new mast and feeders etc which I’ll order as soon as I get firm quotes for the building work I need to do for the extra room.  There’s still a bit of a battle at home over the position of the thing which looks a bit like this one. They are fairly compact masts in as much as they are telescopic but pretty heavy too at 80+Kg.
Plans are to make up a tilt bracket and to mount it on the side of the new room (with enough space for a decent beam in the future).
With it being telescopic the feeder needs to be carefully considered so it doesn’t fracture from being raised and lowered regularly. This is part planning application and part saving antennas from strong winds and salt spray. Ideally a good quality VHF coax will be used for yep, VHF antenna’s but getting the right one is crucial to avoid expensive mistakes. Time for a chat to the DX shop I think.
So
 So I’ve migrated as much as possible in the space of a couple of hours and there is some key material missing but frankly I’m not n the mood to move anything else. This will have to do for the time being. I will attempt to move everything from the WordPress site over time but its going to take a long time to do it if I can actually summon the energy.
Sick of being hacked
WordPress is a great blogging platform but frankly I’ve had enough of being hacked. So to stop needing to spend hours and hours fiddling around with a website, which frankly isn’t much fun, I’ve moved things here until I get either the site sorted or a more secure platform to run things off.
Shame really as I’ve been with WordPress for many years and its done me well, but I just can be hassled with spending hour after hour going through code for a simple blog.
Radio silence
This evening was supposed to be a UKAC night for me but with strong winds and flooding earlier in the day I decided not to head up to Sandwidth with a 50MHz antenna, just in case it got nasty. Even though it looks quite down here in the valley (I’m not just talking about 50Mhz activity either- Only GI4SNA can be heard) the top of the hill will be muddy and potentially windy.
So what to do with the radio time. We’ll I’ve been carrying around a plastic case for some time wondering when I’ll get around to using it as a sturdy case for packing up my FT817 and taking on trips with. The case  used to hold a complex vice but the parts are happier in my tool box. So i stripped out the old foam and measured up the insides. It measures just about the wrong size for the easy to use pick and pluck foam so I ordered a 5 mm base layer and 40mm deep top layer from eFoam. The job is fairly simple and needs only a very sharp long bladed knife and a bit of patience.
I laid out the rig, tuner, wall wart, battery, mic and a few odds and ends into the case and carefully marked out the positions using a steel rule and marker pen (making sure the marker pen was on the inside of the are to be cut as I didn’t want any left over pen. I suppose you could just as easily cut it and turn it all over but that may require extra thinking.
So with holes cut out and the bottom layer done, like so (as they say on Blue Peter) there wasn’t much to do apart from fill it up with the goodies. So with a free(ish) plastic case and a few quid’s worth of foam I’ve got a budget Pelicase. Probably just as sturdy for my needs and significantly cheaper.
Just one reminder, the blade needs to be very sharp and a light sawing action seemed to cut the foam nice and smoothly. Just one last thing to do is to raid the spare elastic department (If we have one) and form a kind of retaining strap for the bits in the lid.
Who said UK activity night should be limited to on air activity?
Mini Rotator?
Whilst leaning out of the car window and manually turning my decorators pole (complete with 70cms 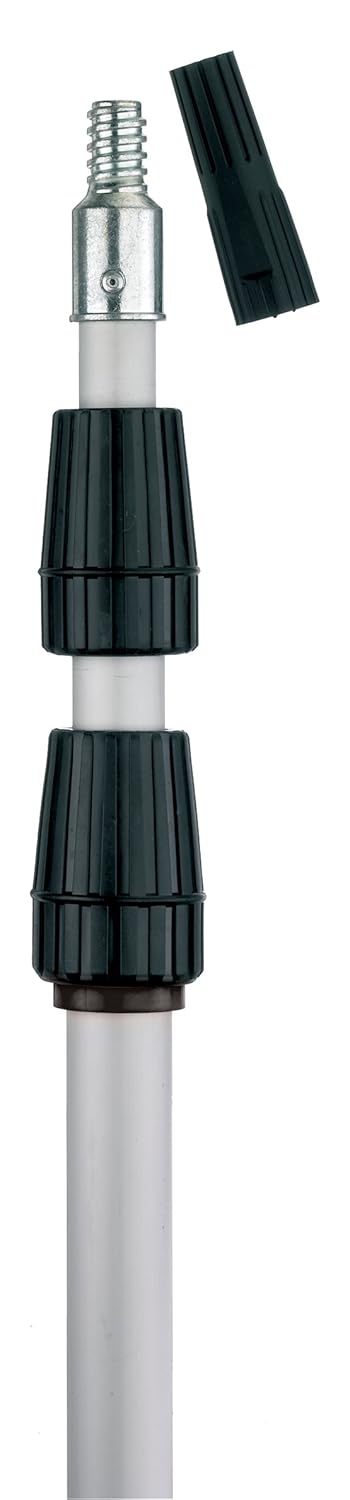 antenna) and waiting for a break in a UKAC (VHF Contest) QSO I thought that there must be a better way of doing this.
The antenna weights way less that 1Kg and the decorators pole has a perfect coarse thread to it so it shouldn’t be too hard to make up a simple attachment with a stepper motor on it, driven of course by the mighty Arduino and its motor shield
Although I’ve not put one of these together and its a bit of a pipe dream whilst work keeps sending me all over the place I’ve seen more that my fair share of articles that use the motor shield to drive stepper motors (guessing its some kind of H bridge / relay arrangement). So I’m guessing (again) that the bare bones of the system could be pulled together over winter. ready in time for next years UKAC series.
I enjoy the UKAC series but running /P has its unique problems up here in West Cumbria. As I type now the winds are getting stronger and we expect the gale force variety over the weekend. Even when we’re not being blasted with salty Irish Sea venturing out /P means that having a car window open in the winter on the top of a hill is ‘challenging’.
So the challenge is on me now to come up with something now that my work project is attempting to shift from ‘Madness’ to simply ‘Frenetic’ between now and November and possibly simply ‘Stressful’ in December.
Once that’s done…hah ha…I’ll concentrate on the single boom 6m / 2m /70cms antenna I’ve been thinking about that means I don’t have to crawl around in the dark with loads of bits in the car.
Still if someone’s done it already, please put me out of my suspense.


