Posts Tagged ‘VHF’
 2012 Field Day: K0NR Results
 For 2012 ARRL Field Day, we operated from the cabin in portable style. Temporary wire antennas were tossed into the trees and the trusty Honda EU1000 generator provided emergency power. The Spousal Unit, Joyce KØJJW got on the air and made some contacts, making this a multi-op effort.
We used a similar approach as last year, see my post, ARRL Field Day: Season to Taste. The main difference is that the sporadic-e on 50 MHz wasn’t as good this year, but we had a fun time working the event.
  Band  Mode  QSOs
     7  SSB     15
    14  USB     78
    21  USB     73
    50  USB     33
   144  USB      3
   420  FM       1
 Total  Both   203
        Score: 406
As usual for Field Day, most of the time the 20 Meter phone band was crammed with stations calling CQ Field Day. There were many times that I responded to one call and had another radio operator think I was working them. It occurs to me that we have this emphasis on exposing new people to ham radio during Field Day via the GOTA stations and public demonstrations. However, this is kind of like showing someone the joy of driving a car by having them experience a giant traffic jam. Is this really the best way to introduce people to ham radio?
Field Day: Make it your own!
73, Bob K0NR
 How Not to Do a SOTA Activation
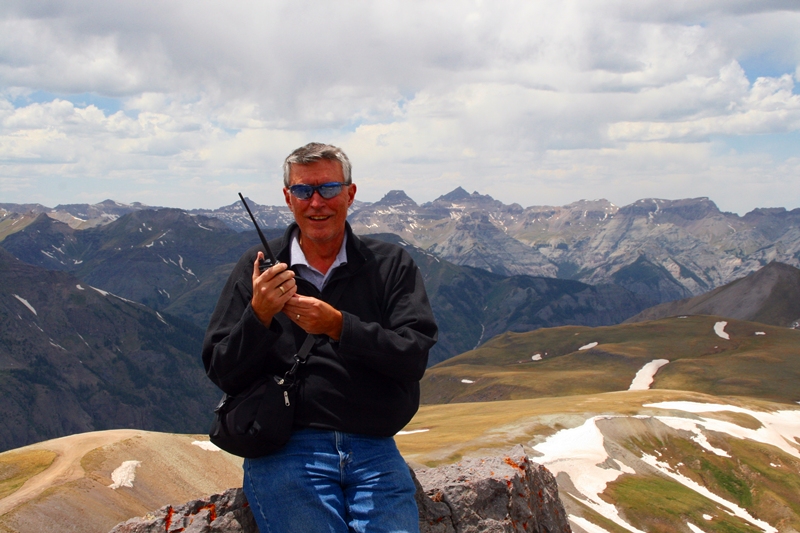
This weekend my wife and I were out exploring the San Juan Mountains near Ouray, Colorado. We found ourselves on a Jeep road to Engineer Pass. When we got to the pass, we stopped to have lunch and I examined the high peaks nearby. I saw some people on the summit of one of the peaks, which I determined was Engineer Mountain by looking at a topo map.
Hmmm, I said to myself, Engineer Mountain is a valid peak (W0/SJ-011, 12968 feet elevation) for a Summits On the Air (SOTA) activation. The only portable radio I had with me was a Yaesu VX-8GR with the stock rubber duck antenna. Not a great SOTA station. But if I could whistle up 4 contacts on 2M FM simplex, I would have a legitimate activation. We had already decided to climb to the summit, so any radio activity was just icing on the cake.
So off we went up the mountain. I got to the top and started calling on 146.52 MHz FM. Now it hits me that we are in the middle of a national forest, away from population centers and, to top it off, no one is expecting a SOTA activation here today. This might be a bit of a challenge to make 4 contacts. Then Thomas, KRØNK, answered my CQ. OK, there’s one contact. A little bit later Dave, AKØMR, comes on frequency and gives me a second contact. Both of these guys were in Grand Junction, CO, which is about 100 miles from Engineer Mountain. Not bad for a peanut-whistle HT using a standard rubber duck antenna.
I needed two more contacts. I tuned around for a repeater in the area and came across the 147.27 MHz machine which turned out to be a stones throw away from my location. It requires a CTCSS tone, so I fumbled around until I figured that out. No, I did not have a repeater directory with me…that was safely stored in the Jeep at the bottom of the mountain. I gave a quick call with my location and Ben WB5ITS came back to me. We QSY’d over to 146.52 to make my third contact. Anticipating a rough go of it, I asked my wife Joyce K0JJW to descend off the peak while I remained at the top, so she could be my fourth contact. (SOTA rules do not allow contacts between parties on the same peak.)
Somewhere along the way, I reach for a piece of paper to log the contacts, only to find that I did not have a writing utensil with me. Duh. I would have to remember the times and callsigns of the contacts and write them down later.
I completed the fourth contact and headed down. Later that evening I checked the ListsofJohn database and found that there are actually two peaks in the area called Engineer Mountain. Go figure. The SOTA database only recognizes one of them…of course, you guessed it, not the one I was on. It turns out that the Engineer Mountain I was on is subordinated by an adjacent peak: Darley Mountain (W0/RG-034, 13260 feet). However, since I operated from 13,218 feet on my Engineer Mountain, it is within the 75 foot vertical activation zone for Darley Mountain. So, this does count for a SOTA activation of Darley Mountain.
This is where I could claim that incredible skill, flexibility and a little luck ruled the day. I think a more appropriate analysis is to concede that a complete lack of planning and preparedness produced a marginal result.
What can we learn from this?
- Do your homework concerning the SOTA peak that you intend to activate before you start the climb. Make sure you know where it is and that you are really on it.
- Always keep a notepad and pen/ pencil in your backpack
- Even for casual hikes, take along a decent antenna for the HT. A half-wave vertical is way better than a stock rubber duck.
- Plan in advance so you can post your intended SOTA activation on sotawatch.org
- Have a repeater directory (or equivalent) available to identify repeaters in the area.
- And don’t forgot the normal hiking Ten Essentials
Beyond doing a SOTA activation, some of these items could be important if an emergency should occur. It runs out there was no mobile phone coverage in the area. I used to be pretty vigilant about taking an HT with spare batteries and extended antenna along on hikes but have gotten sloppy lately. See Rescue on Uncompahgre Peak, which describes an incident years ago when my radio turned out to be very useful during an emergency.
In the end, I did complete my first SOTA activation, so I can be happy about that. And it gave me the opportunity to relearn a few things about planning and being prepared.
73, Bob KØNR
P.S. The WØ SOTA guys recently created a great W0 SOTA page.
 Gear Up for the June VHF Contest!
 This weekend is the ARRL June QSO Party (also known as The June VHF Contest). It is a great opportunity to get on the air and try out the VHF bands. In particular, 6 Meters usually has some fun sporadic-e propagation during the contest. It is a blast when that band comes alive with signals from across North America.
For complete info see: http://www.arrl.org/june-vhf-qso-party
I am going to operate from our cabin near Trout Creek Pass (DM78), focusing on 6 Meters and 2 Meters.
Check out this article that I wrote on how to work a VHF contest:
http://www.k0nr.com/rwitte/vhf_contest.html
Most of the activity will be on SSB, calling frequencies are: 50.125 MHz, 144.200 MHz, 432.100 MHz, all USB
On FM, try these frequencies: 146.55 MHz, 223.5 MHz, 446.0 MHz
Get up off the couch and have some radio fun this weekend!
73, Bob K0NR
 This Spewed Out of the Internet #22
 The internet keeps spewing forth a river of bits, some of it actually useful information.
Reliable sources tell me that the date for the 2013 Hamcon Colorado has been set: June 28-30 in Estes Park, Colorado. This event is the best hamfest in Colorado and happens every 4 years. (It is the ARRL Rocky Mt Division Convention which rotates between Colorado, Utah, Wyoming and New Mexico.) The date is a little later in the year than previous Hamcon Colorado’s which I think will be even better for attracting out of state visitors. The 2012 division convention will be held July 27-29 in Bryce, Utah.
The ARRL June VHF QSO Party is coming up on June 9-11. This is my favorite ham radio event of the year, since it stimulates VHF activity and (usually) has some good propagation on 50 MHz. Get on the air and have some fun!
For the EEs in the crowd, my friend Ken Wyatt (WA6TTY) is now writing an EMC Blog for Test and Measurement World. Ken is a industry expert on Electromagnetic Compatibility and a pretty darn good author as well.
This article in The Atlantic says that people are using their WiFi SSID to share their political position (“I Heart Obama”). This is sad, really sad.
Neil Armstrong is one my personal heroes, not just because he was the first man on the moon (I mean, if you believe that really happened). He has had every opportunity to promote himself as a celebrity but instead he keeps a low profile. I like that. I came across the video of an excellent (and rare) interview with him on an Australian web site.
There is a new ham radio podcast on the air: Ham Radio Podcast. Check it out and give it a try. And, in case you haven’t found this one, check out the Practical Amateur Radio Podcast by my friend Jerry Taylor (KD0BIK).
The ARRL has launched the digital version of QST magazine. It seems to work but it’s not a very satisfying experience on my little netbook. Probably better with a large monitor. See comments from AA6E and KE9V.
- 73, Bob K0NR
 A New Digital VHF/UHF Radio from Yaesu
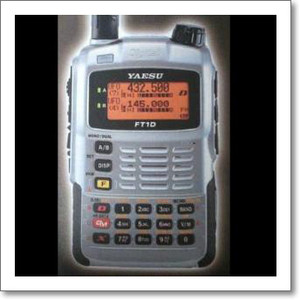 A while back, Yaesu published a white paper/brochure on VHF/UHF digital technology that slammed D-STAR for using GMSK modulation and stated that C4FM (4-Level FSK) is the way to go. See my previous posting on that topic. The paper also talked about DMR and APCO 25 as standards that use C4FM.
At this point in time Vertex Standard believes the C4FM (4-level FSK) FDMA or TDMA are the most suitable selections for Amateur radio applications. In early 2012, we will release a C4FM (4-level FSK) FDMA Handy-Talky and a Mobile transceiver into the Amateur radio market. After our initial introduction, we plan to introduce a C4FM (4-level FSK) TDMA (2 slots) or TDMA Handy and Mobile transceiver into the Amateur market.
 Look, No IP
A couple of years ago we changed our broadband Internet service provider. The new provider did not support a static IP address. I have a QNAP network attached storage device which is primarily used for backup. However, it’s actually a Linux box that runs the LAMP (Linux, Apache, MySQL and PHP) software which I occasionally use as a web server for experimentation. I sometimes need it to be accessible from the internet. So I opened a free account with DynDNS in order to access the server using a host name.
Some time last year after I came out of hospital I started to receive emails from DynDNS informing me that my account was being disabled due to abuse and inviting me to open a paid account. As far as I could tell, the only “abuse” was that my script to inform DynDNS of my current IP address was running more than the number of times DynDNS permitted. I had no idea why it should start misbehaving like that and cynically thought it was just a ploy to convert free users to paid subscriptions. I was in no frame of mind to deal with the problem, nor to dig into my wallet, so I simply closed the account and had done with it. This would have had the effect of breaking some APRS-related functions on my site but I had other things of greater concern to think about.
A few days ago I decided to look into why the CDGVHF ANSRVR group was not sending any messages. ANSRVR is an APRS tool used to send APRS messages to groups of interested people. CDGVHF stands for Cumbria Dumfries and Galloway VHF group and it is intended to disseminate alerts about VHF and UHF openings in the Cumbria, Dumfries and Galloway area (grid square IO84.) It’s essentially a filter that acts on emails sent out by DX Sherlock and converts them to APRS messages addressed to ANSRVR. I could, of course, just have the emails sent to my smartphone. But it’s more fun to make use of ham radio!
I looked for an alternative free service to DynDNS and decided to try No-IP Free. As far as I can tell, No-IP won’t accuse you of abuse for updating your IP address too frequently, in fact its client software appears to do this every few minutes which seems like plenty. It does have a requirement that you confirm your account is being used once a month, which could be a bit annoying, but I’ll see what happens at the next update.
In the meantime, CDGVHF is now sending out propagation alerts again. To receive alerts of VHF and UHF openings in the IO84 area just send an APRS message to ANSRVR with the text CQ CDGVHF. You’ll need to repeat this from time to time as the server unsubscribes you from the group after 8 hours of no activity, unless you are using KJ4ERJ’s APRSISCE software which can maintain your subscription for you.
 Jeep Wrangler Radio Install
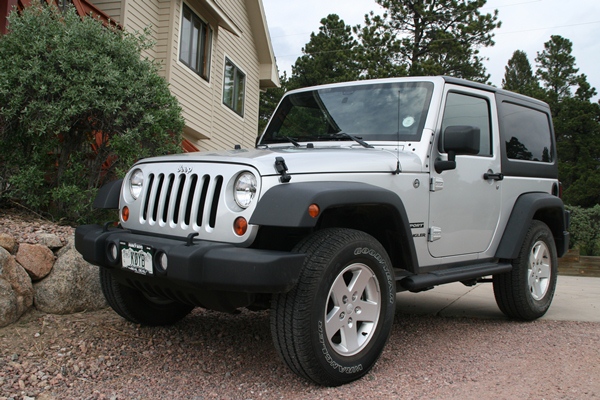
We recently sold the old white Jeep and bought a 2012 Wrangler (JK). After quite a bit of researching and experimenting with antenna mounting options, I finally got the ham gear installed in it. My objective is to get 2 Meter and 70 cm FM capability into the vehicle, using the Yaesu FT-7800 that I pulled out of the old Jeep. The big question was what to do about the antenna. The fiberglass hardtop does not make for a good antenna ground plane. Even if it did, during the summer months, we’ll sometimes take the top off to enjoy the open air ride.
Initially, I planned to use the Arizona Rocky Road NMO antenna mount with a Diamond dualband antenna that is a 1/2 wave on 2 Meters. The 1/2 wave does not need a ground plane, so the performance is usually better with irregular mounting structures. However, I found that this antenna combination did not clear my garage door. I don’t like to have to remove or tilt a vehicle antenna to get in/out of the garage — my experience is that it usually just gets left in the “down” position. I tried a shorter 19-inch dualband whip antenna but its performance was dismal due to these factors: lack of a ground plane, being blocked by the vehicle body and poor grounding on the spare tire carrier. By the way, the grounding issue on the tire carrier (and many other technical topics) are discussed in these online forums: WranglerForum, JK-Forum. I think the Arizona Rocky Road mount would have been my preferred way to go (with the longer Diamond antenna), except for the garage issue. One problem I ran into with that mount is that the standard NMO mounts I have (the basic mounts with the cable attached) did not handle the thick steel of the mount. I had to purchase special NMO mounts made to handle thicker metal (see TheAntennaFarm.com).
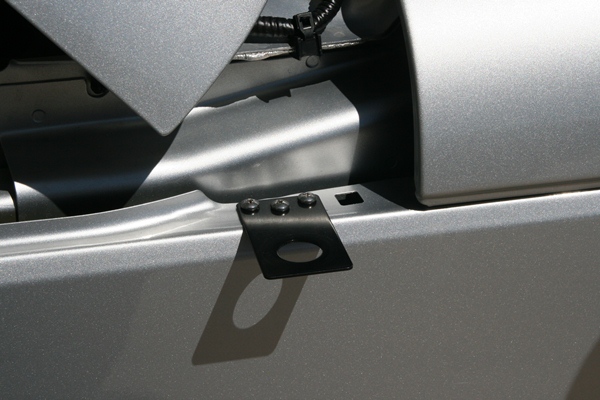
I abandoned the Arizona Rocky Road approach and decided to use a simple NMO mounting bracket (Laird SBTB3400) on the driver’s side hood. Like all Wrangler antenna installations, this is a compromise. It is lower on the vehicle than I would like but it does not block the driver’s view. Other people have used a variety of “trunk lip” mounts to accomplish the same thing but be sure to check out the driver’s view before installing. Installing the mount was easy, just three holes drilled and three sheet metal screws.
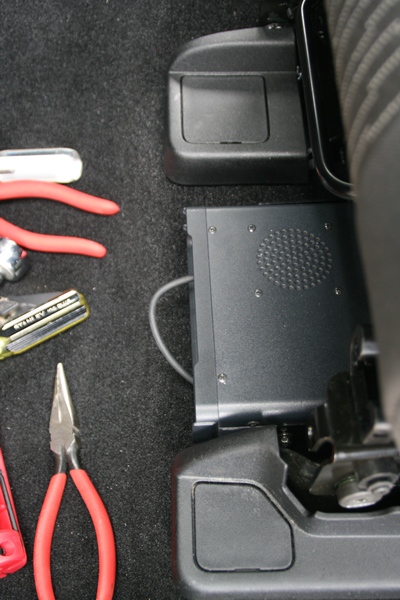
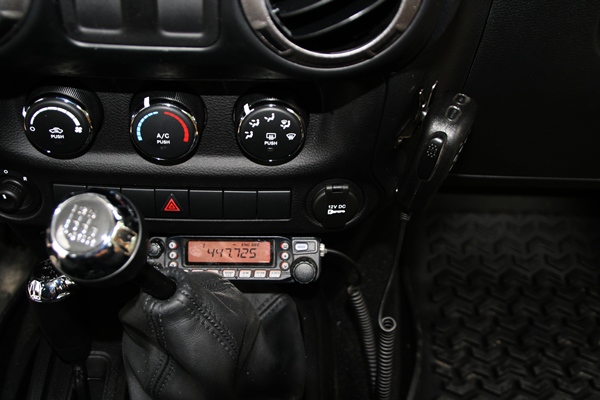
The next question was where to install the radio. I took advantage of the FT-7800′s detachable control head, mounting it on the dash, while placing the radio under the driver’s seat. I attached the radio’s mounting bracket to the floor of the Jeep with two heavy sheet metal screws. This keeps the radio up off the floor in case water gets into the Jeep. However, it only provides about 1 inch of water clearance, so you hard core Jeepers that are used to flooding the interior of the vehicle during stream crossings may find this inadequate.
I have to admit that I ran into a significant problem at this point. There was not enough clearance around the radio mounting bracket to get all four of the screws installed that attach the radio to the bracket. In the end, I unbolted the drivers seat and tilted it back, which gave me room to insert and tighten the screws. More careful positioning of the radio mount might have saved me from this hassle.
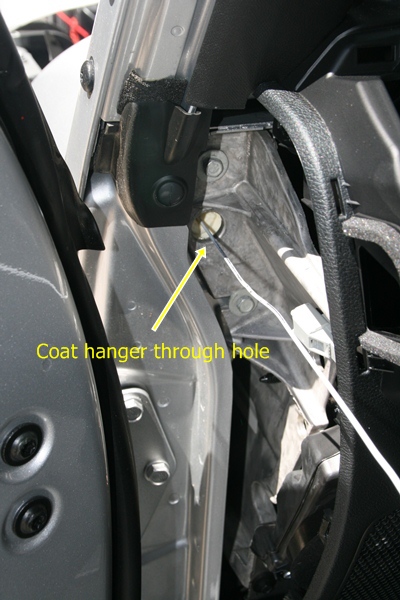
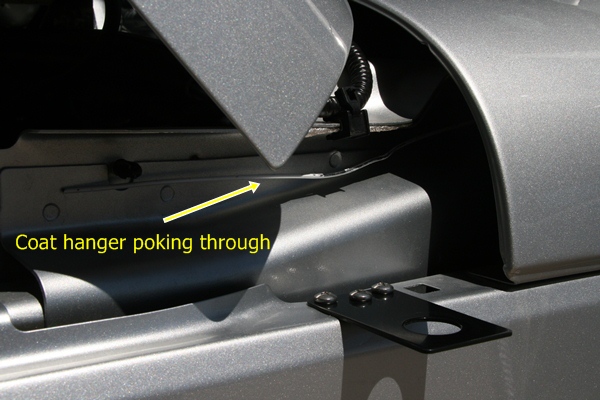
It is always a bit of an adventure to find a way to route the power cable from the engine compartment to the vehicle interior. Fortunately, Jeep has made this very easy, but it is not obvious just by looking around. Fortunately, the folks on the various online forums have scoped this out and provided good advice.
I popped off the small side panel of the dash on the driver’s side, to expose a hole filled with foam (see photos).
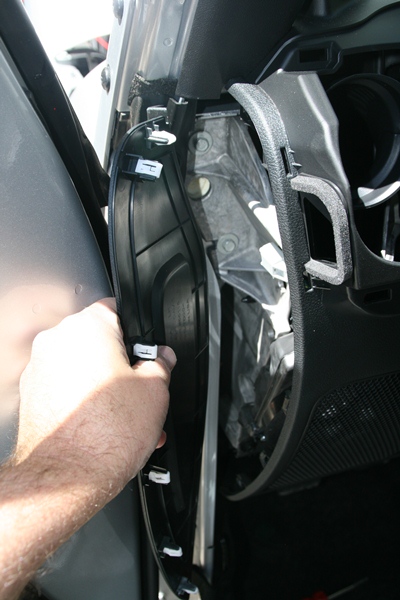
The plastic panel on the driver’s side of the dash pops open to reveal a routing hole filled with foam
A stiff wire or coat hanger can be poked into this hole and the foam easily gives way.
And the coat hanger comes out the other side, right next to the antenna mount.
I routed the power cable and the antenna cable through this hole. I connected the power cable directly to the battery, which is the recommended approach to avoid alternator whine and other problems. I understand there is a similar routing hole on the passenger side but I did not verify that.
The last thing to figure out was where to mount the control head. Although it is a tight fit, I mounted it in front of the gear shift. (I have the 6-speed manual transmission…the automatic transmission gives you more room here.) The control head is very light, so I used stick-on Velcro (about an inch wide and four inches long) to attach it to the dash. This seems to work OK but I will admit that the attachment is just a bit wobbly…fine for turning volume and VFO knobs but the not so good for pushing buttons. Also, I’ll have to see if it shakes lose on bumpy 4WD trails. If so, I’ll fabricate a small bracket to provide better attachment.
In the process of exploring, I did take the dash apart to figure out what my options were. In retrospect, it was probably unnecessary due to where I eventually mounted the radio and control head. I found this youtube video to be very helpful in dismantling the dash.
Initial checkout shows that the radio installation is working fine. I was pleasantly surprised that the antenna SWR was quite good (<1.5) over the bands of interest. I will use the short 19-inch whip most of the time but I can swap out other NMO mount antennas (including the Diamond dualband antenna I mentioned earlier.)
I appreciate all of the info out on the interwebz concerning JK radio installs and I am passing along what I learned to assist other folks with their Jeep installations.
- 73, Bob K0NR
Update 20 June 2012:
It turns out that the Velcro (hook-and-loop fastener) approach did not work. The Velcro attachment itself was pretty reliable but the stick-on adhesive failed after a few weeks. I used a couple of L-shaped brackets to attach the control head to the dash and it seems to be working fine. I have used Velcro successfully in past installations but in situations where the control head was positioned on top of the center console so the main purpose of the Velcro was to prevent horizontal movement. In other words, the Velcro did not have to support the entire weight of the control head, just keep it from moving around.
